Managing Your Practice Settings
Whether you want to update your account information, adjust notification preferences, or explore advanced settings, this guide will provide guidance and helpful tips to navigate through Practice Manager smoothly.
From the Navigation Bar, select Practice Manager. Here you'll find the following tabs

Practice Info
Here you can find or edit your company information, including:
- Organization Name and Email
- Adding an Image of your logo
- Practice Domain and Kiosk Domain
- Practice's Privacy Policy URL
- Main and other Phone Numbers
- Practice Fax Number
- Organization Address
- Hours of Operation
- The practices' time zone.
- Manually add additional places of service
- Create Team Member Tags

Click here for a more in depth guide for team member tags.

Billing & Payment
Here you can:
- Enable AutoPay and select the frequency for AutoPay to run payments. Click here to learn more about AutoPay in TiQ

- Select How the client invoices are sent
- Auto-Send Invoices at Event Creation
- Manually Send Invoices
- Automatically re-open invoices with open balances after payments

- Decide how claims will be generated
- At the time clinical documentation is completed and signed
- At the time attendance is marked

- Connect your Stripe terminals

- Add or edit Insurance Billing Settings such as NPI, Taxonomy, and/or Tax ID

If you want to add more than one NPI or Taxonomy code, select + Add More
NOTE: If you are adding an additional NPI and wish to check eligibility or receive ERAs you will need to enroll with each payer using your additional NPI.

Also you can:
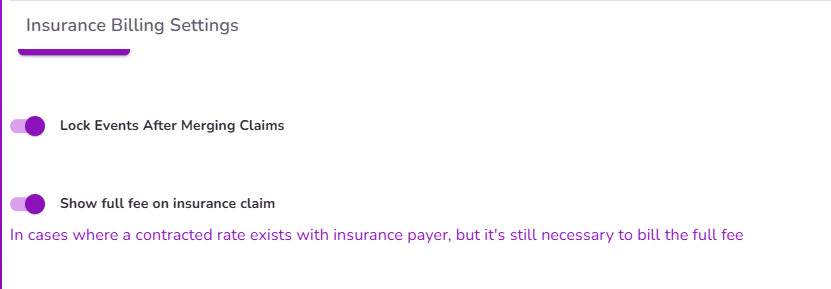
- Lock Events After Merging Claims
- Show Full Fee On Insurance Claim (when you’ve set payer contracted rates)
- Activate Mental Health Diagnostic Codes

- Select Mental Health Procedure Codes

- Select Location Codes

- Activate Revenue Codes

- Activate Speech Therapy Procedure Codes

- Activate Physical Therapy Procedure Codes

- Activate Occupational Therapy Procedure Codes

TIP: You can also type the code you need.
Services and Tags
Here you can:
- Change the settings for Initial Assessment, No Show, and Late Cancel appointments.

- Add or edit services and fees.


NOTE: The options that you create for your practice will become available for all users to select from drop-down menus and lists throughout TiQ.

Alert Settings
Here you can:
- Add custom names, set the frequency, and decide whether to display or not the following alerts:
- - Biopsychosocial Assessments
- - Treatment Plans
- - Progress Notes
- - Treatment Review
- - Discharge Reports

- Enable and disable the Dashboard Alerts you want with the toggle.
IMPORTANT: The dashboard alerts refresh every 15 minutes.

- Add the preferred amount of days of No Show to Discharge

- Customize the frequency of the Operational Alerts

- Set the Frequency of Client Email & SMS Appointment Reminders

Subscription
IMPORTANT: Only Account Owners have access to this tab.
- View the Billing Portal

- Manage the Seat Roles for your practice
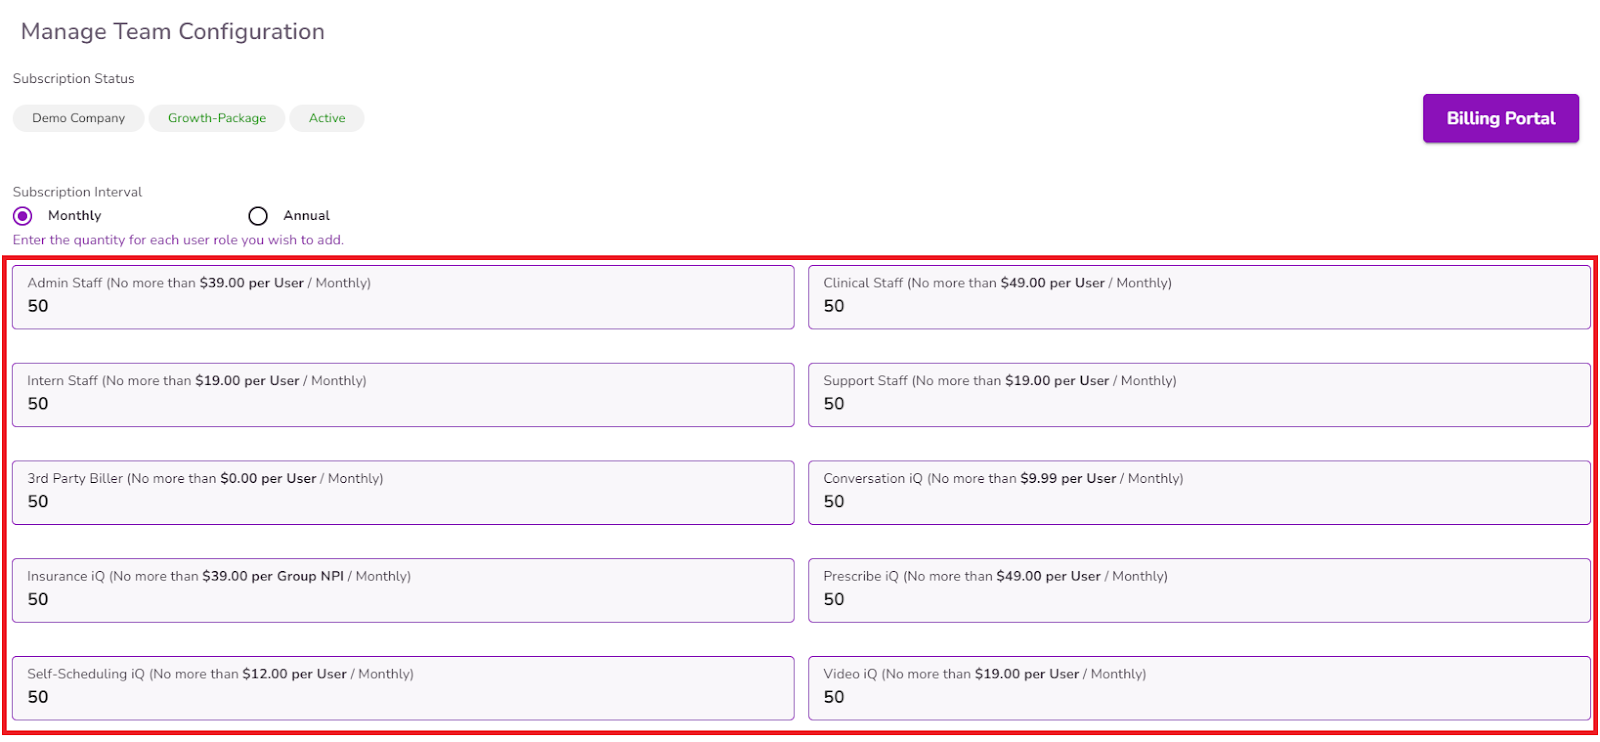
Click here for a more in-depth guide regarding managing your TiQ billing
Client Export/Import
Here you can export a client list and their demographics, and generate 2 test clients.

Form Settings
Here you can:
- Use the ‘Choose default progress note type’ dropdown to set a default progress note for your practice from the available options: Default, DAP note, SOAP note, and any custom progress note you’ve created.

For more information on how to the ‘Choose default progress note type’ works please click here
- Enable and disable which forms will be available for your Practice
NOTE: These are located in the Forms Library of each client

- Set Specific Practice-wide Features

Portal Settings
Here you can decide whether to prompt your clients to enter a credit card when they access their portals, and make that mandatory for them or not.
Click here for more information.

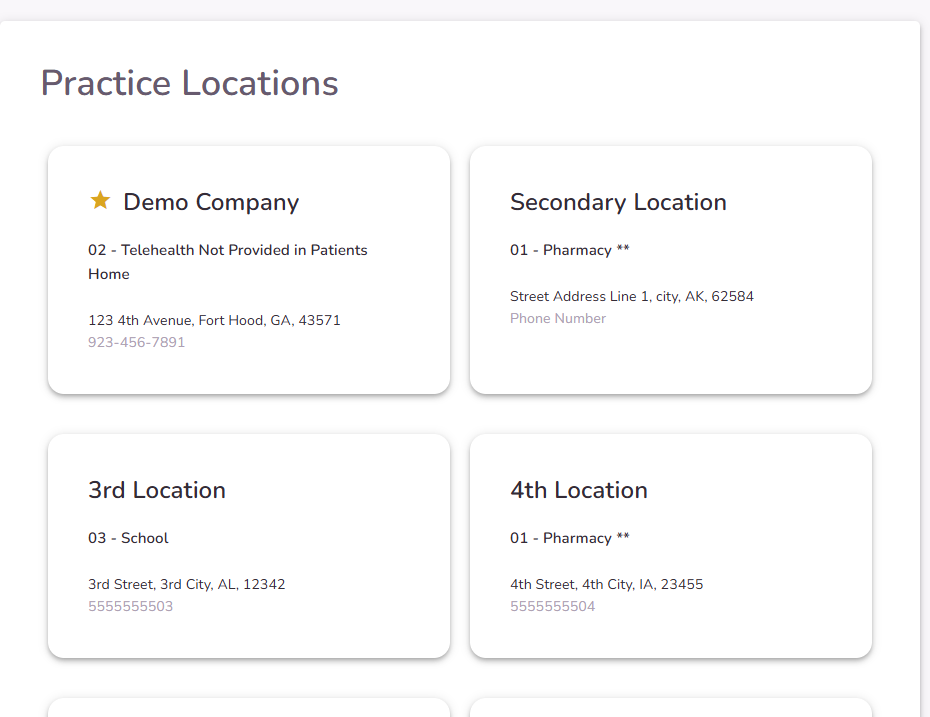
Locations Manager
Here you can add or edit all the locations for your practice. The primary location will be added by default, you can edit it but not remove it.
Click here for additional information.
Event Settings
From here you can:
- Enable/Disable the TiQ Default Events, as well as add custom display names for them.
Click here to learn more about the Event Settings tab.

- Create custom event types to match the specific services your practice offers.

Billing Rules.
You can set 3 different types of rules here:

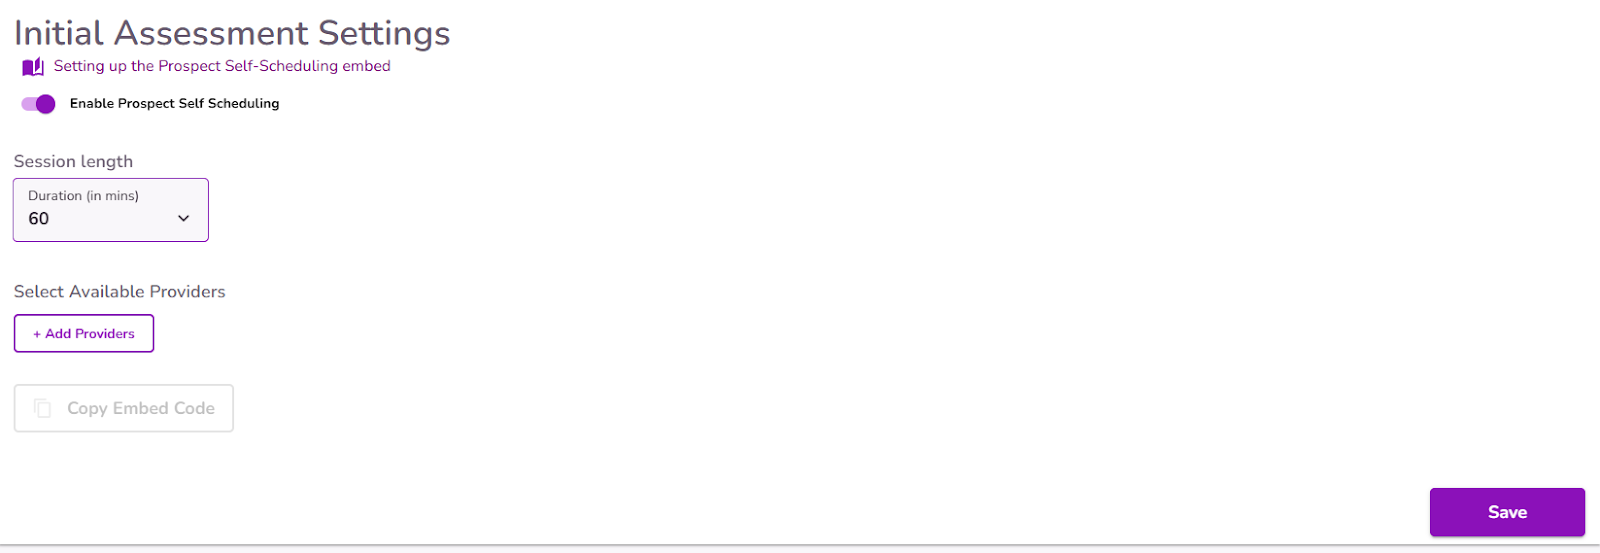
Prospect Self Scheduling
If enabled for your practice, you can use this as another version of a lead form for potential clients to request their initial consultation with your providers directly from your practice’s website.
Click here for more information about this.