Email And Text Message Reminders In TiQ
** IMPORTANT: Messaging iQ is our automated appointment reminder system, which delivers reminders via SMS text messages. While convenient, SMS is not HIPAA-compliant, and this tool should not be used to share sensitive or protected health information.**
** IMPORTANT: Email iQ is designed to be HIPAA-compliant, providing a secure way to communicate with clients via email. All Protected Health Information (PHI) is encrypted both in transit and at rest, ensuring privacy and compliance with federal regulations.**
This guide will show you how to setup Email and Text message appointment reminders and how to use them.
How To Set The Frequency Of Email and Text Message Reminders
NOTE: text reminders come from the same number for all practices. If you would like a custom number you will need to enable the Conversation iQ add-on, which will allow you to text with a personal phone number for your practice. Reach out to TiQ Support if you'd to make this account upgrade.
Navigate to the Alert Settings tab within Practice Manager.

Scroll down until you see the Client Email & SMS Reminders section.
NOTE: This will allow you to specify when your client will receive email and SMS (text) reminders for their appointments.

Use the + Add More button to add as many frequencies as you needed.

Select Submit.

Friendly Reminder: When making an appointment for the client, the email and SMS reminders checkboxes must be selected in order for the client to receive email and/or text messages reminders.

You can also save the clients reminder preferences in their demographics page to avoid having to select the preference each time on the event page.

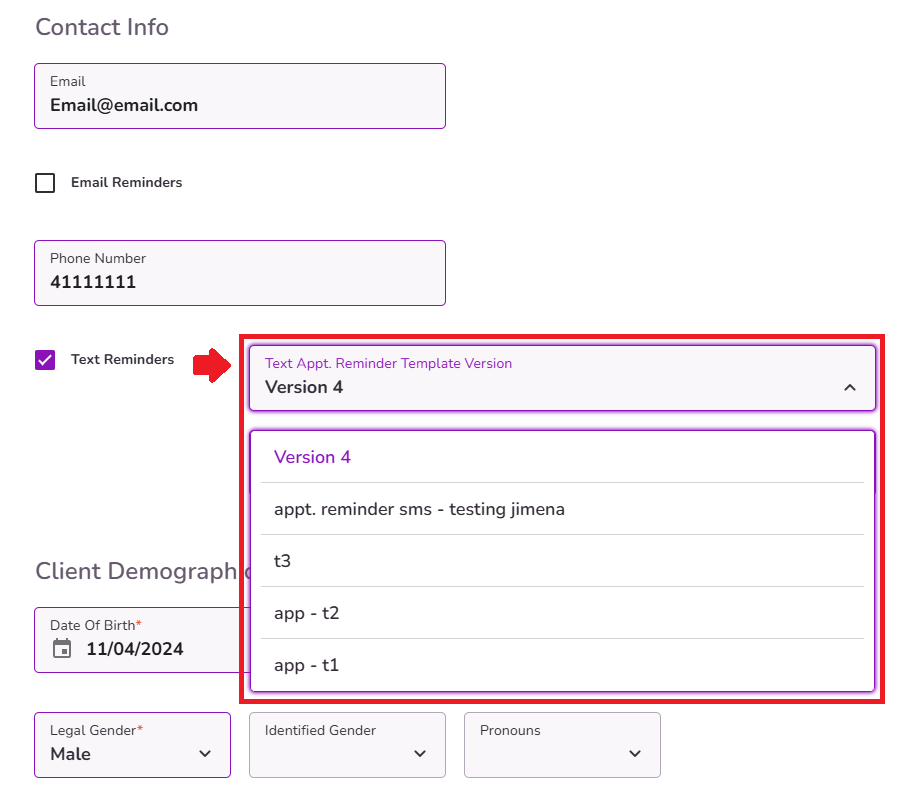
After selecting any of the checkboxes, you can choose the corresponding version for each Email or Text Reminder type. This allows you to select a version from either the Appointment Reminder (In Office appointments) or Telehealth Reminder options.

While the default template is assigned automatically, it can also be manually updated from the client’s profile settings if needed for each version.
This ensures that the Email and Text Reminders options are enabled and the correct template version is applied to every client.
After configuring the client's profile, be sure to scroll down and click "Save Changes" to ensure the updates are properly applied.

For additional information on how to create Email and Text Reminder templates, please refer to the guides below:


