Understanding AutoPay In TiQ
AutoPay allows the system to automatically run payments on open invoices. In this guide, we will help you to understand AutoPay in TiQ.
IMPORTANT: The AutoPay feature must be enabled in Practice Settings and the client must have a payment method on file to run payments automatically. Click here to learn how to enable AutoPay
From the Practice Manager under the Billing & Payment tab, to enable AutoPay you will see the AutoPay toggle.
If the AutoPay feature is enabled, you’ll have the ability to select when you want to run the auto payments:
- 3AM UTC on the day of the service
- 3AM UTC the day after the Service Date

REMEMBER: Activating AutoPay in Practice Manager doesn't automatically enable it for all your clients. You must also enable AutoPay individually for each client you want to collect payments from automatically. Click here to learn how to enable AutoPay for specific clients.
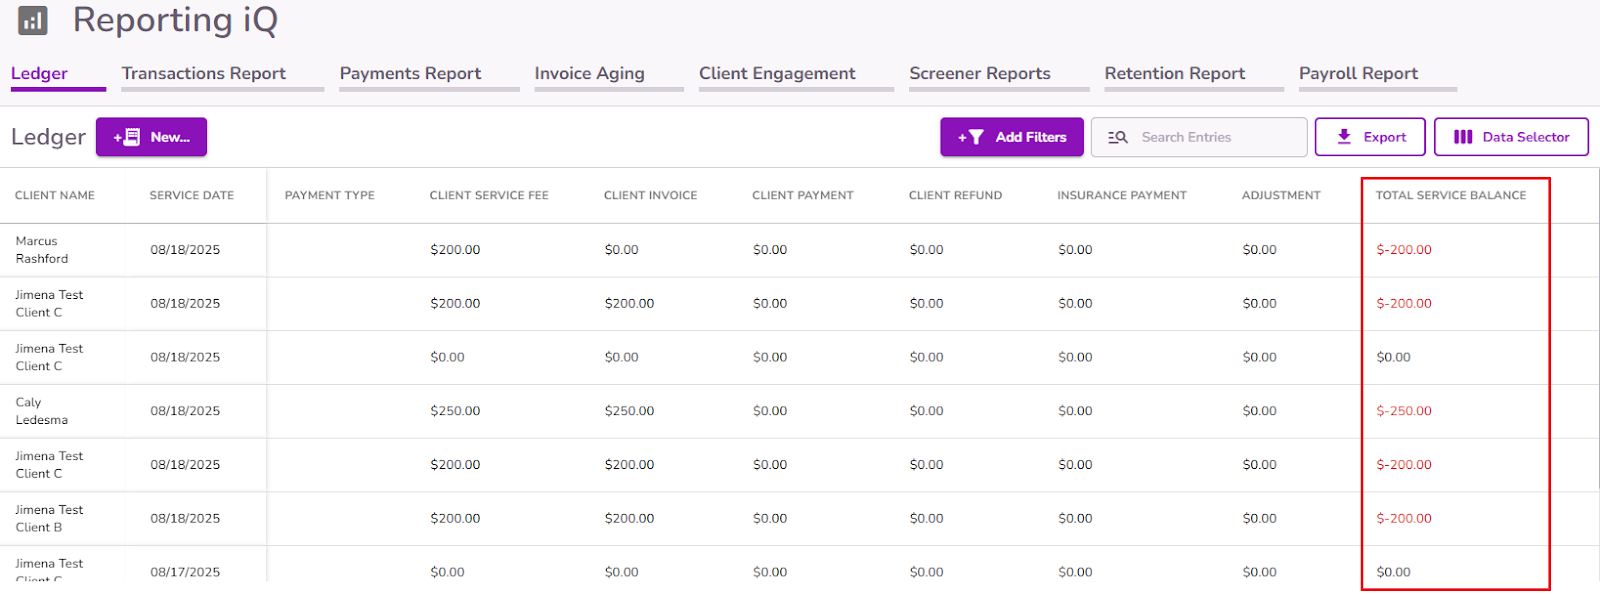
When an AutoPay payment is successful, the amount paid will appear in the client's Ledger under the Client Payment column for the corresponding date of service.
The payment amount should match the amount shown on the Client Invoice, as AutoPay charges the client the invoiced amount.

Once the payments are processed, the Total Service Balance column will be deducted accordingly based on all information in that ledger entry.
NOTE: A PDF Receipt will also generate automatically in the Client Files.
Please keep in mind:
- Payment method required: Clients must have a payment method on file for AutoPay to collect payments automatically.
- Automatic payments start when AutoPay is enabled: AutoPay will automatically collect eligible payments from that point forward.
- Existing open invoices: Payments for open invoices generated before AutoPay was enabled must be collected manually.
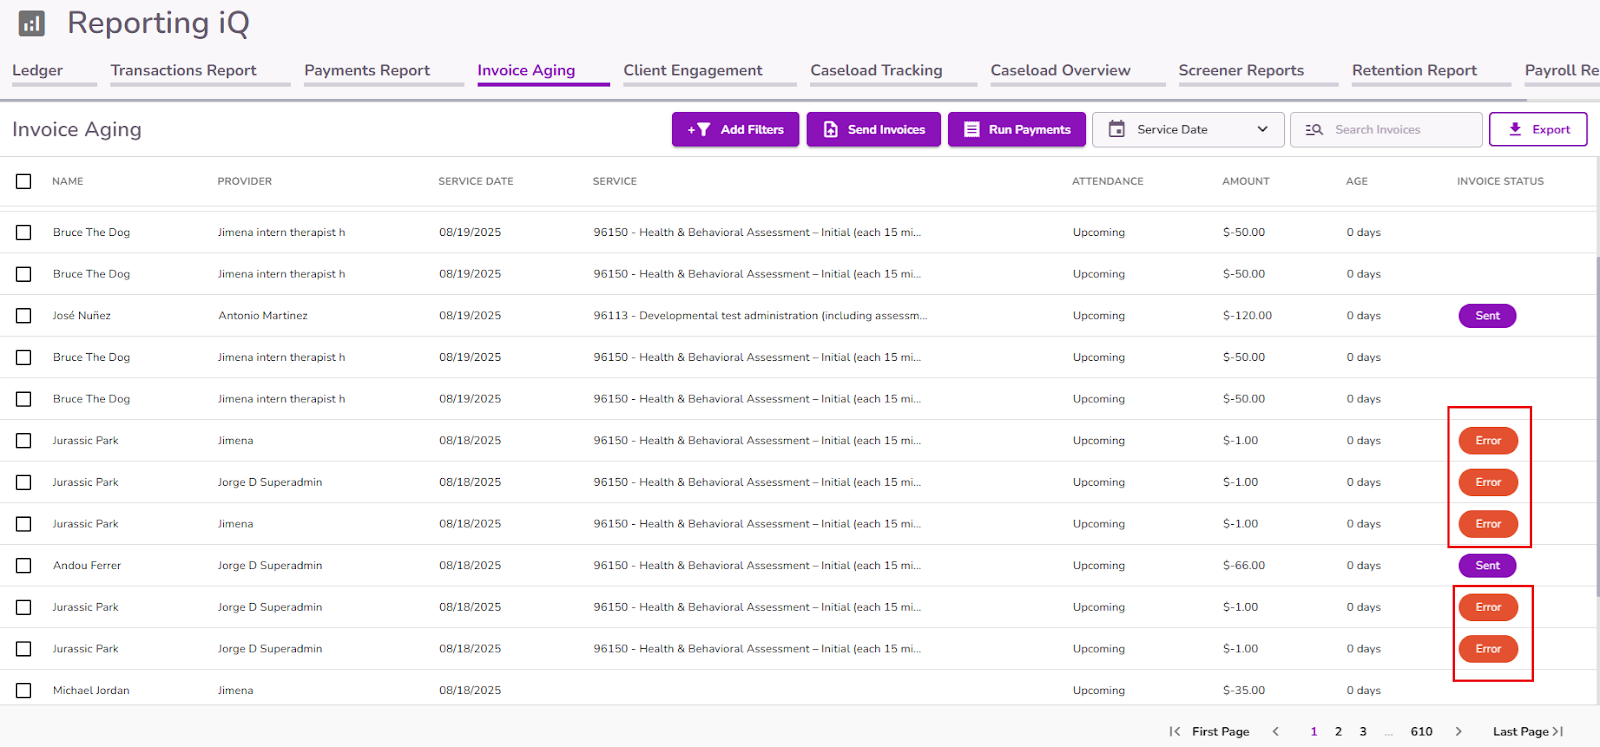
Any errors with automatic payment collection will appear in the Invoice Aging Report under the Invoice Status column.
Click the Error button to view the reason for the error, which is provided directly by Stripe.
IMPORTANT: AutoPay makes only one attempt to charge the client to the first card listed in the client's profile. If an invoice shows an error, AutoPay will not retry the payment or attempt to charge a different card. You'll need to collect the payment manually in these cases.


