Managing Your TiQ Profile
In the upper right-hand corner click on your name to display the submenu. Then select Profile from the dropdown menu.

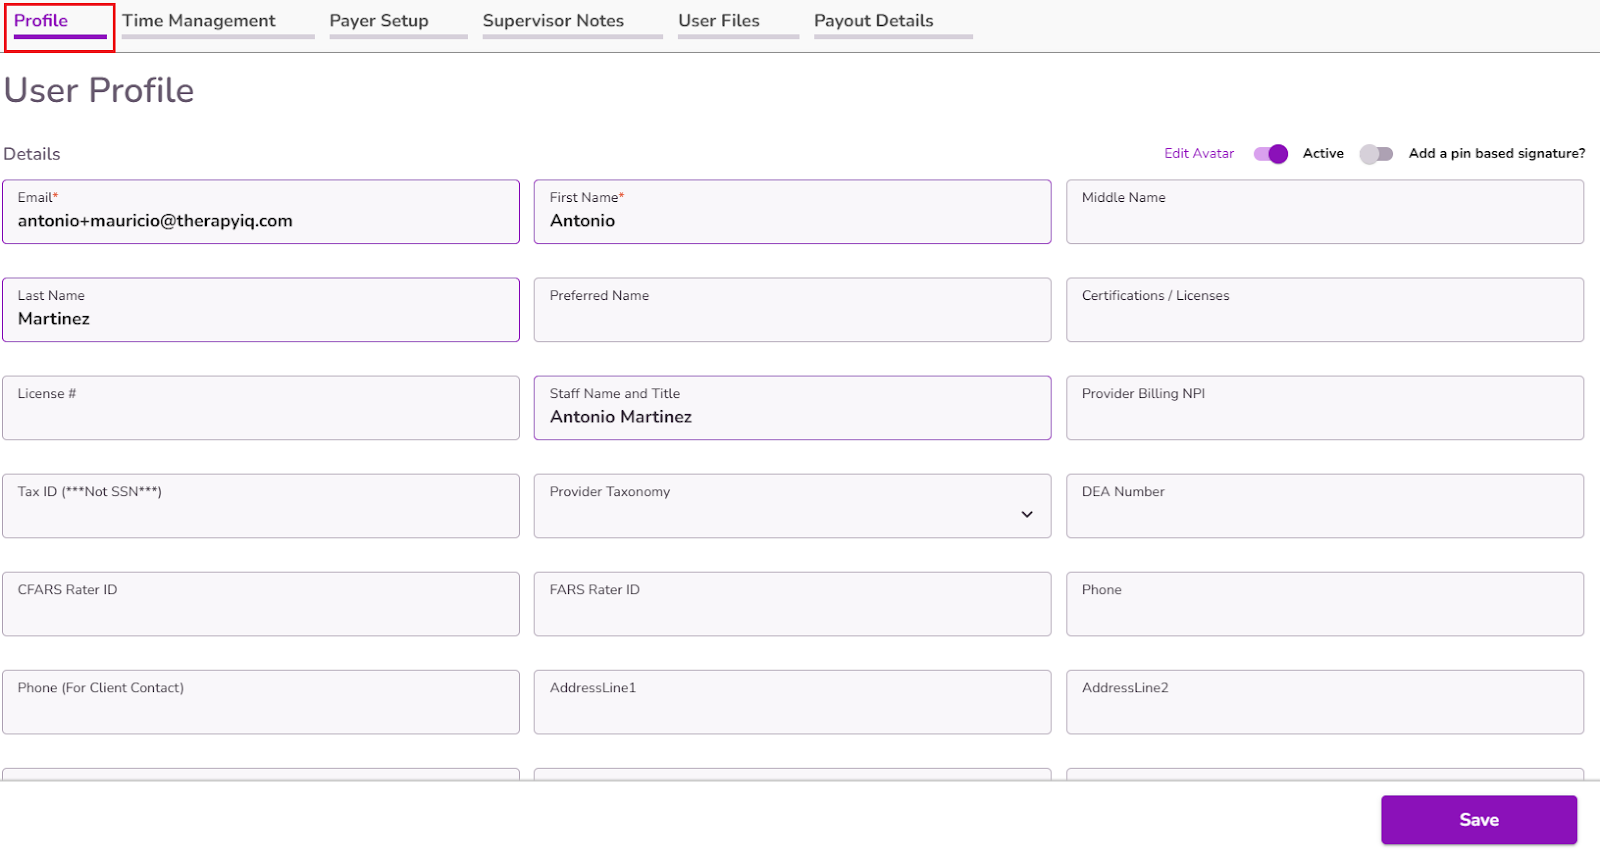
In your User Profile, under the Profile Tab, you can type in any information you wish to add, for example License #, NPI, Tax ID

NOTE: The Staff Name and Title field will be autofilled by the information added in the First Name, Last Name, and Certifications/Licenses fields.

If you would like to add a picture associated with your profile select Edit Avatar in the upper right.

In the pop-up window, select the pencil icon in the upper right to choose an image from your computer.

Select Confirm. Your Avatar will be displayed in the upper right.

You can add a pin based signature by toggling the switch in the upper right.

Create your 4 digit pin, write your signature, and select Confirm.

User roles and Permissions can also be managed within the Profile Tab.
Learn more about User Roles here

Here, you can also set your specific practice location.

Tags can also be added to segment information related to team members.
Learn More about Team Member Tags Here

In the Time Management tab, you can set up your availability as well as the Self Scheduling options. Click here to learn more about setting up your availability and configuring self scheduling.

Within the Payer Setup tab, you can assign supervisors, and setup contracted payers for providers.

Under the User Files tab, you will have the ability to upload user files directly to your profile.

Select + Add Files to upload a new file to your profile.

A new pop up will open, select Confirm to upload and save your file.

Files must not exceed a maximum size of 30MB per upload.

Files can be downloaded or deleted using the 3-dot menu.

Selecting a file's name opens it in PDF format for viewing.

You can use the Search Bar to locate files by their name.

In the Supervisor Notes tab you'll find any notes your supervisor has left for you.

The Payout Details tab is where the provider can set the percentage rate or the flat rate they'll get paid for services, and this will be transferred to the Payroll Report.
Click here to learn more about the Payroll Report.


