How To Process An Insurance Claim
As a reminder, the following tasks must be completed before you can begin billing insurance using TiQ
- Your company's insurance billing settings must be complete and accurate within your company settings
- The client, associated with the claim being processed, must have complete and accurate insurance information within their client profile
- To receive communications (e.g. ERAs, Verification of Benefits) from the clearinghouse, you must complete the enrollments necessary for the provider.
In TiQ, claims are automatically generated in Insurance iQ with a Pending status once a calendar event is marked as attended. Please note that claims are only created for clients who have active insurance information entered in their profile.
NOTE: Depending on your claim generation settings, a completed document may also be required in order for a claim to be generated. Click here for additional information on how to configure claim generation
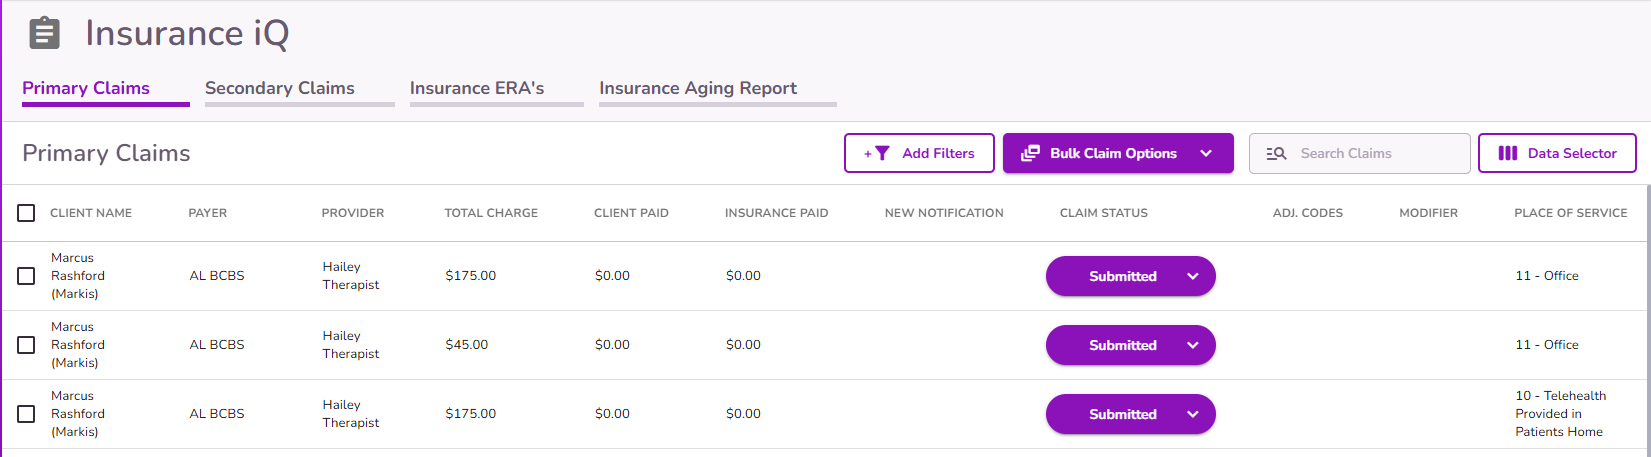
From the Navigation Bar, navigate to Insurance iQ
This report will contain all claims that have been generated based on your claim generation settings.
NOTE: The status of claims will update based on whether they have been submitted and the response received from the clearinghouse or the appropriate payer. Click here for additional information on claim statuses
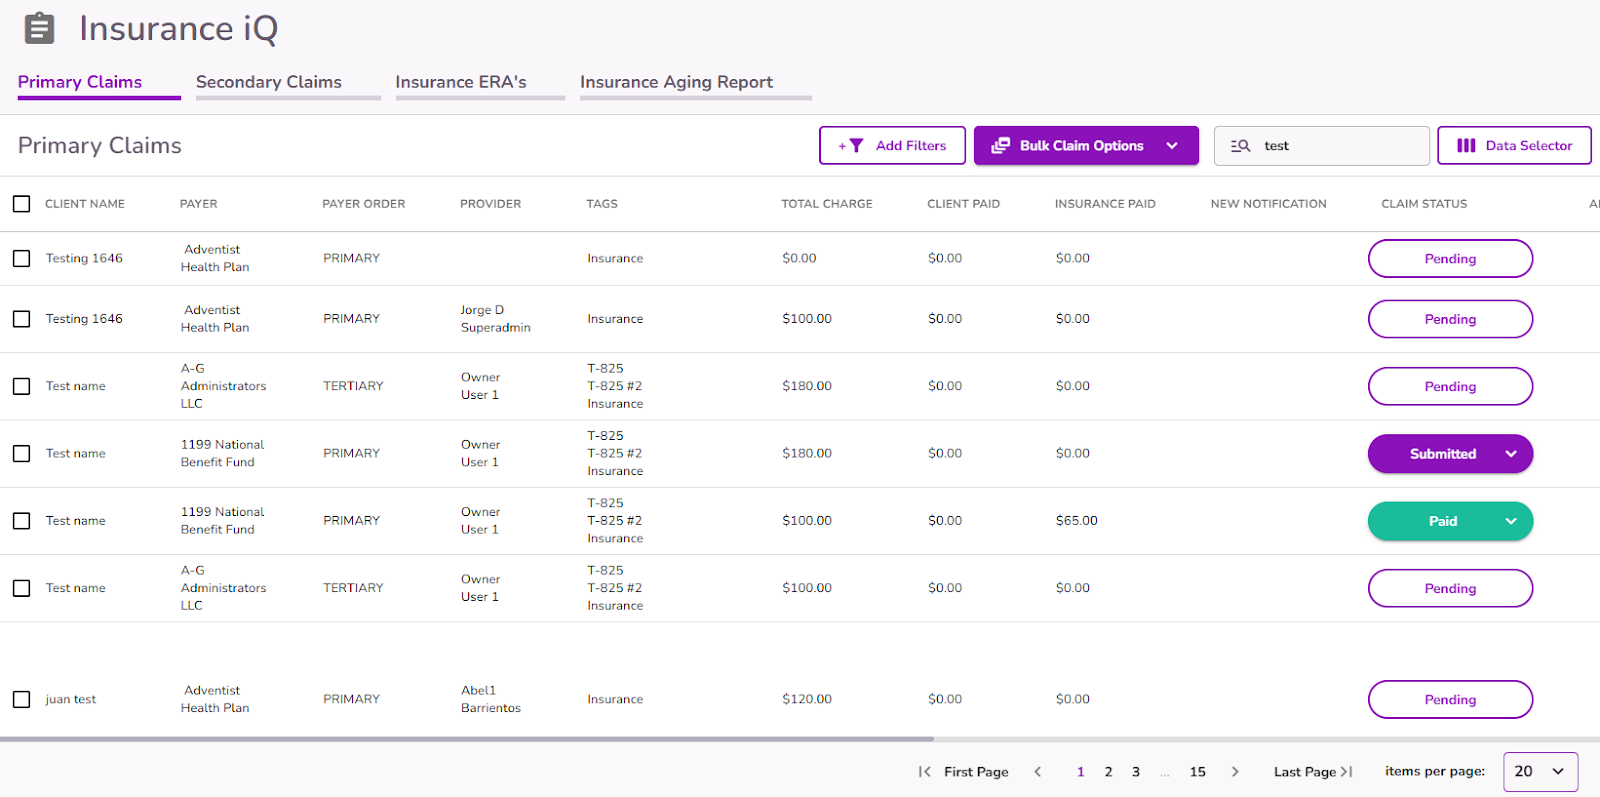
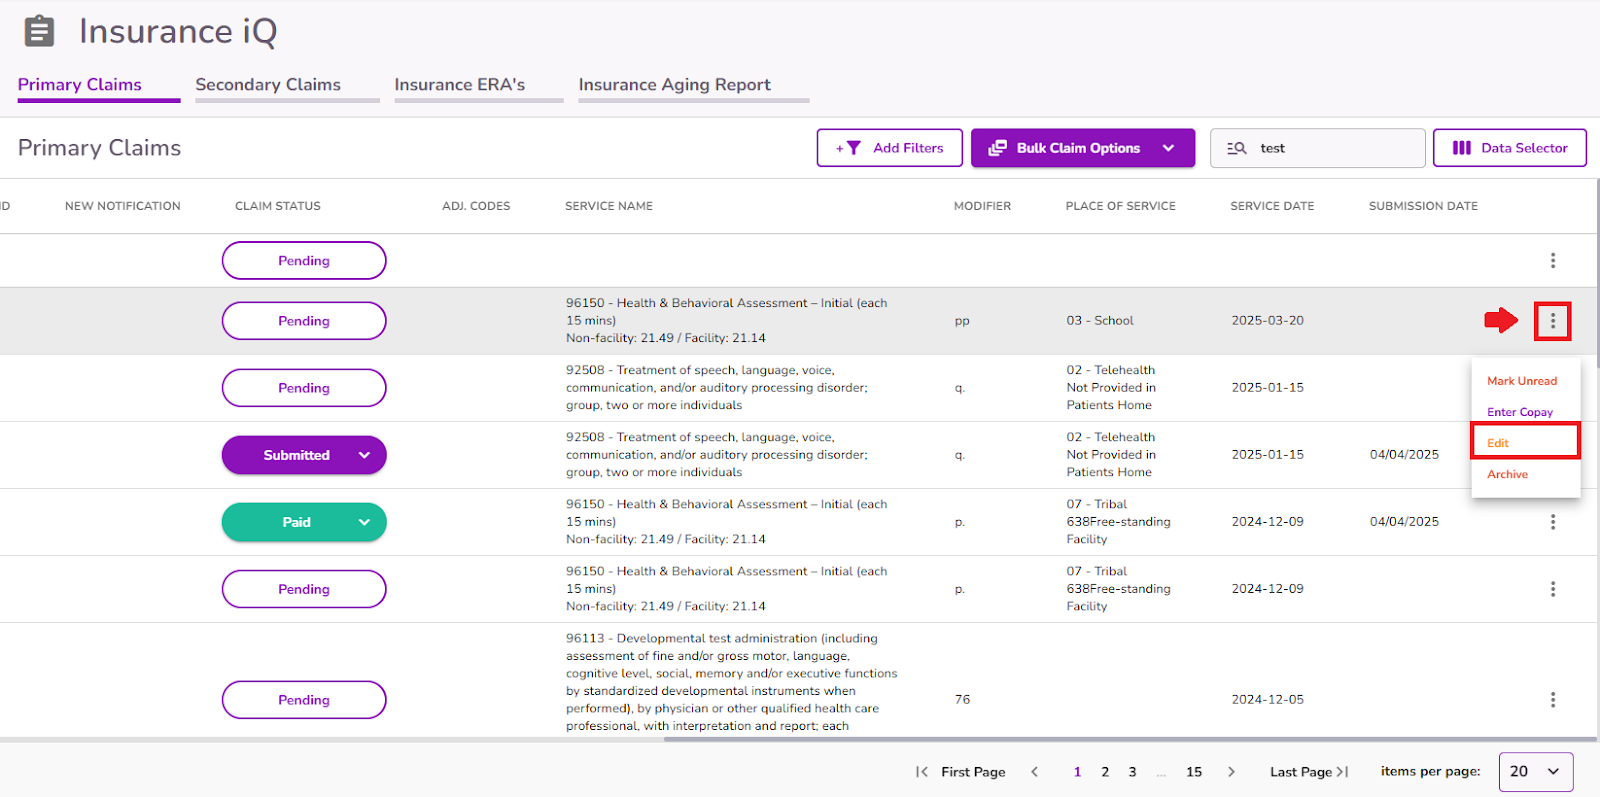
To process a claim in Pending status, locate the corresponding claim in the list and either click directly on it or select the three dots next to the claim and choose Edit.
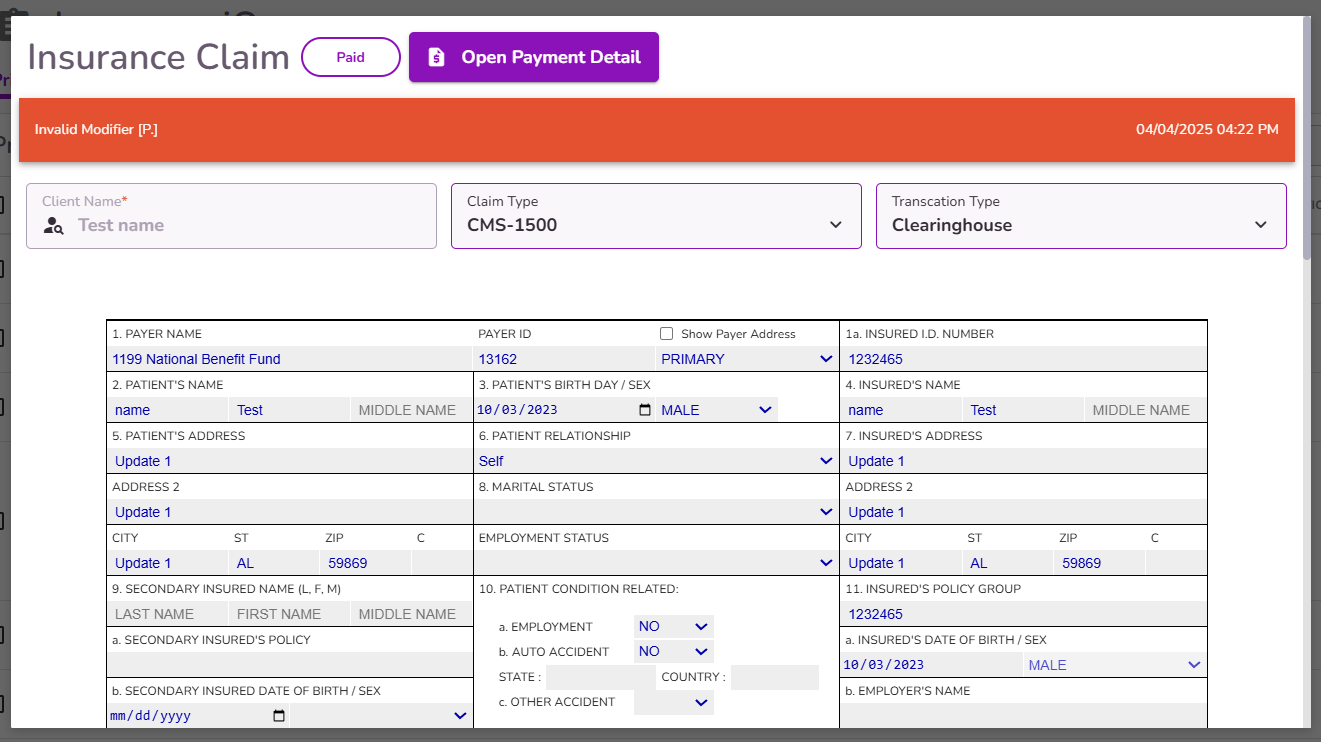
The claim form will appear displaying the automatically populated fields.
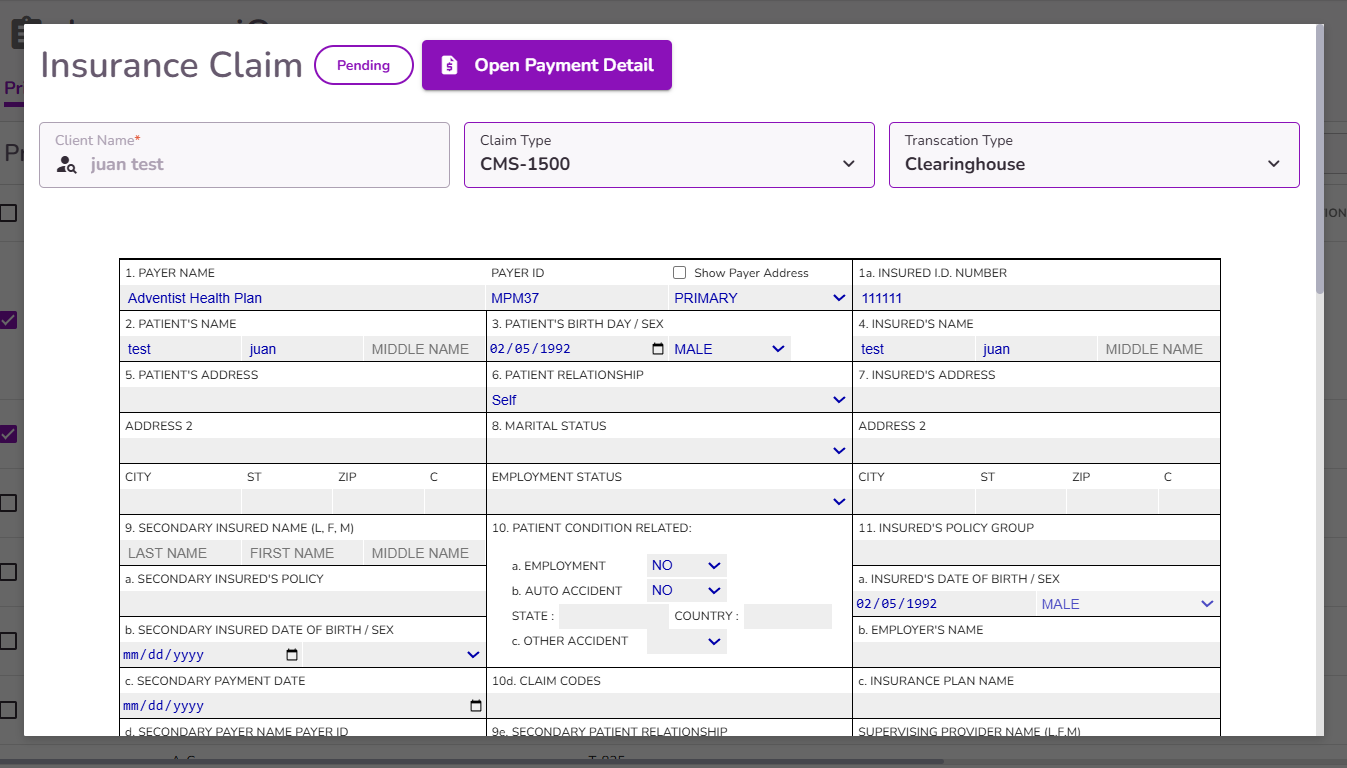
You can review, modify, or manually enter any additional information as needed. Once you've confirmed all the information is accurate or made the necessary edits, scroll to the bottom and select Submit
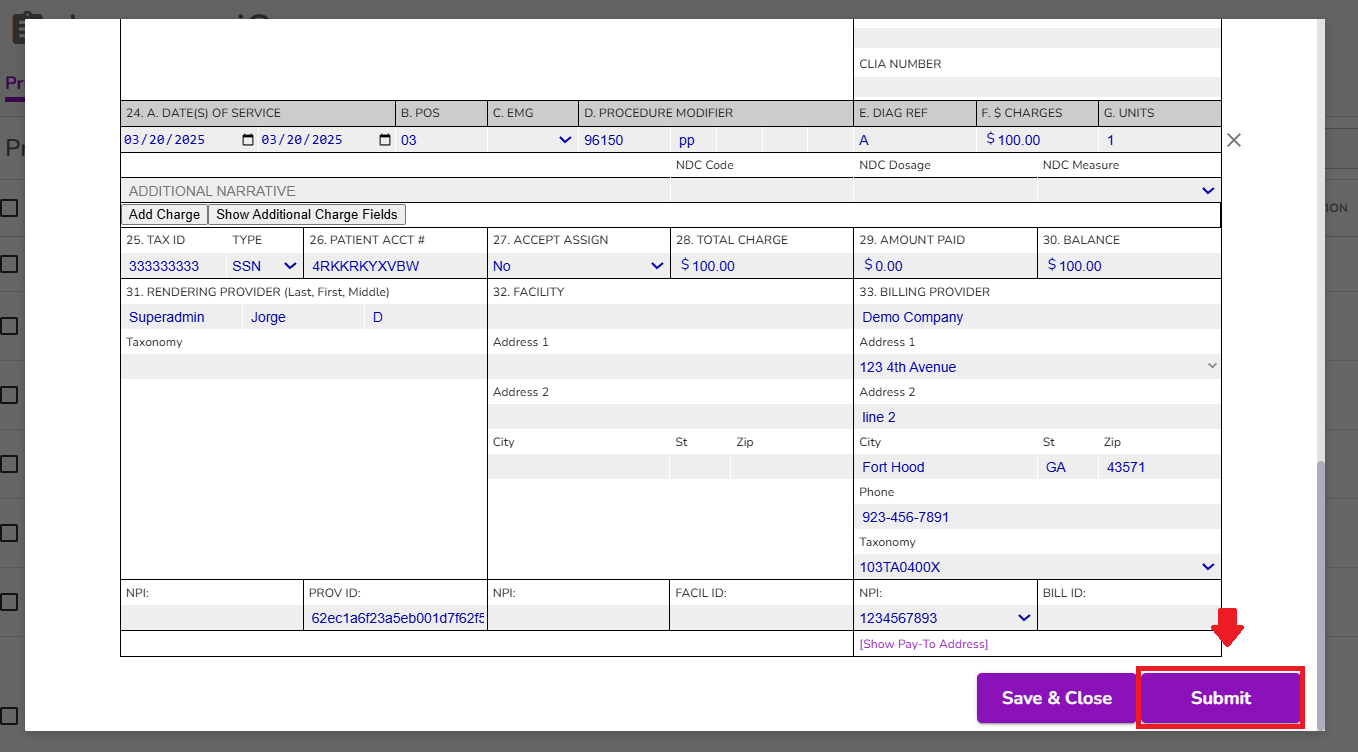
The claim status will change to Submitted and will be immediatelly sent to the clearinghouse for processing.
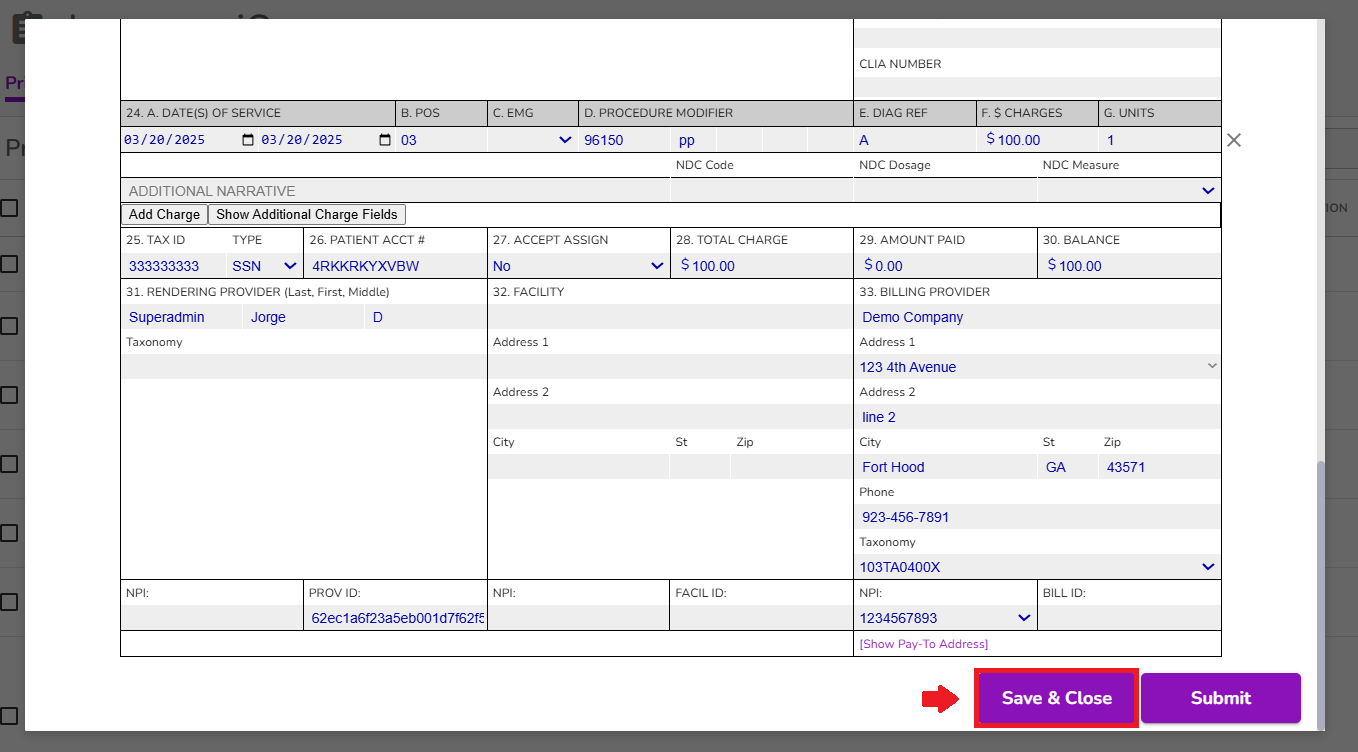
You have the option to Save and Close the claim if you prefer to process it at a later time. Any changes made will be saved, and the claim will remain in Pending status. You can reopen and submit it whenever you're ready.
Once submitted and a notification returns from the clearinghouse, the new notification column displays a Notification Bell until viewed
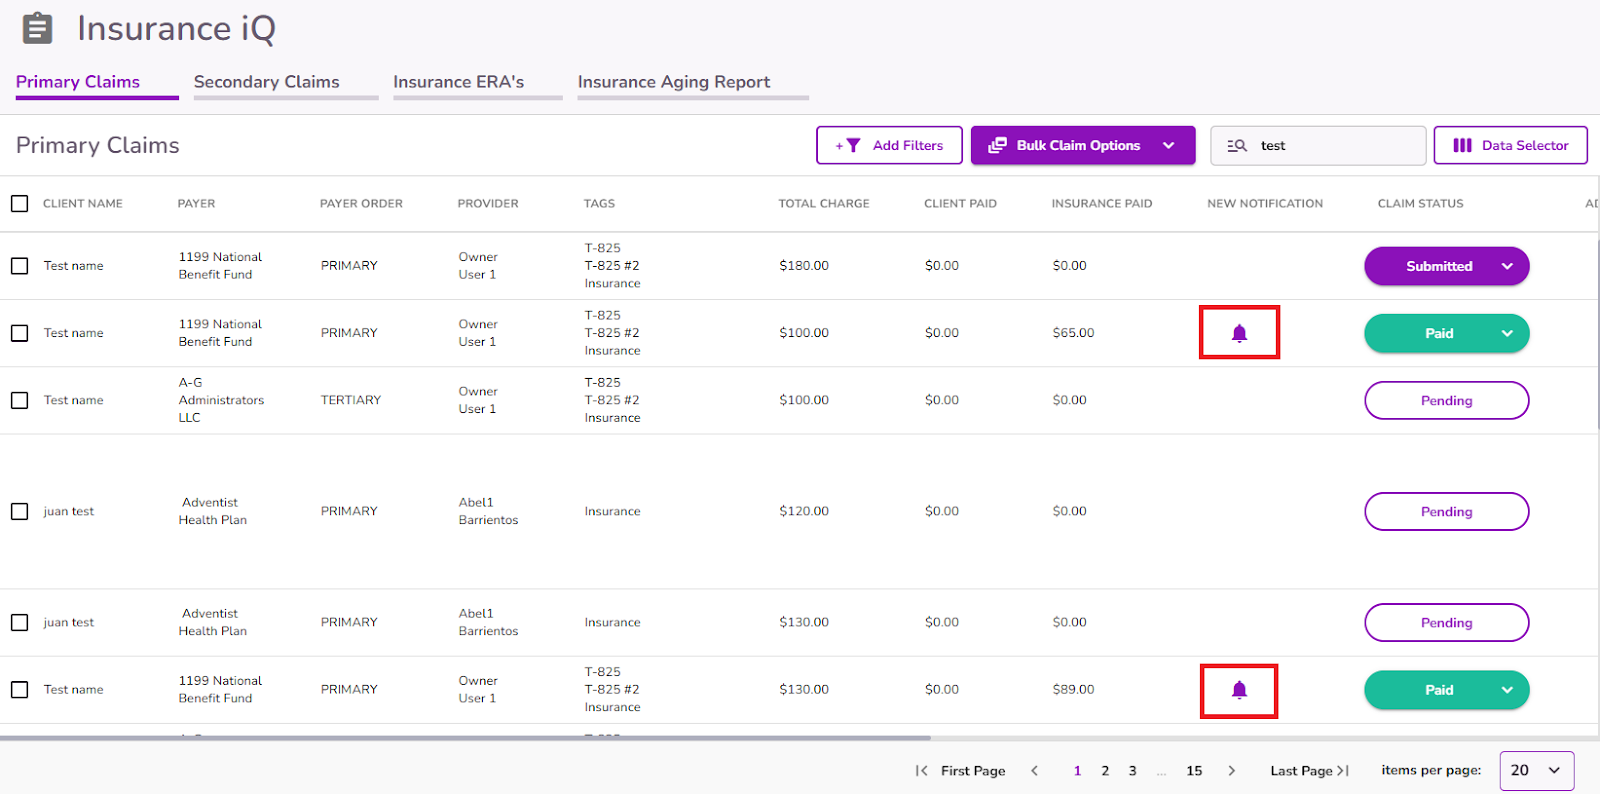
Click on the row of the claim you would like to review to view its notifications and take any necessary actions. Any error codes will appear in red at the top, indicating the fields that may require review or correction.
Once the notification has been viewed, the bell icon will be removed

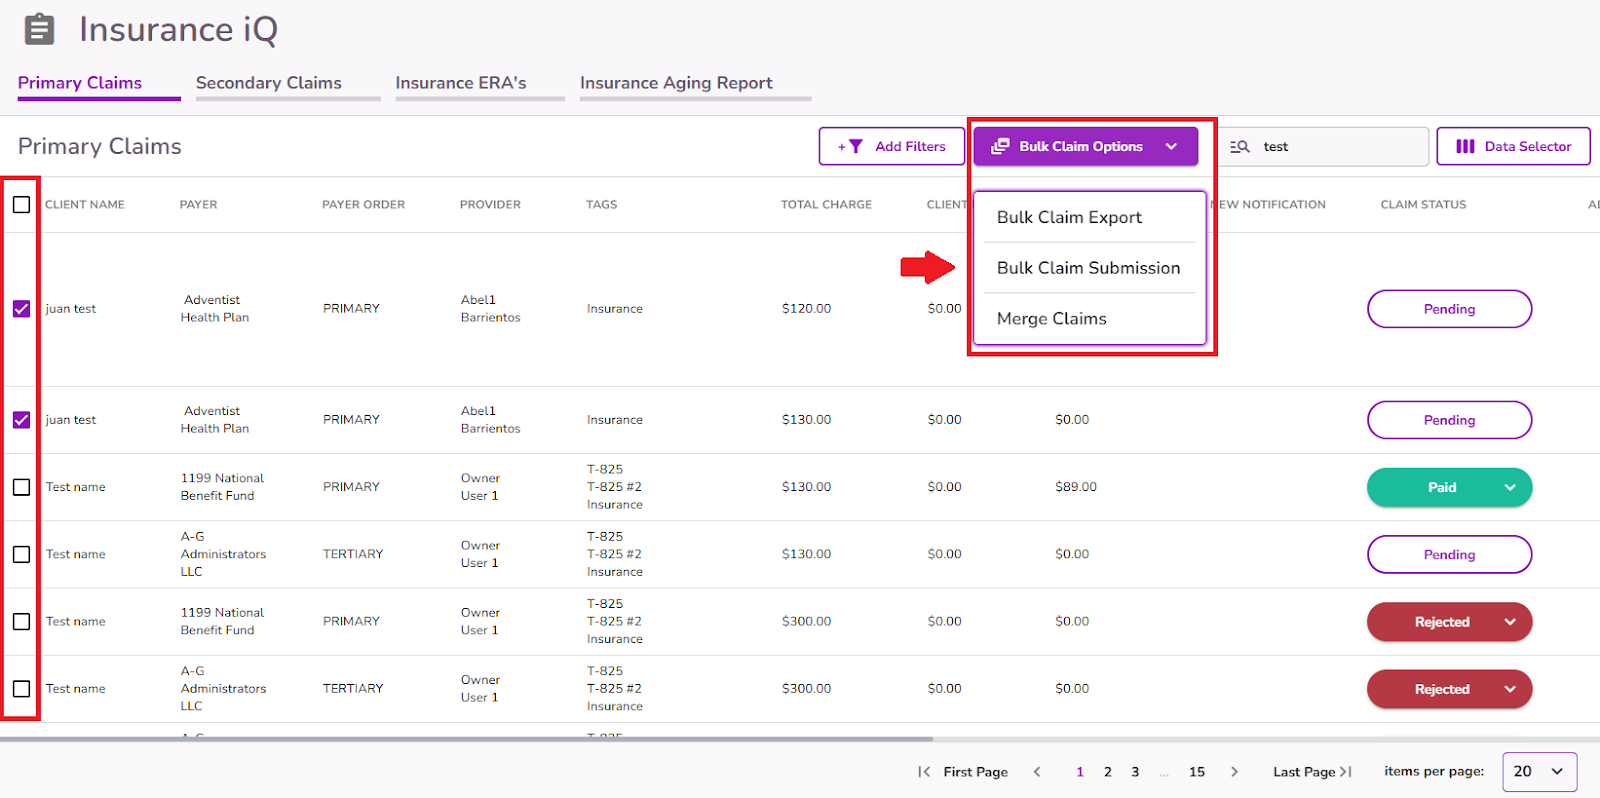
Submitting Claims In Bulk
You can use the checkboxes on the left side to select multiple claims that are in Pending status. Once selected, click on the Bulk Claim Options button and choose Bulk Claim Submission.
All selected claims will be submitted unless any of them contain errors. If a claim has errors, it will change to Rejected status.
For more information about processing claims you may refer to these guides:


