Understanding The New Prospect Self-Scheduling
With the New Prospect Self-Scheduling feature, your potential clients will have the ability to schedule appointments directly through your practice's website without requiring access to your practice's client portal. This feature is designed to simplify the appointment booking process and enhance engagement with prospective clients seeking mental health services at your practice.
Once you have configured your New Prospect Self-Scheduling in Practice Settings, you will have the ability to integrate it into your practice’s website. Click here to learn how to configure this feature in Practice Manager.
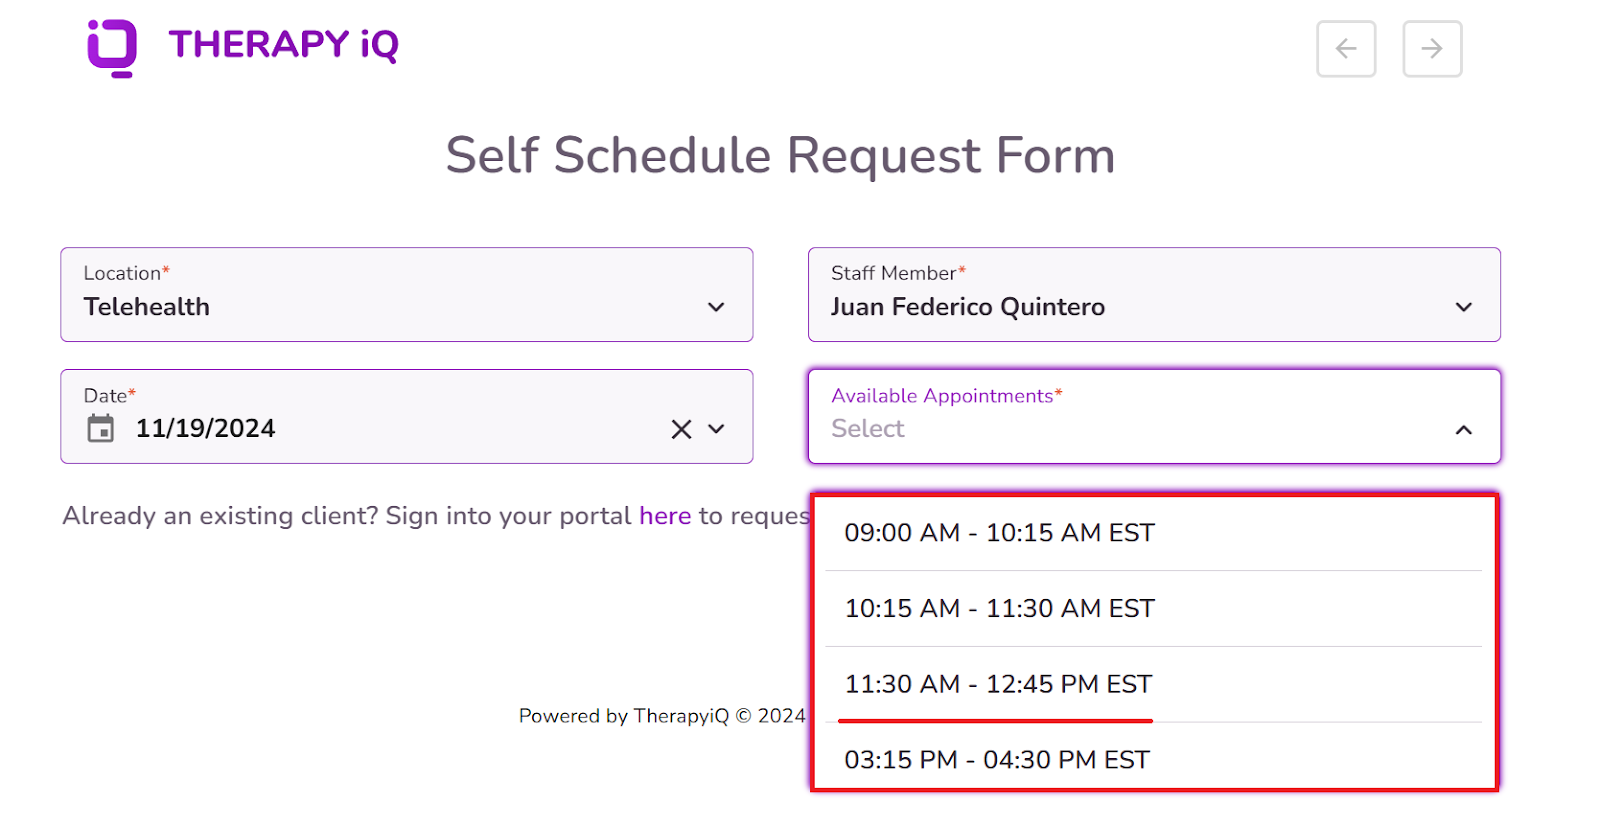
Once embedded on your website, this is what your clients will see:
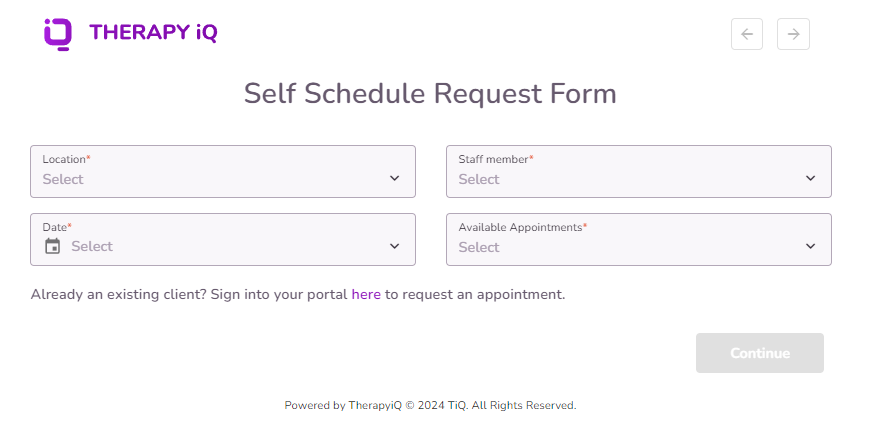
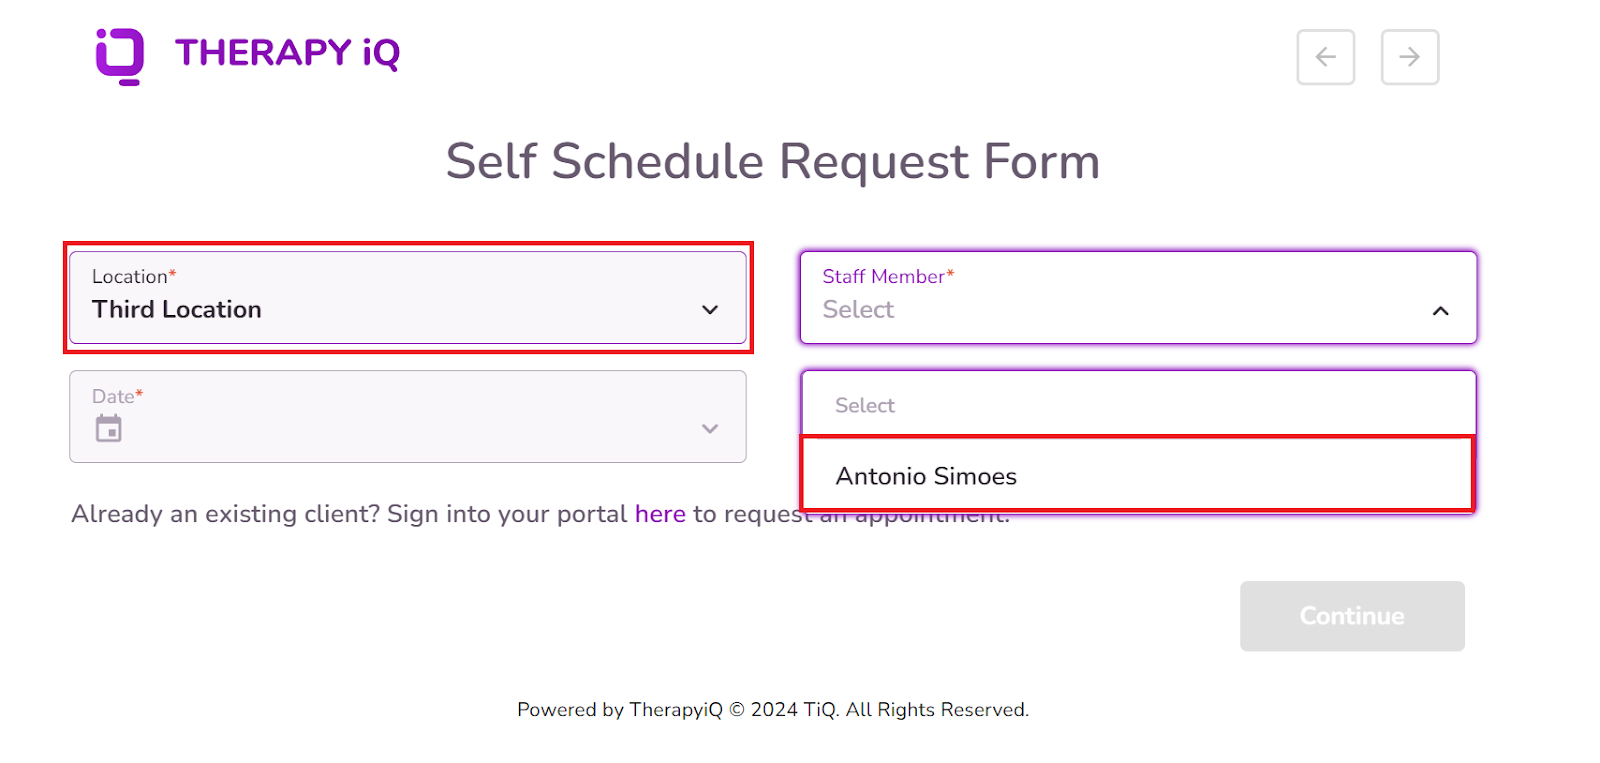
They will select a Location, Staff Member, Date, and Available Appointments based on your Practice Manager settings.
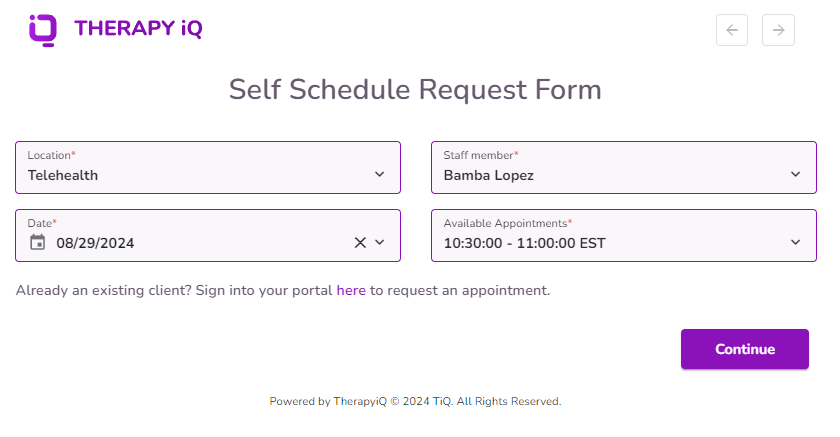
Locations and Staff Members
Important: The "Location" dropdown will only display locations that have been set up in the Locations Manager within your Practice Manager settings and that are assigned to your Team Members.
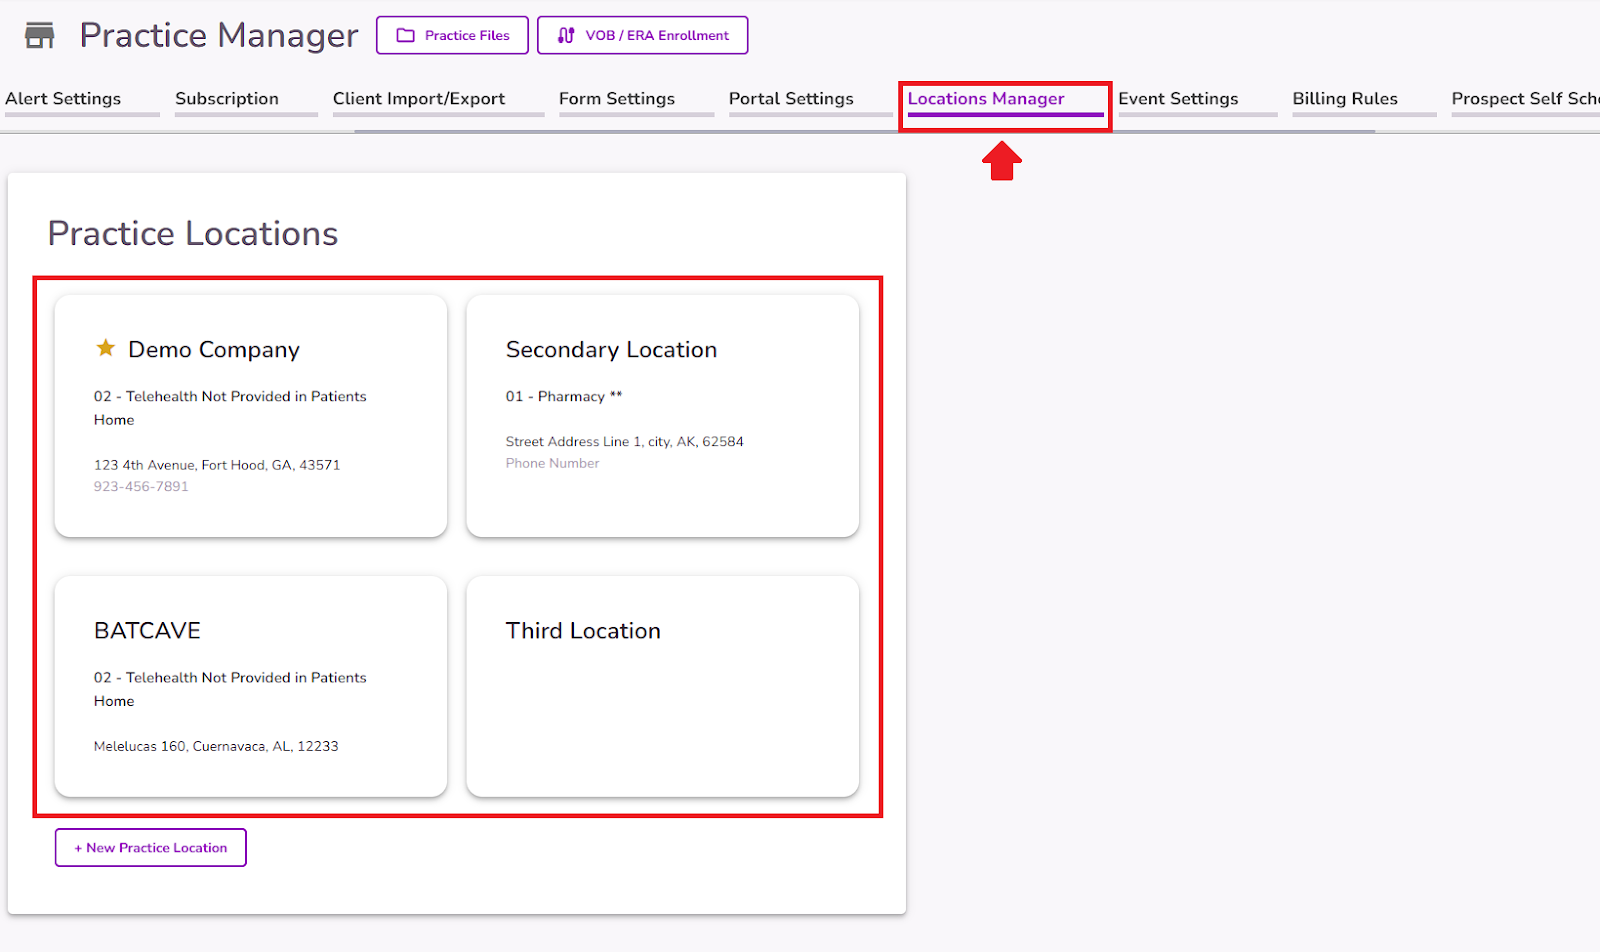
Once a location is added to your practice, it can be assigned to each one of your Team Members through their profiles under Practice Locations.
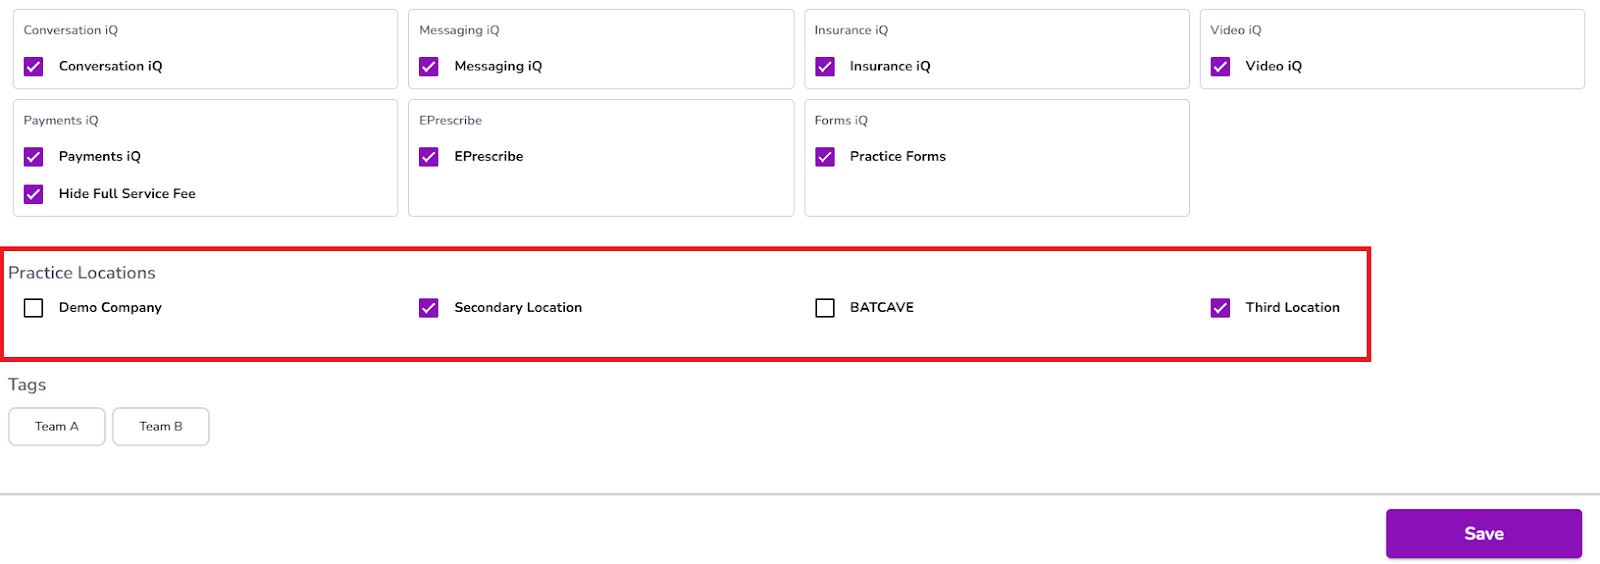
After a location is assigned to a team member, its availability can be checked under the New Prospect Self-Scheduling tab in your Practice Manager.
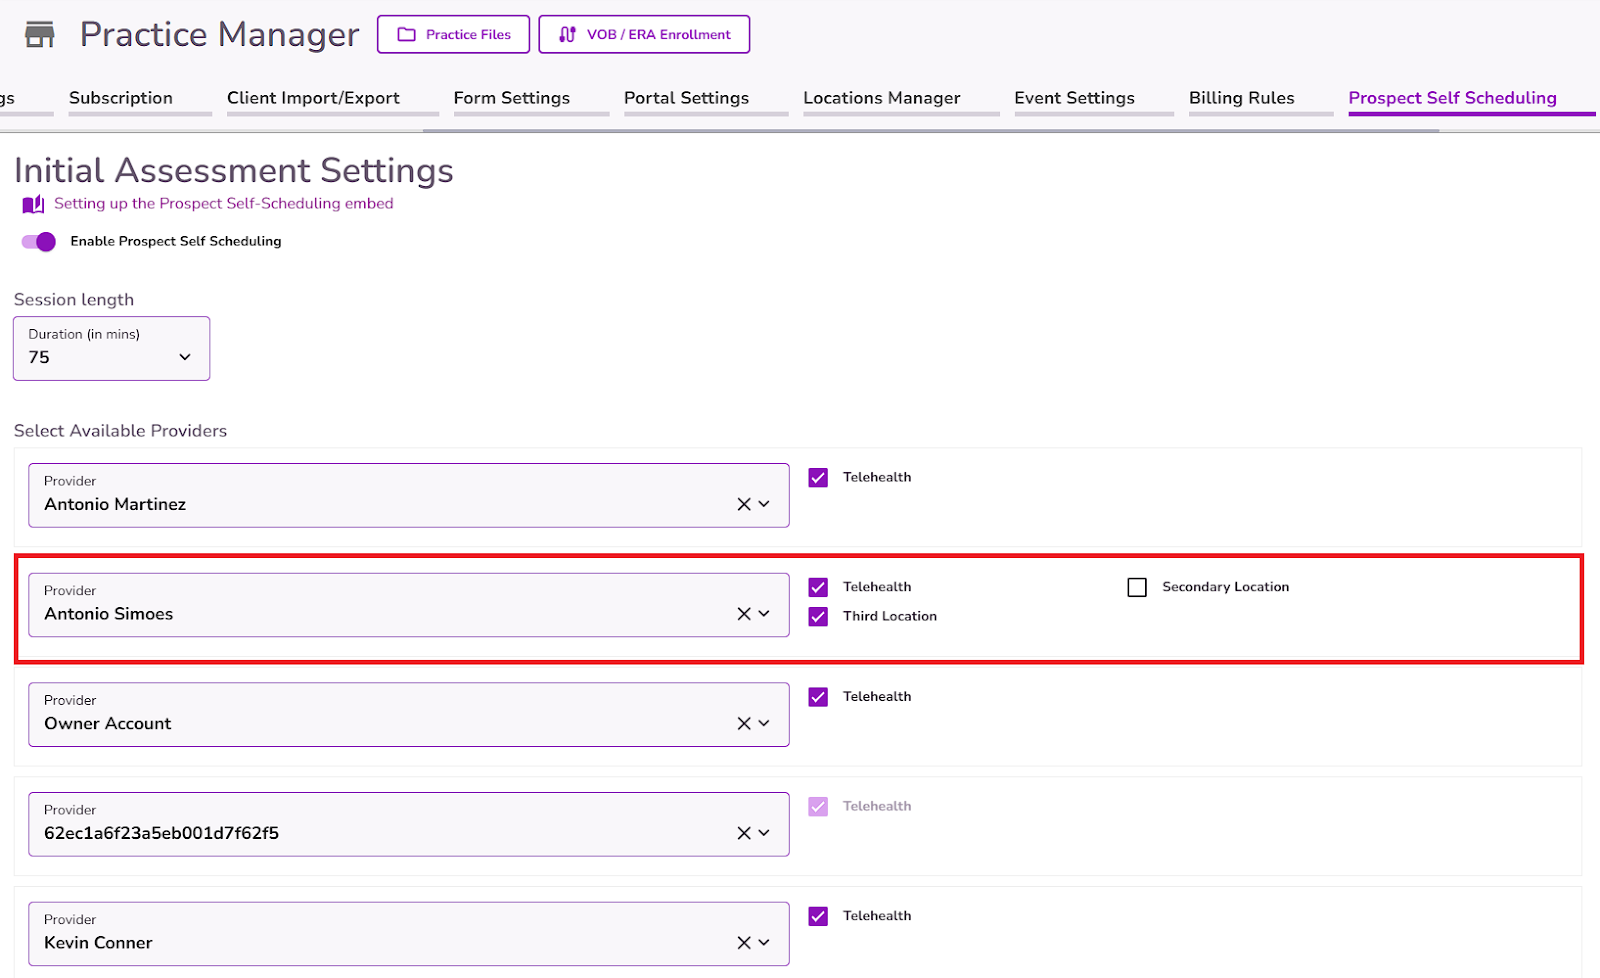
Note: When a new prospect selects a location, only team members who have that location assigned and checked for availability, will appear for scheduling that specific location.
Click here to learn more about the Locations Manager feature in Practice Manager.
Date and Available Appointments
Scheduled events within the user’s availability range are automatically excluded in the Available Appointments field.
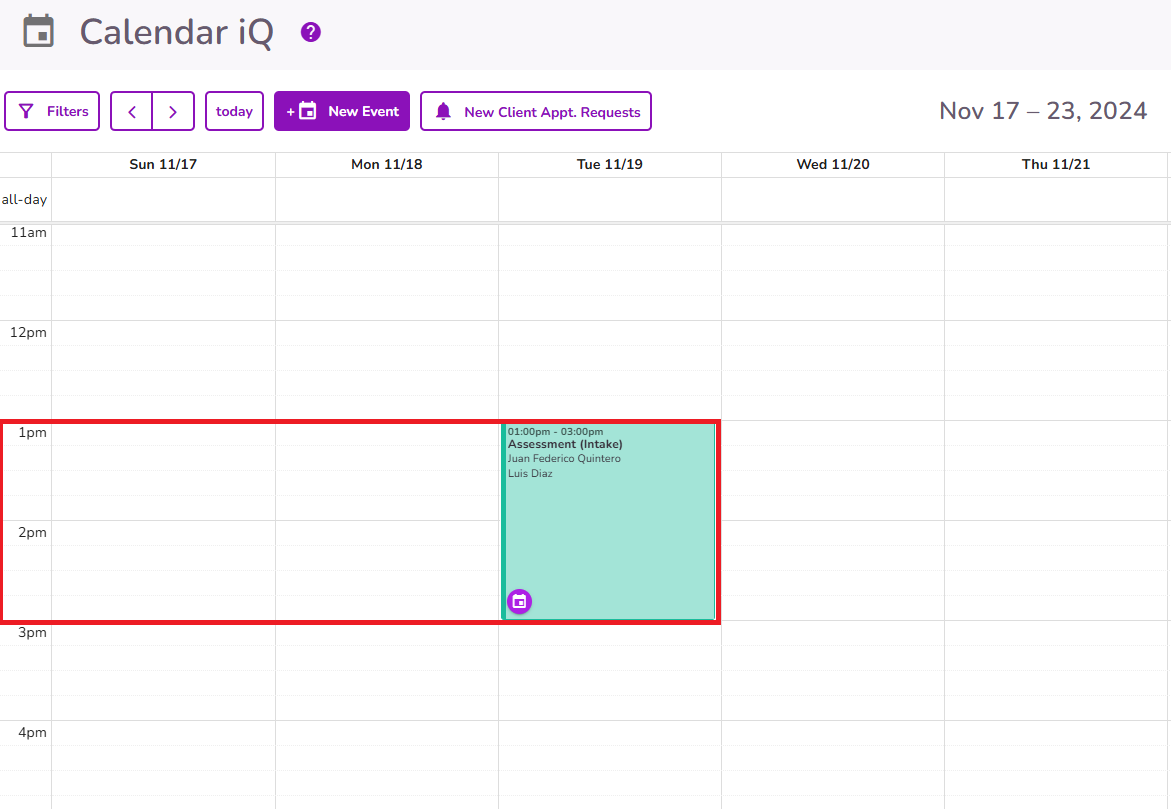
This is to ensure only open time slots are displayed to new prospects on the Self-Schedule Request Form.
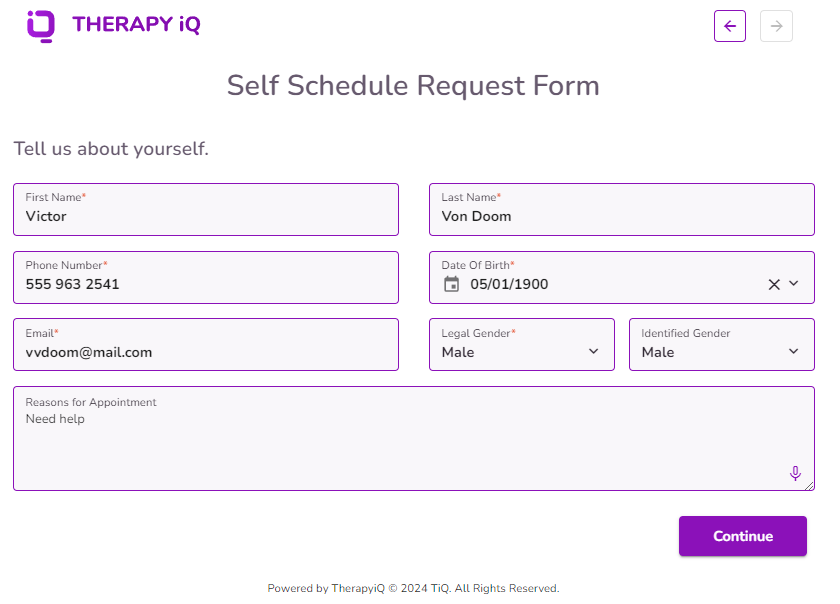
Tell us about yourself
When clicking Continue, clients will be able to add their personal information.
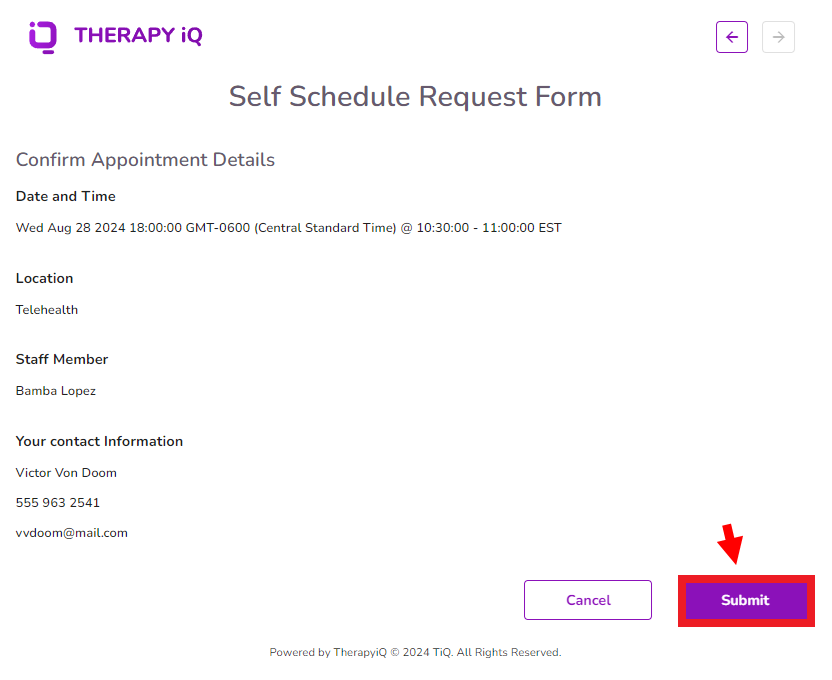
Selecting Continue will display a Confirmation Appointment Details screen. If everything looks accurate, clients should select Submit.
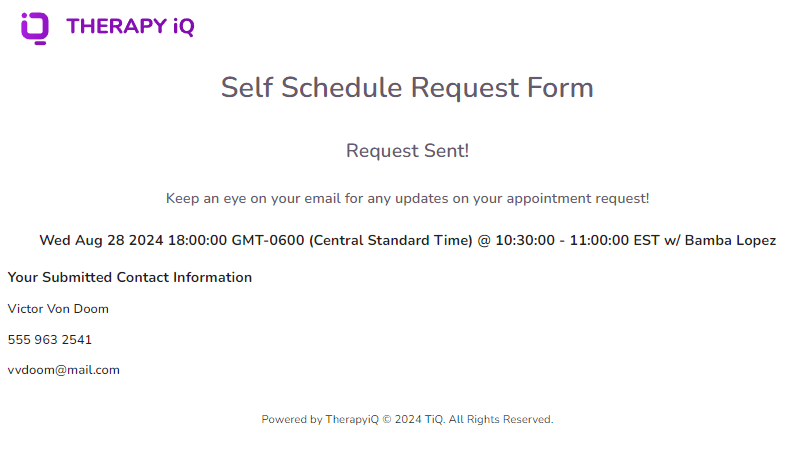
A new confirmation window will appear.
New Client Appointment Requests
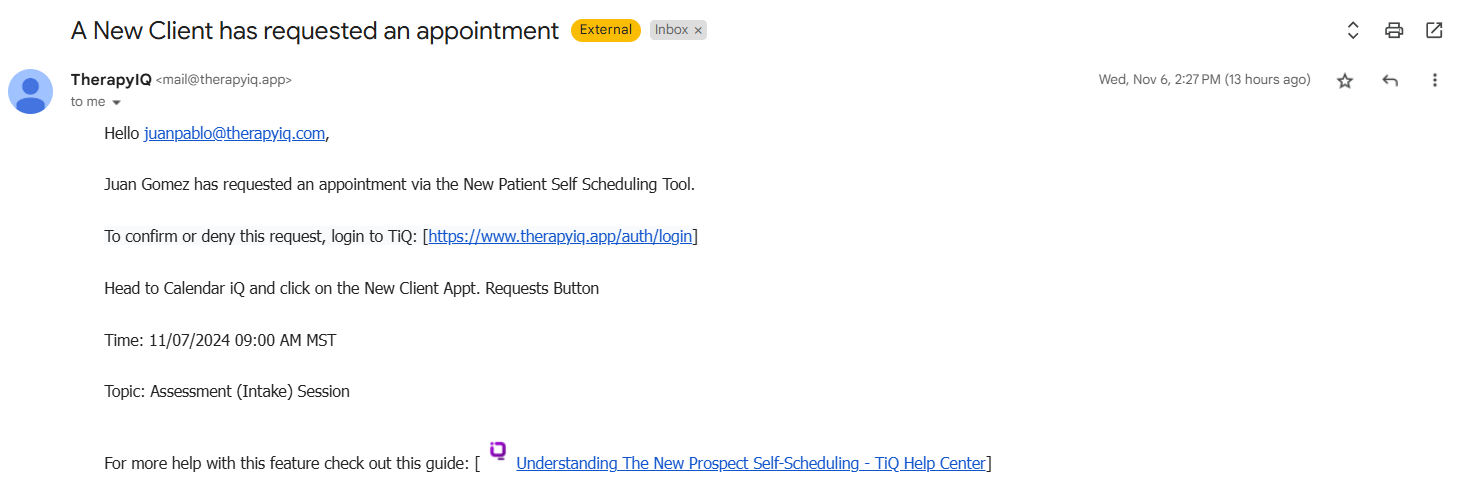
Once your client has requested the appointment you’ll find that request in Calendar iQ. Select the New Client Appt. Request button. Also, the selected provider will receive an email with the appointment request.
IMPORTANT: All users with the “Manage all appt request” permission can see the “New Client Appt Request” button on the calendar. (Except the Biller role)
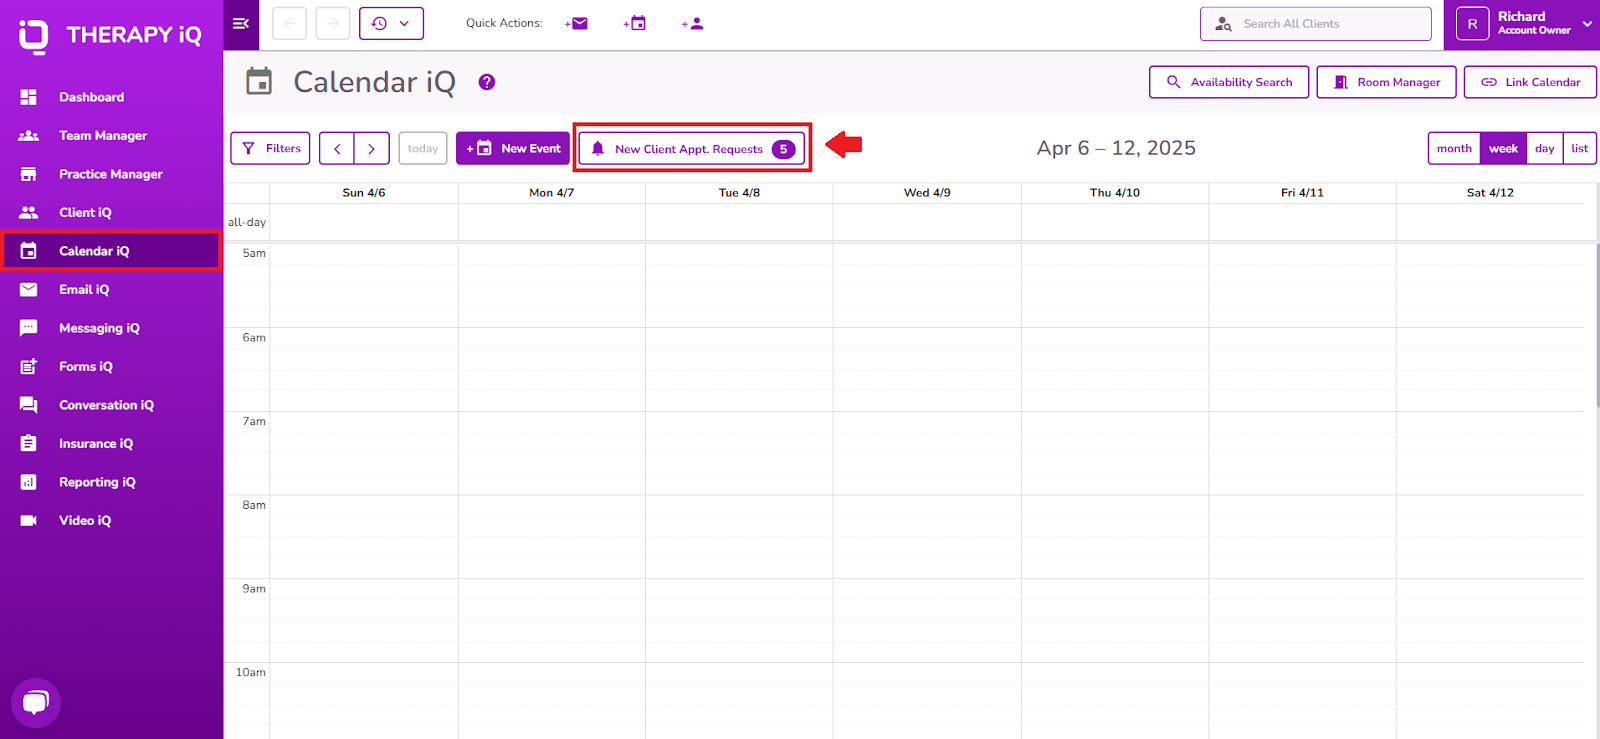
However, any user listed in the “Select Available Providers” section in Practice Manager will also see the “New Client Appt Request” button in Calendar iQ, but it will only display their own appointment requests.
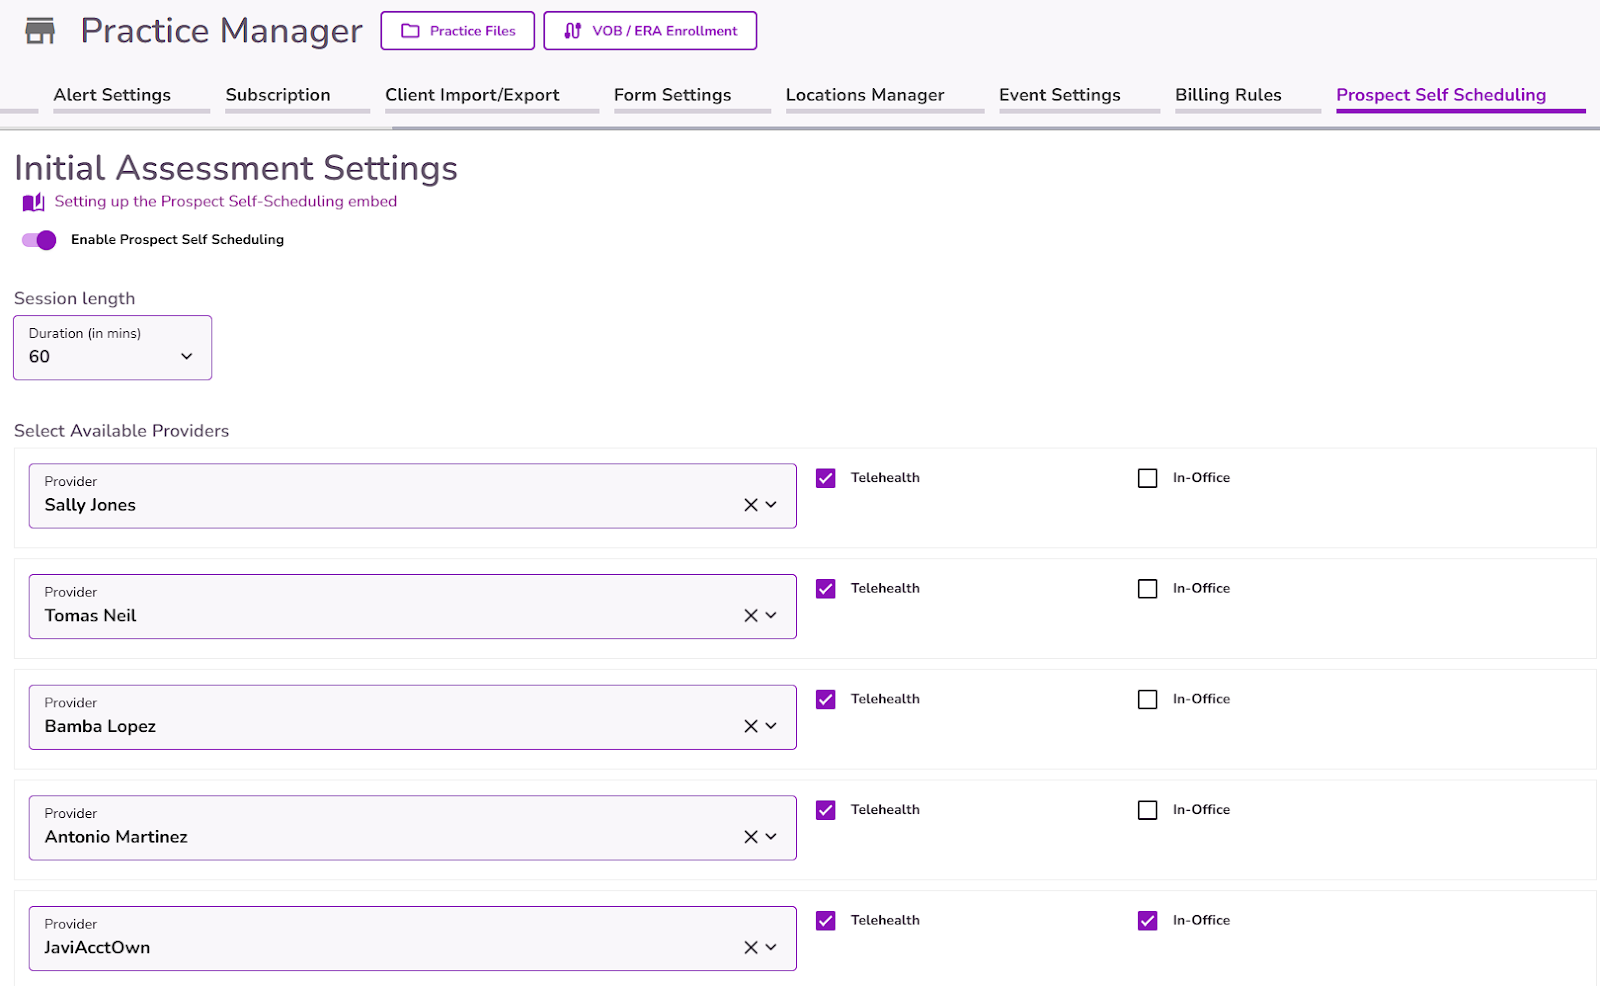
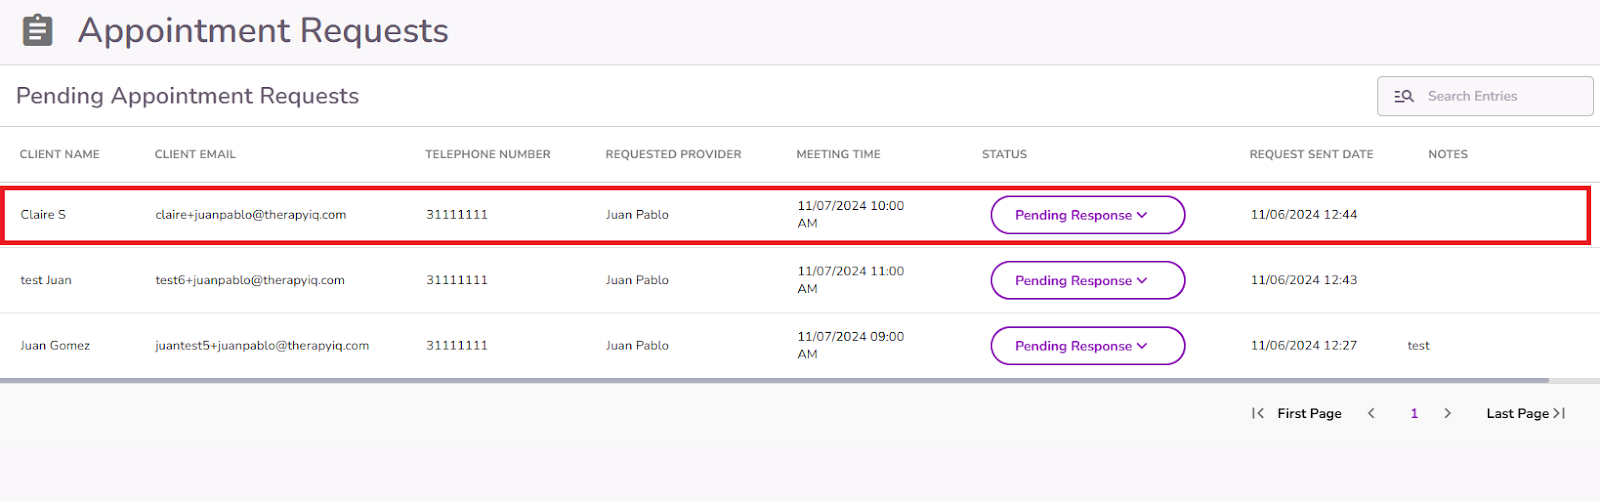
You’ll see the list with all appointment requests, and the details the client added when submitting the form. All non-worked appointments will show a Pending Response status.
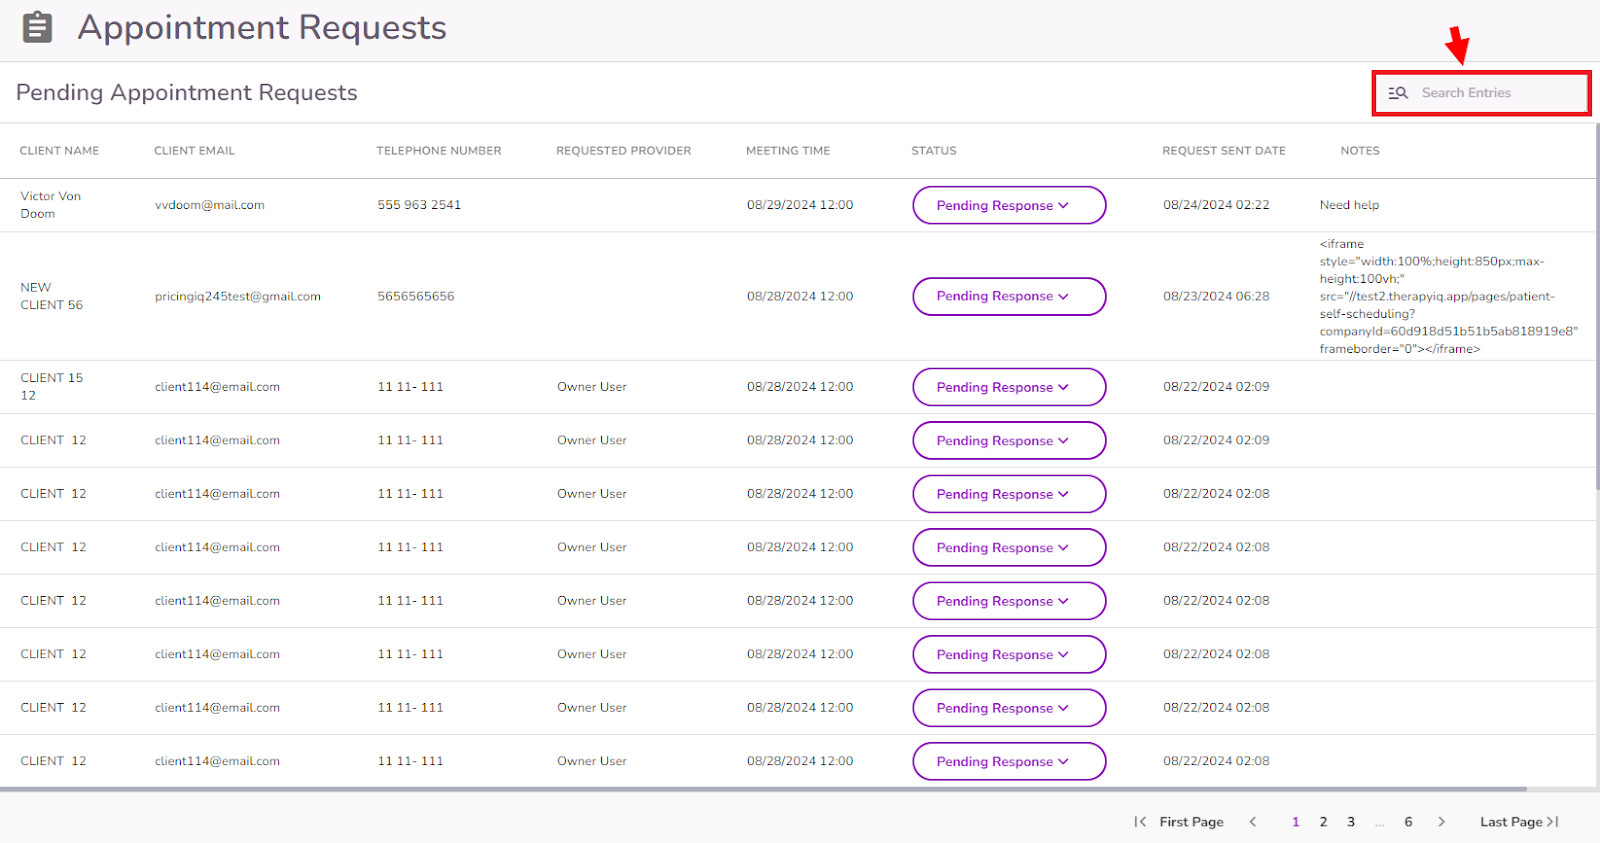
With the Search Entries box, you can search by Client Name, Provider, and Status.
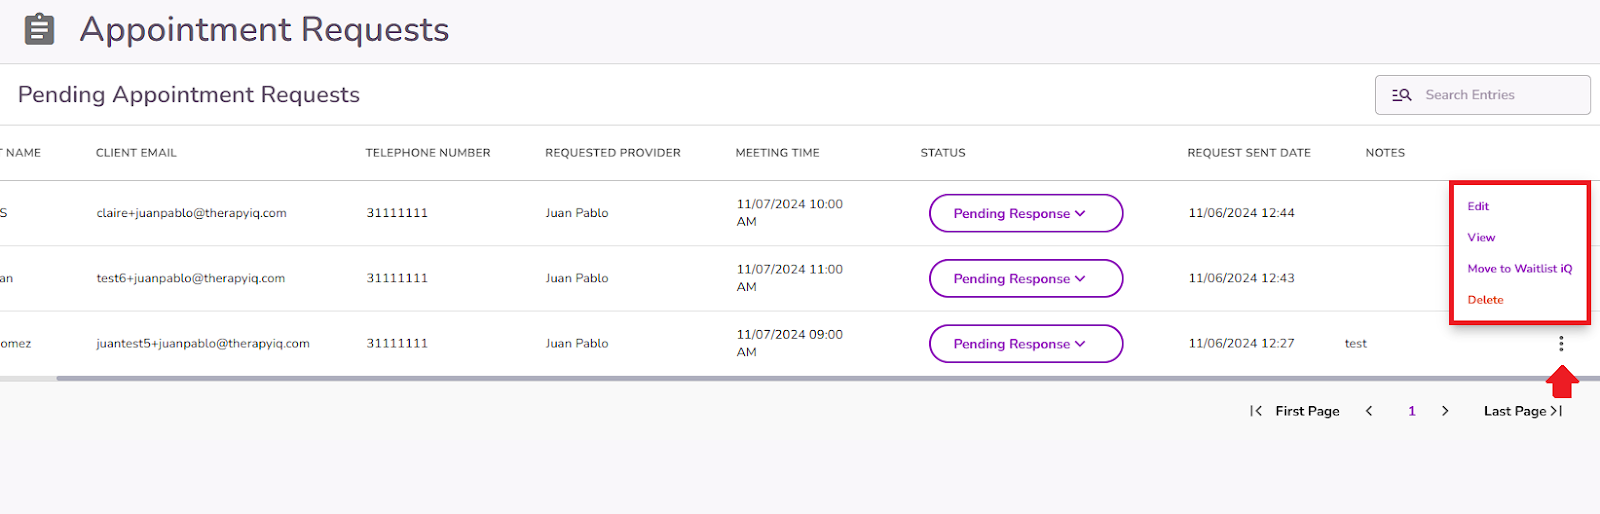
By selecting the 3 dots on the right side, you’ll be able to View the request details, Edit it, Delete it, or move the request to Waitlist iQ. Click here to learn more about Waitlist iQ
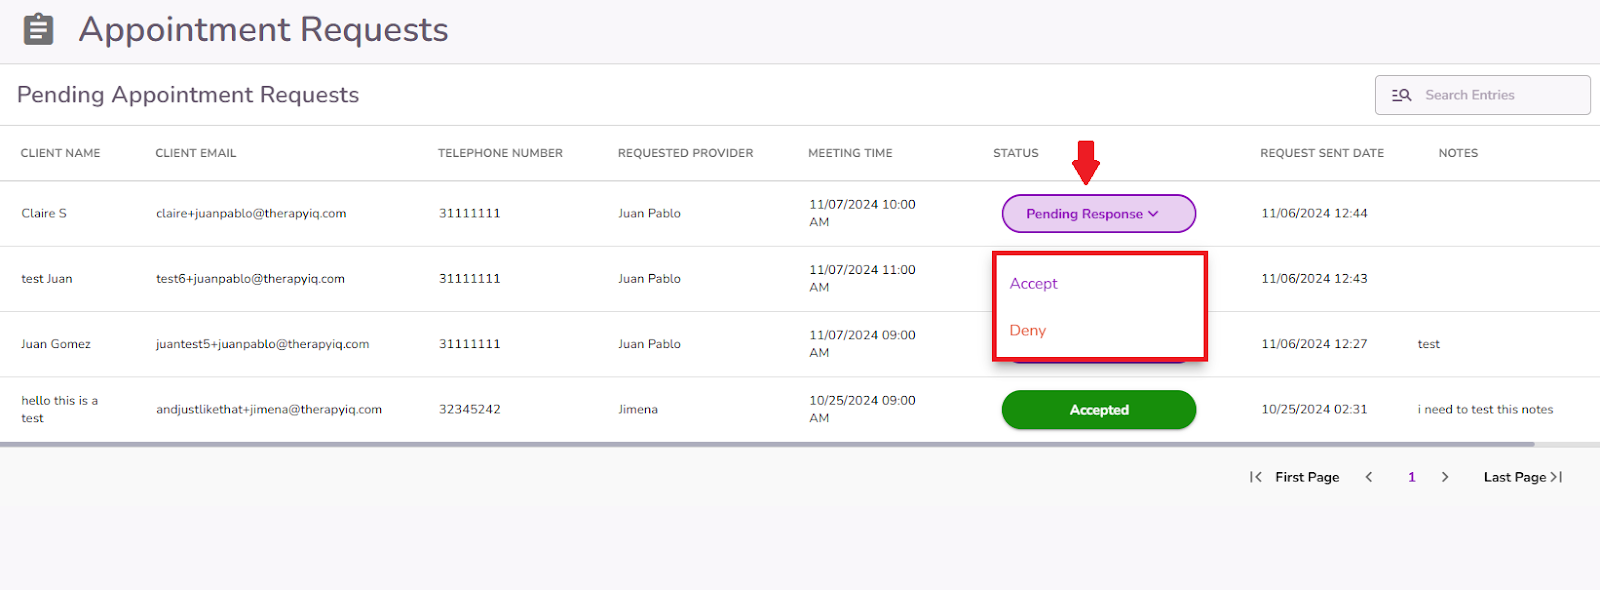
You can decide whether to Accept the request or Deny it by selecting the Status button.
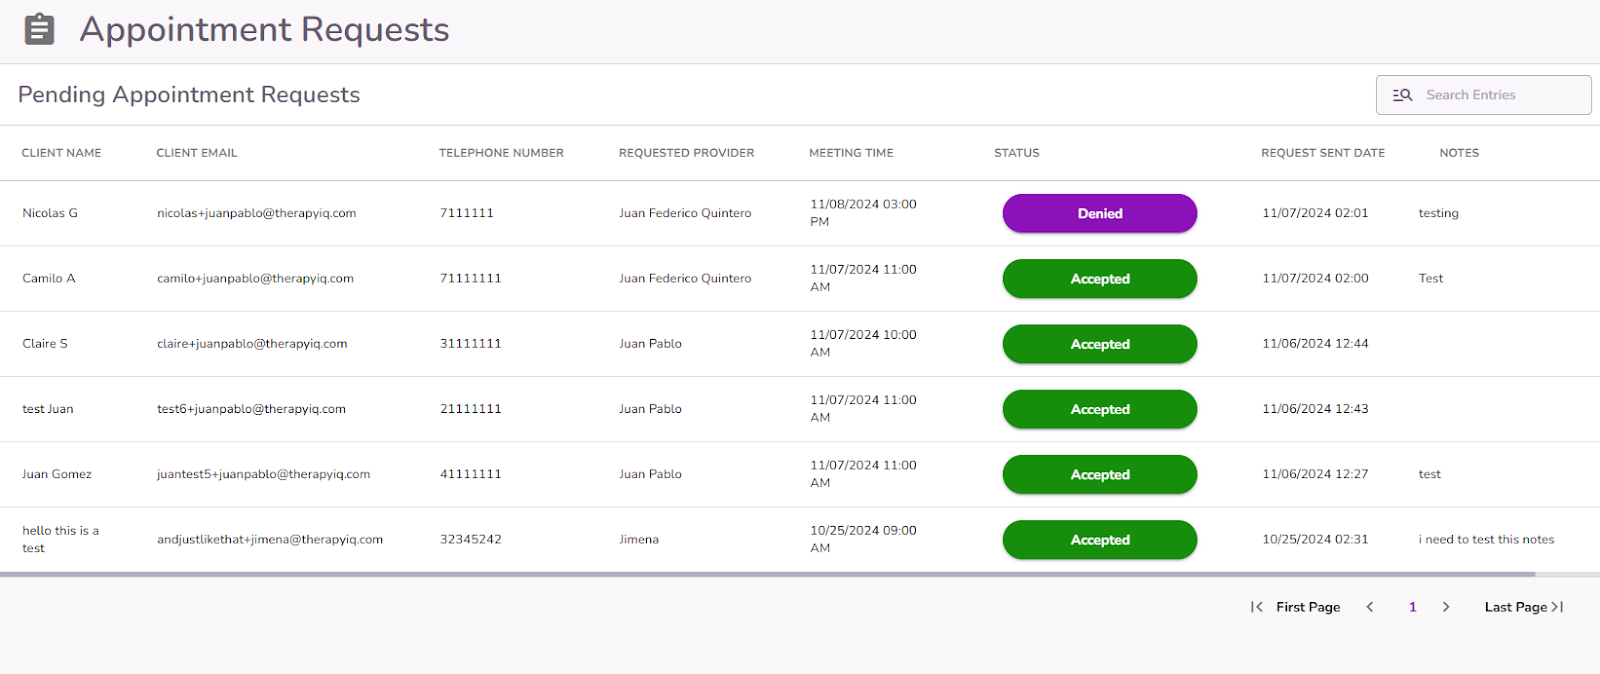
IMPORTANT: Once a request has been accepted or denied, the status can’t be changed.
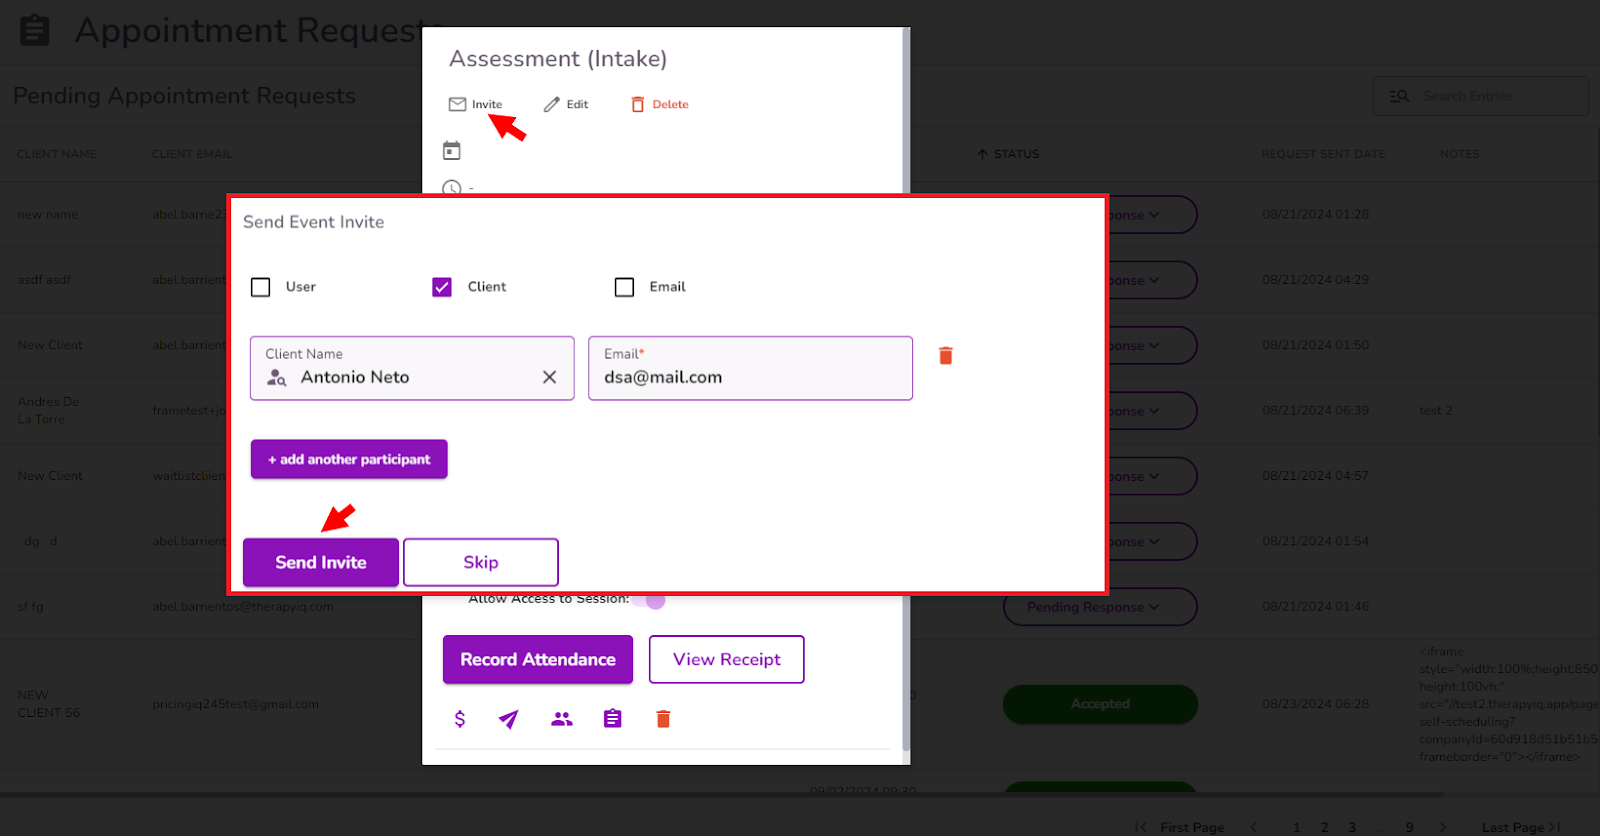
When a request is accepted, a popup window will appear showing the details of the new Intake session.
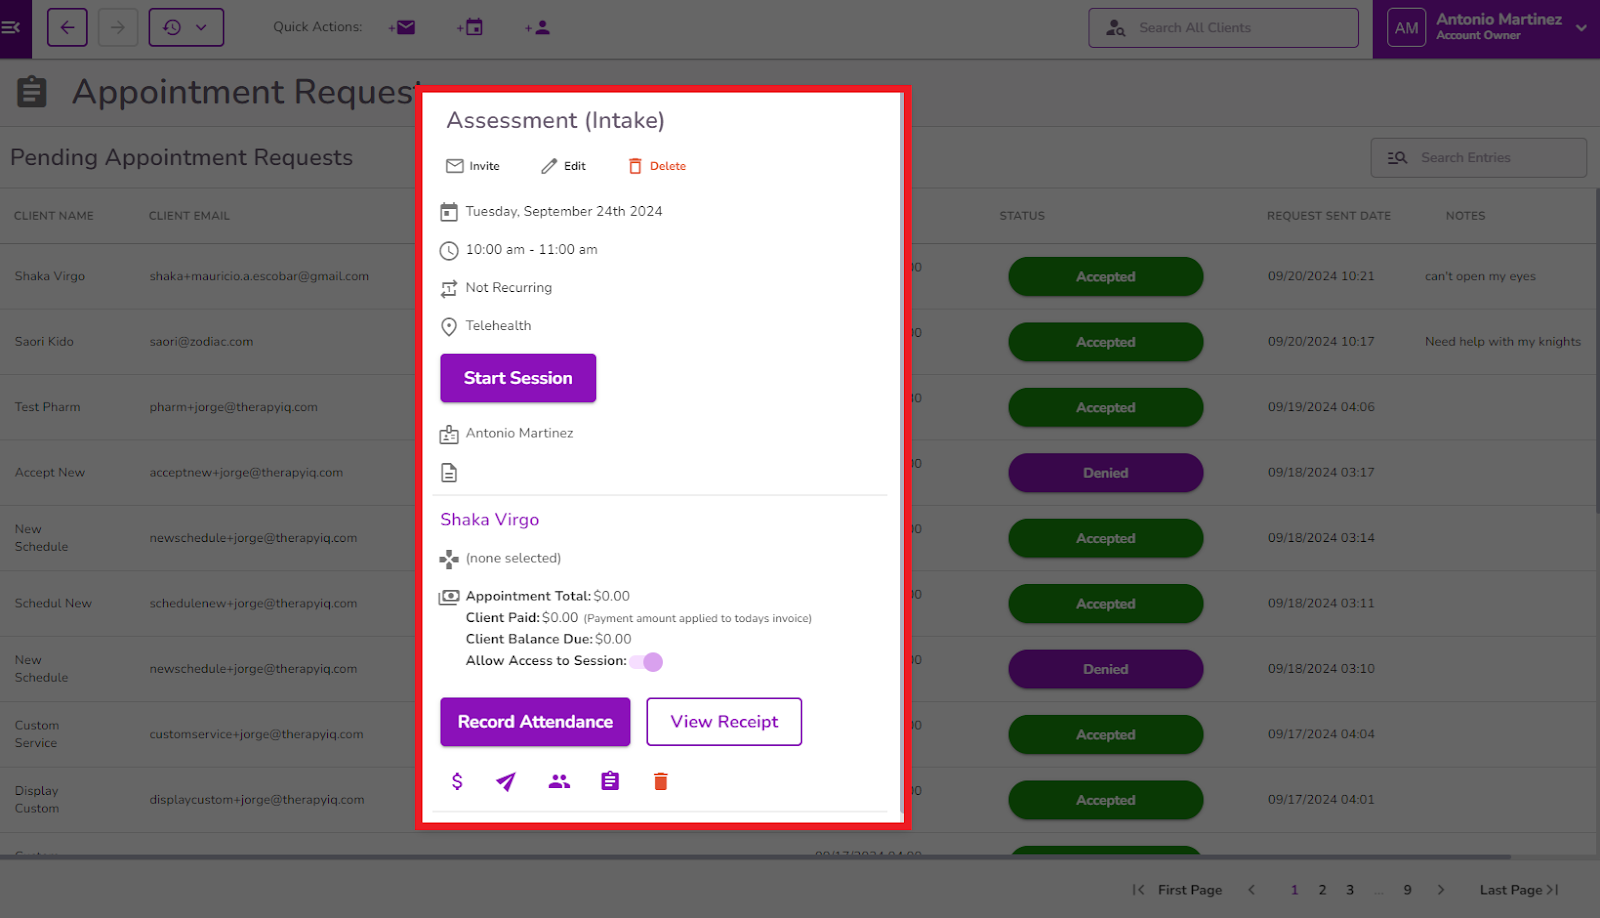
From this screen, you’ll be able to send the appointment invitation to the client, by selecting the Invite button.
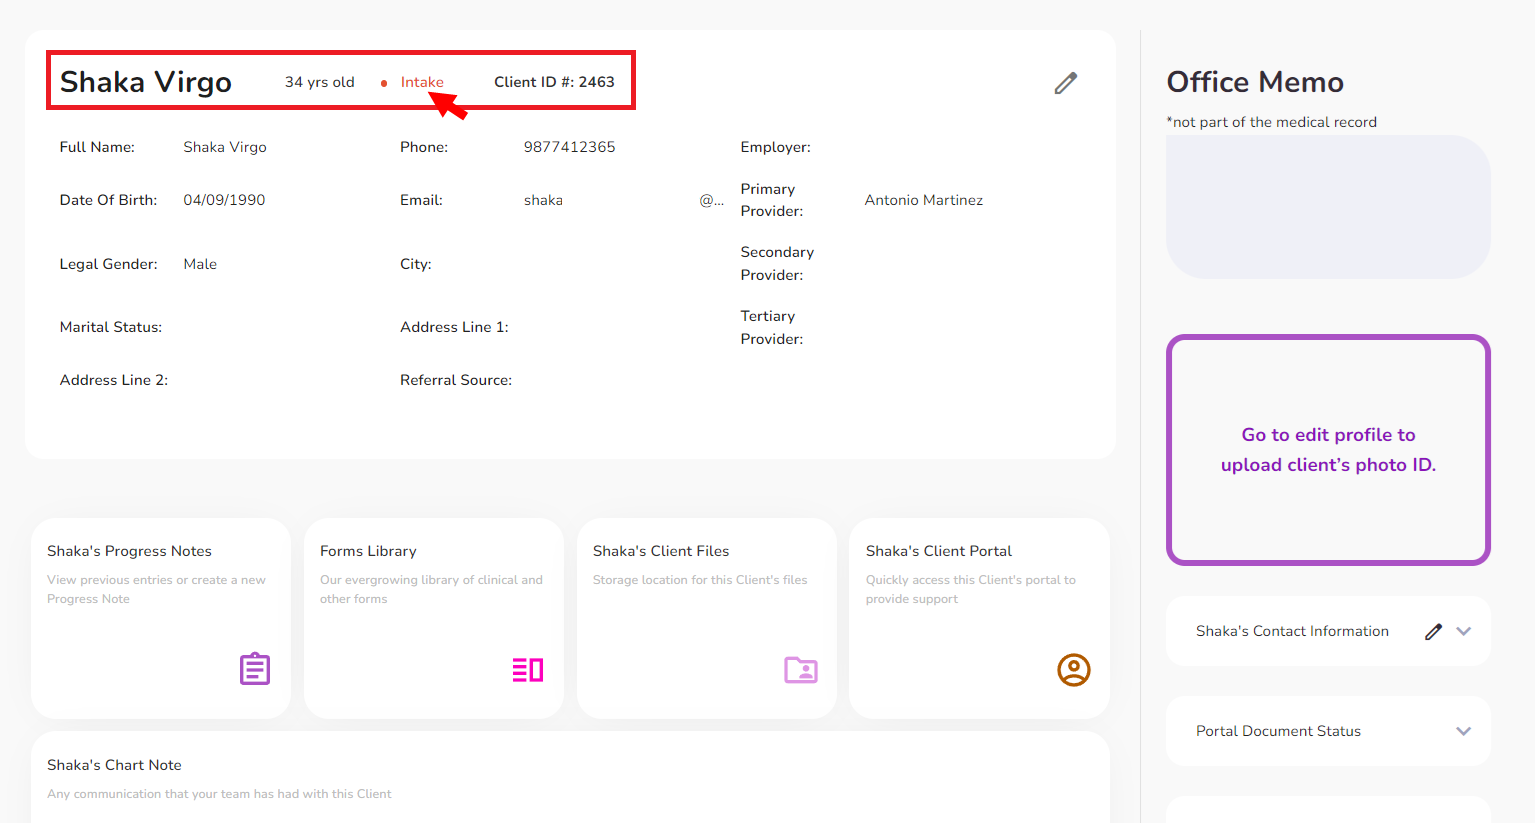
Also, TiQ will automatically create a new profile for this new client in Intake status.
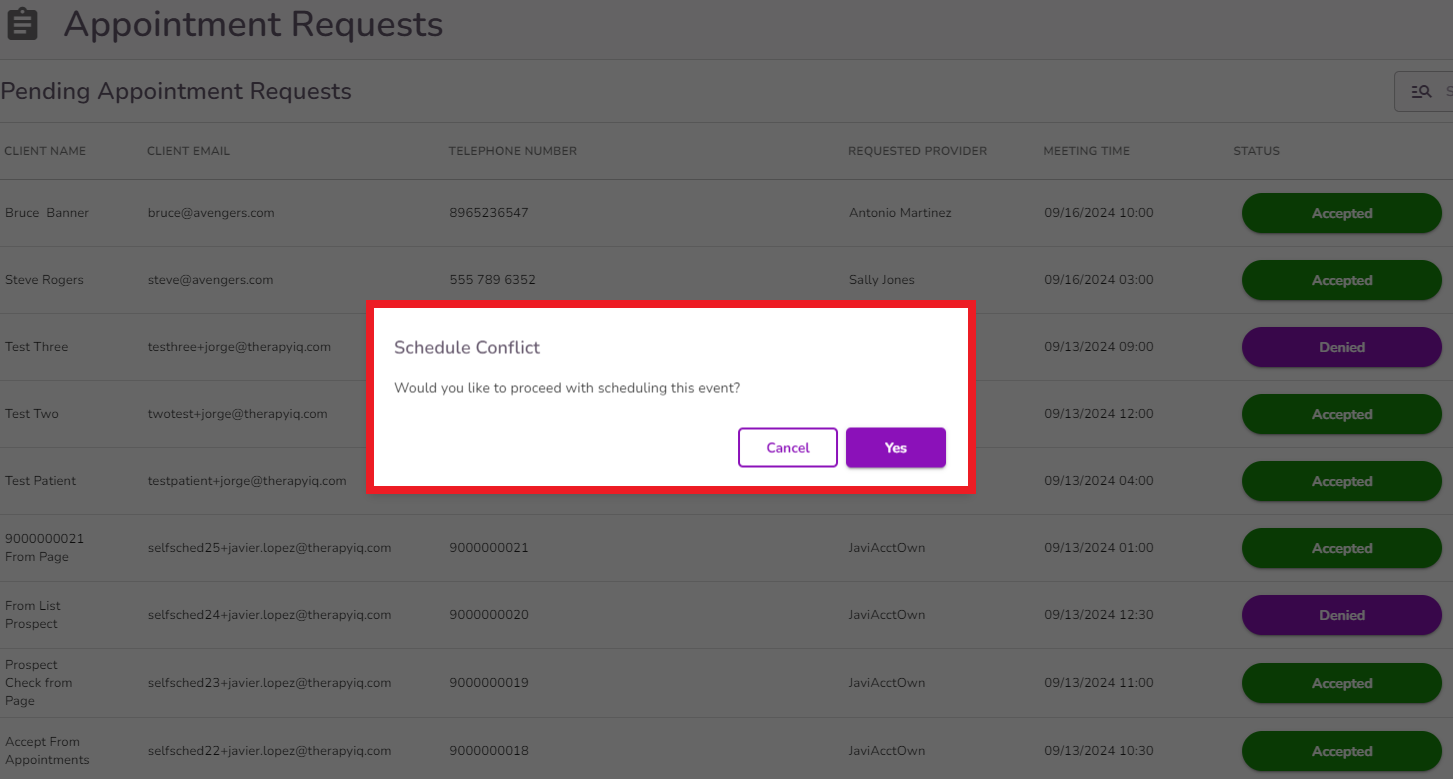
NOTE: If a request is accepted and there is another appointment scheduled in the same slot of day and time, you'll see a Schedule Conflict pop-up
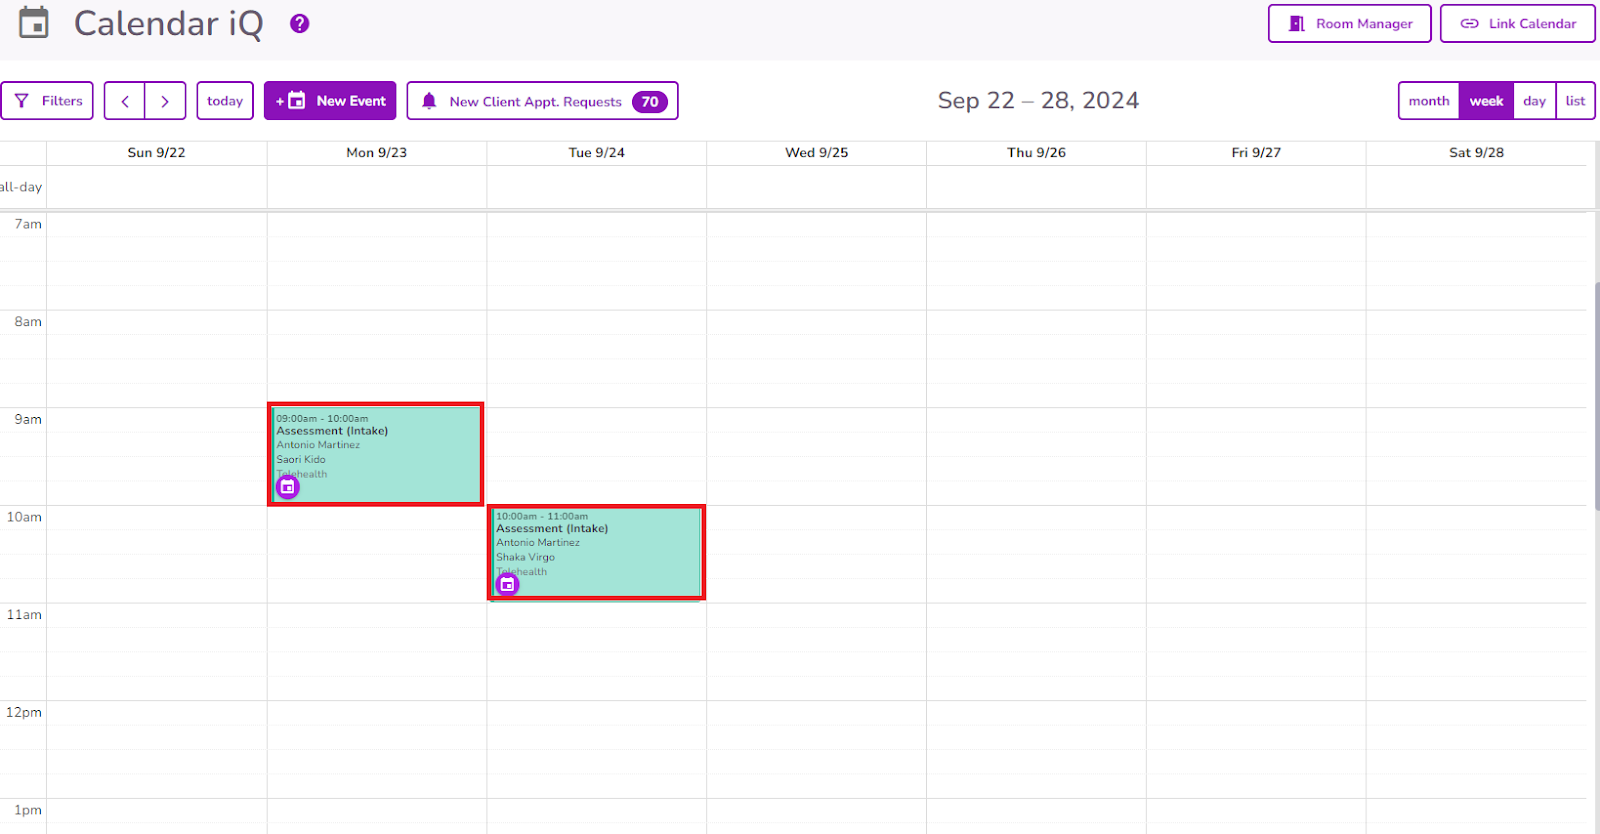
Once the request is accepted, it will show up in the provider’s calendar.
Providers will also receive an email when a new prospective client requests an appointment with them
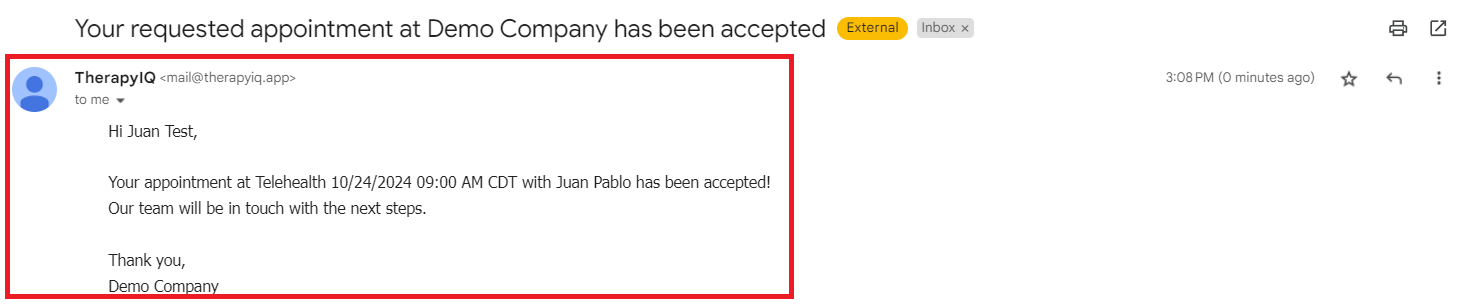
When a prospect’s appointment request is accepted from the 'Appointment Requests' page, the client will automatically receive a notification email.
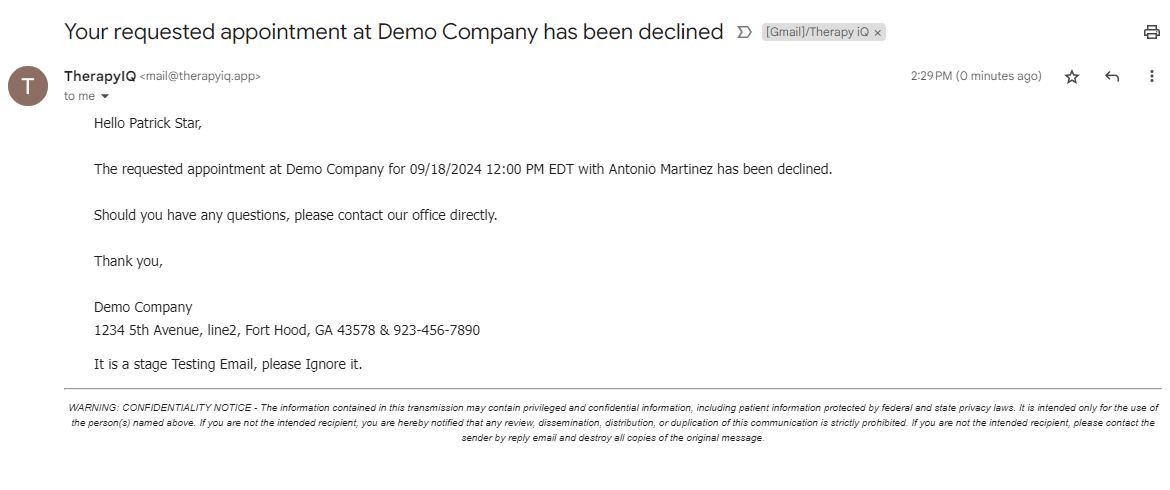
When a request is denied, the client will receive a denial email.