How To Record A Batch Payment
The Batch Payment feature allows you to post multiple insurance payments at once. Utilizing the batch payment feature provides the ability to ensure the amounts entered for each individual payment add up to the total payment of the batch.
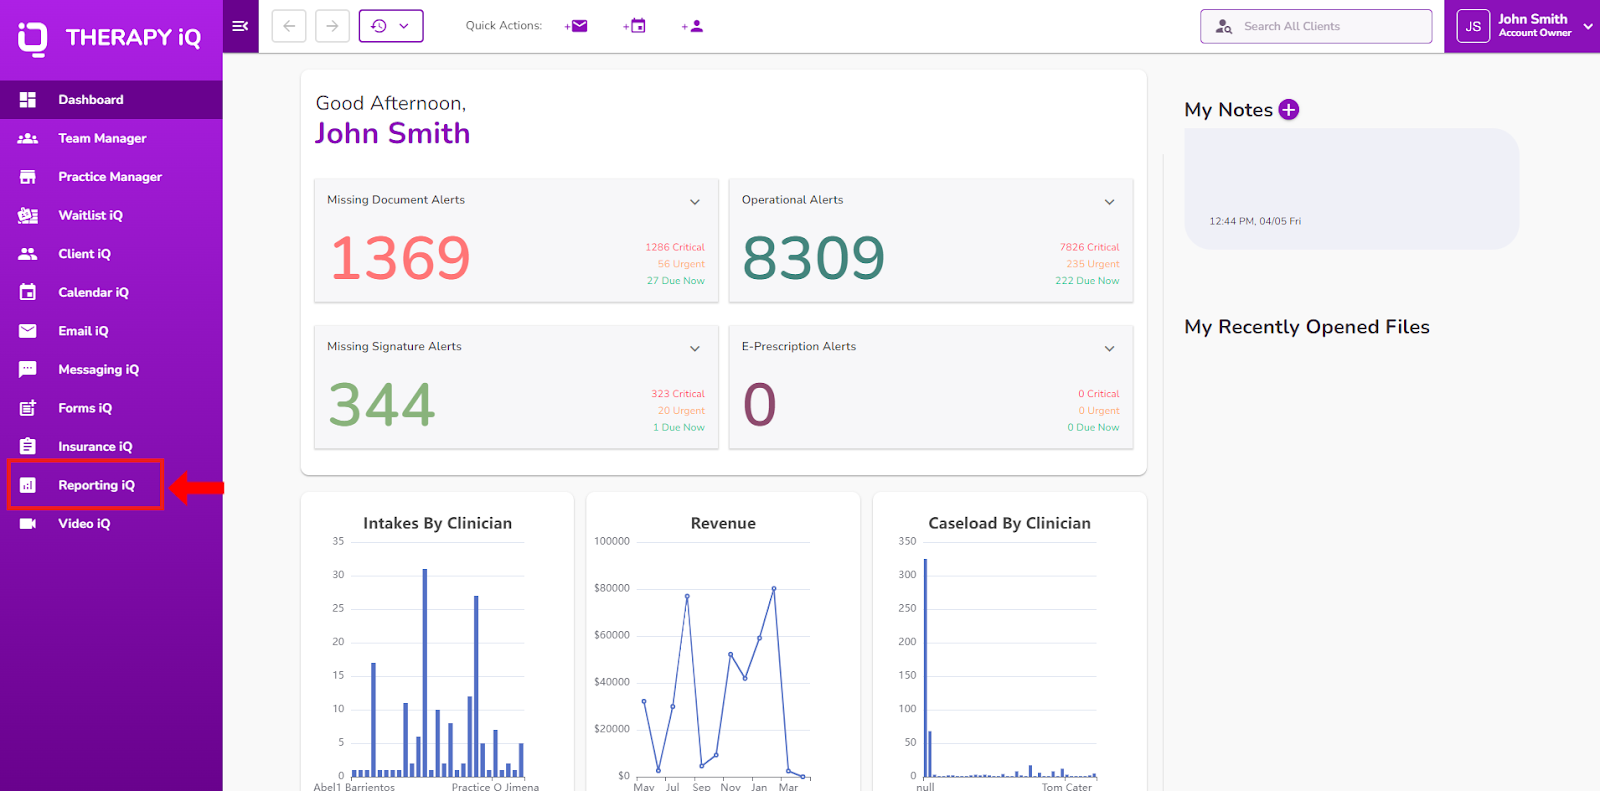
From the Navigation Bar, select Reporting iQ.
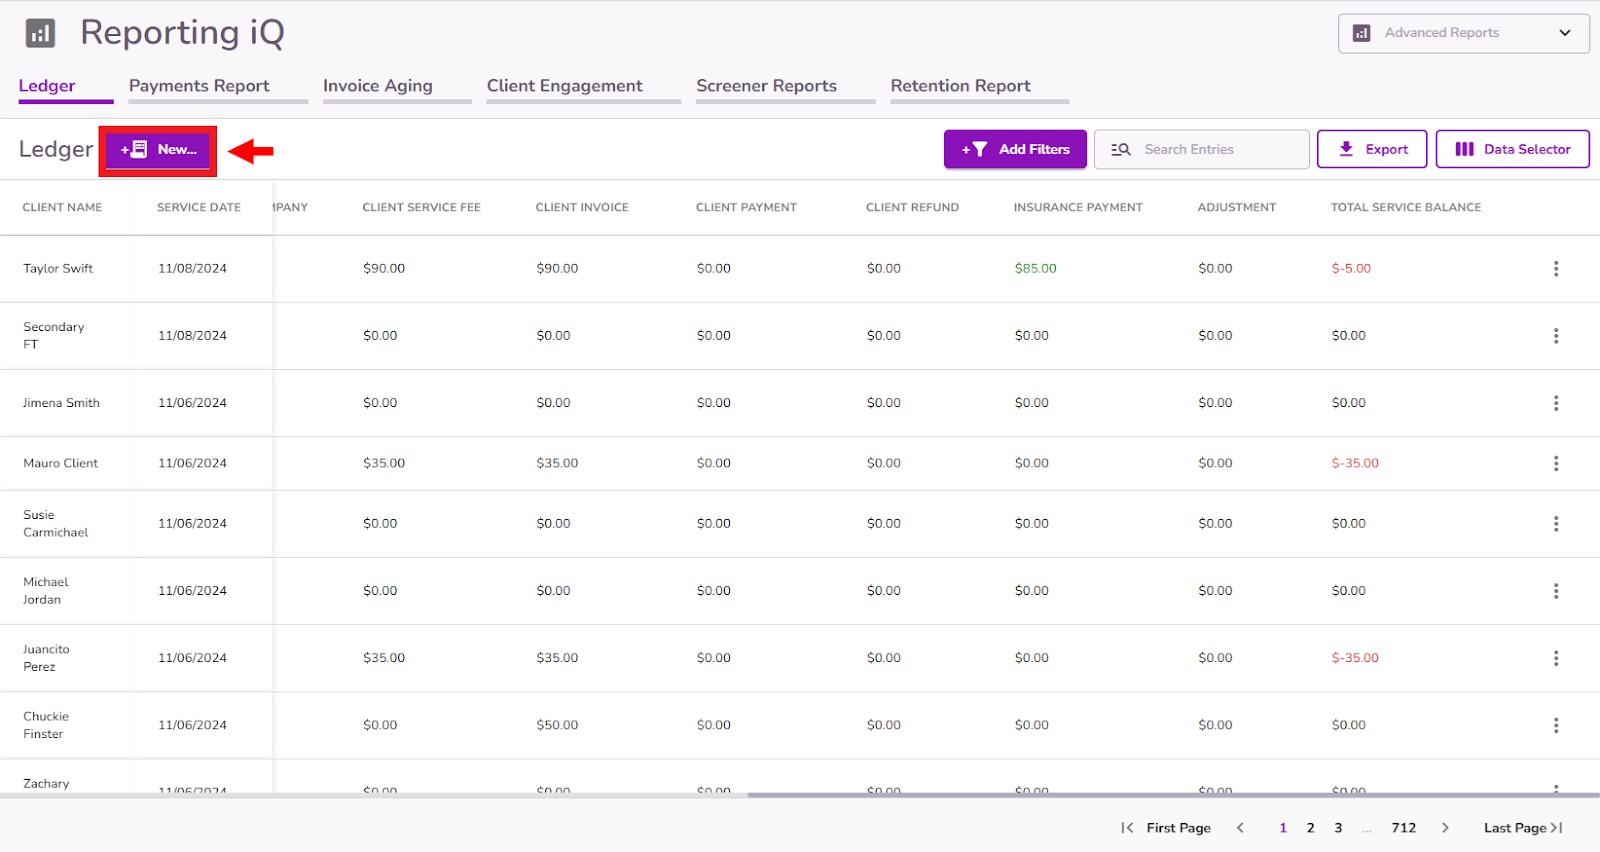
Within the Ledger select the New… button.
Select Batch Payments

Select a Payment Date

Enter the Insurance Company

Enter the Payment Type, Check/Reference Number (if needed), and Total Payment Amount.

Enter a client to the Client Name field.
NOTE: When you start typing the name, the options list will show up.
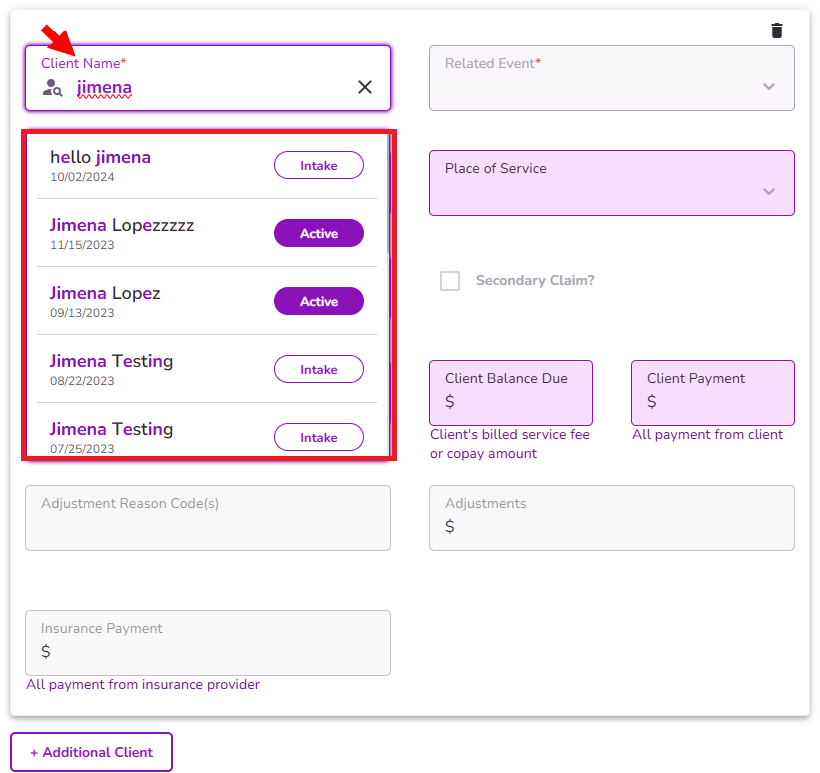
Select a Related Event.
NOTE: The Related Event dropdown will show only events related to the selected client.
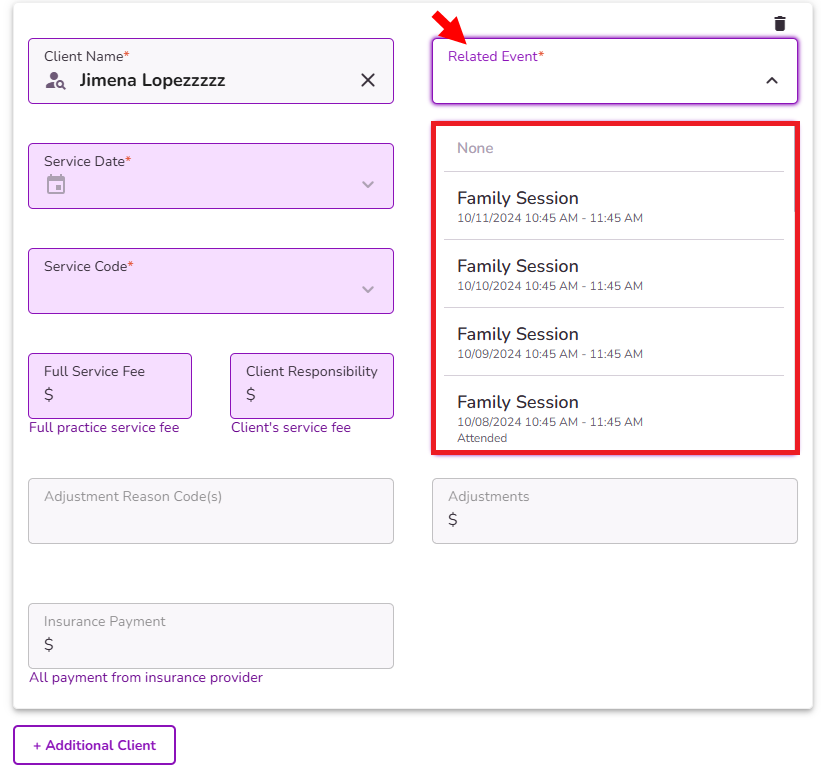
The remaining fields (Service Date, Service Code, Full Service Fee, Place of Service etc.) would auto-populate based on the related event details.

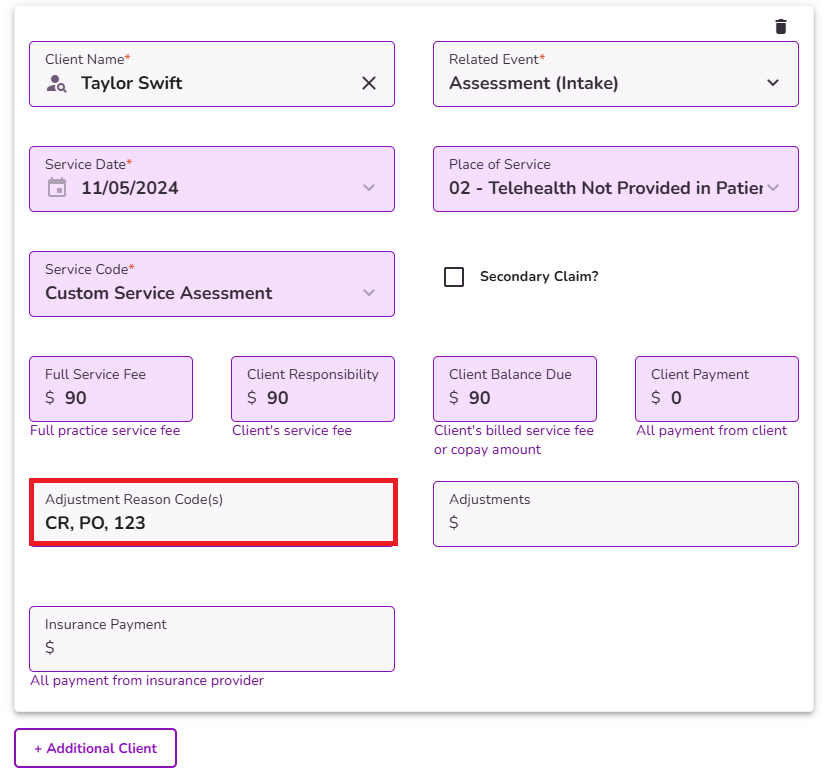
Add any relevance Adjustment Reason Codes for the payment you’ll record.
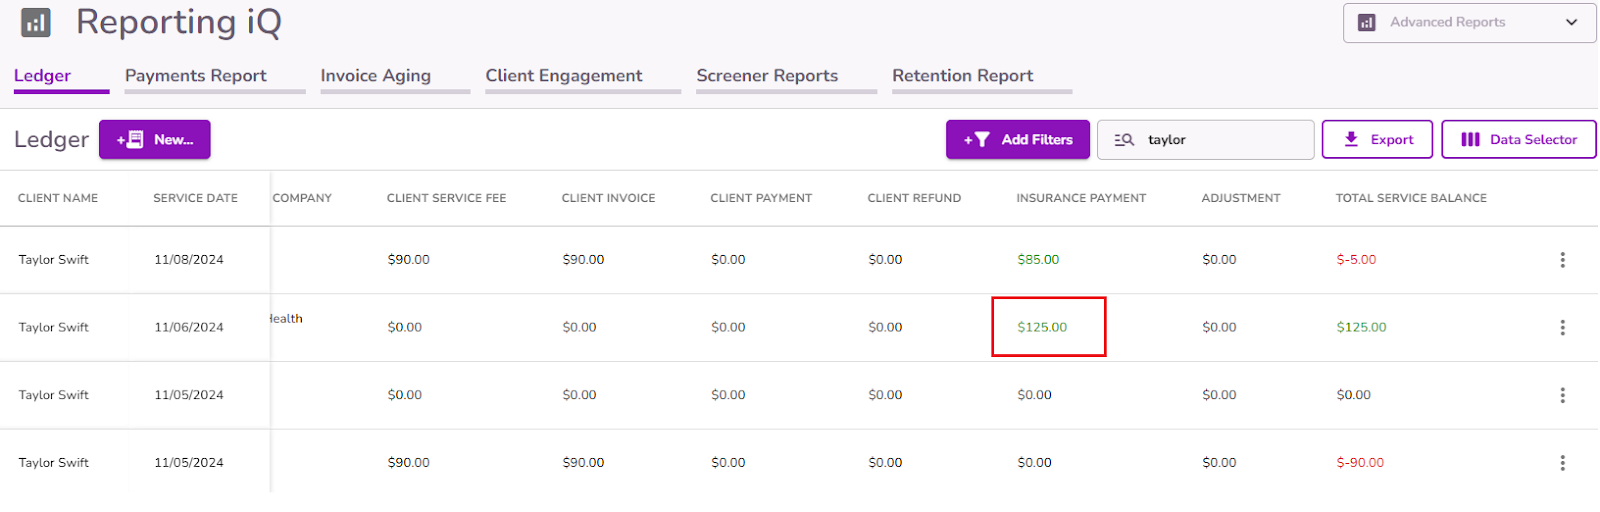
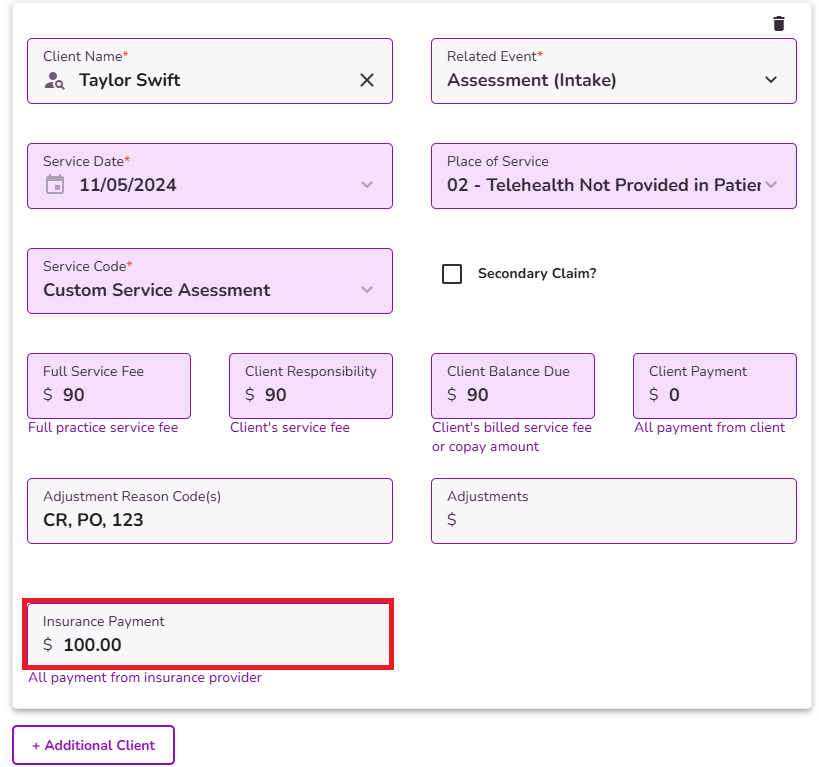
Enter the Insurance Payment amount
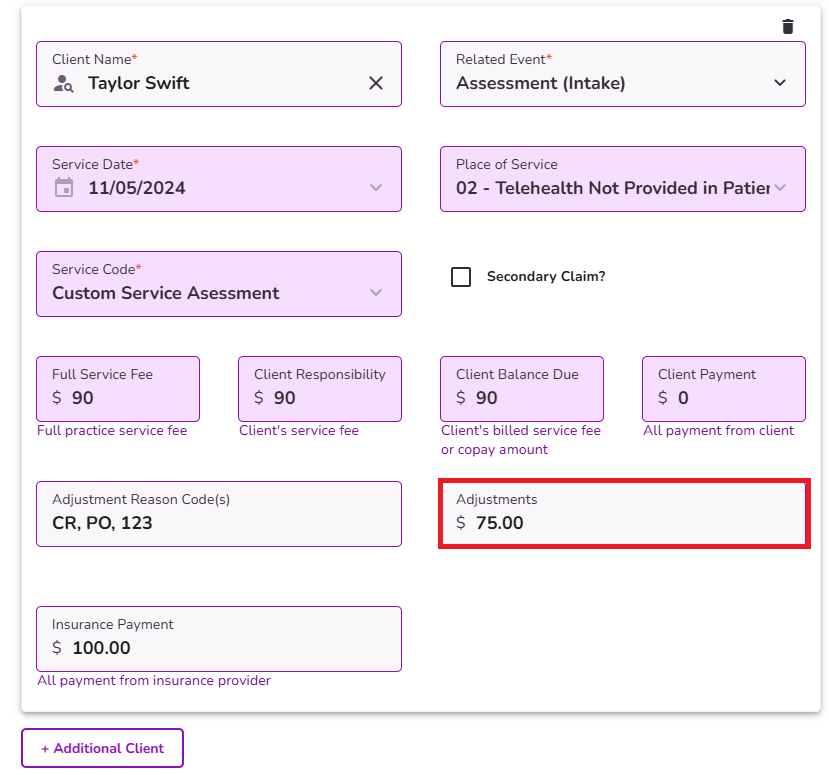
Any Adjustments will be displayed in the Adjustments column of the Ledger.
NOTE: This adjustment can be in negative values
If the Secondary Claim? the checkbox is selected, that payment will show on the subline of the Ledger. Click here to learn how secondary claims are reflected on the ledger.

If you need to add an additional client for this payment select the + Additional Client button.

Select Submit Payments
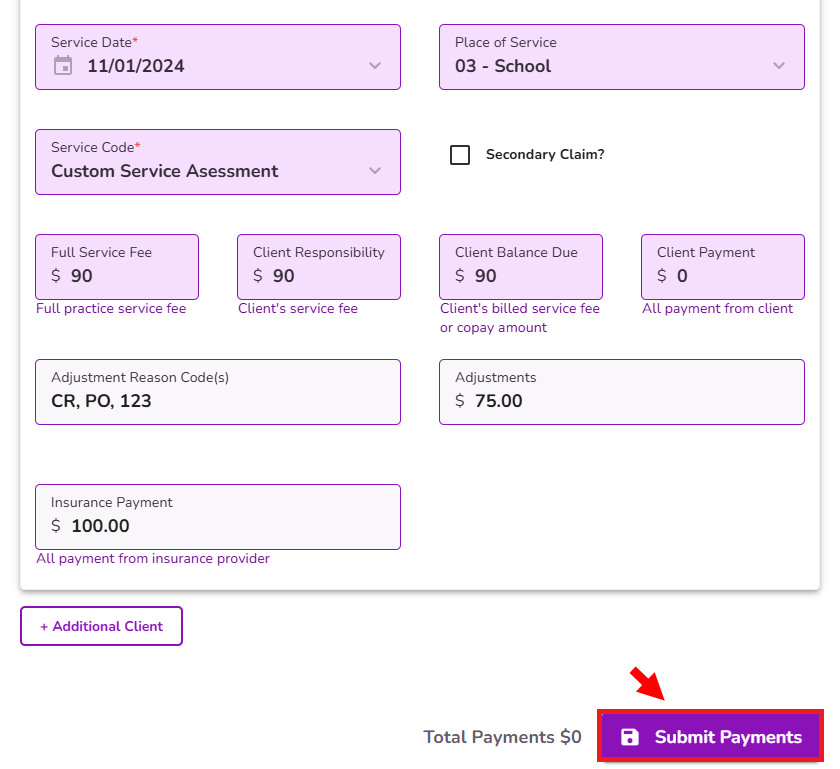
If the Total Payments amount does not match the Payment Amount, the relevant fields will be highlighted in red, and an error message will be displayed to alert. Make sure the payment match to submit.
After submitting the payment, you will be brought back to the Ledger page and all associated line items touched will be updated.
NOTE: You are able to select an event that has had an insurance payment made previously, but a validation message will pop-up. You can either Cancel or Submit Anyway. The purpose of this popup is to notify you that a payment has already been recorded to avoid data entry errors.

Once you click Submit Anyway, you’ll need to, type the word “continue” on the confirmation pop-up to confirm, and select Confirm.

After submitting the payment, you will be brought back to the Ledger page and all associated line items touched will be updated.
NOTE: The system will combine this new insurance payment with the previous total submitted insurance payment for the same date.