How To Assign Services And Fees To Clients
In this guide, we’ll walk you through the process of assigning services from the Client Profile page. The services you assign here will determine which options are available when booking appointments for the client.
NOTE: The recommended way to assign services is through the completion of a Treatment Plan. This method automatically populates the assigned services into the Client Demographics page. Click here to learn how to complete a treatment plan in TiQ
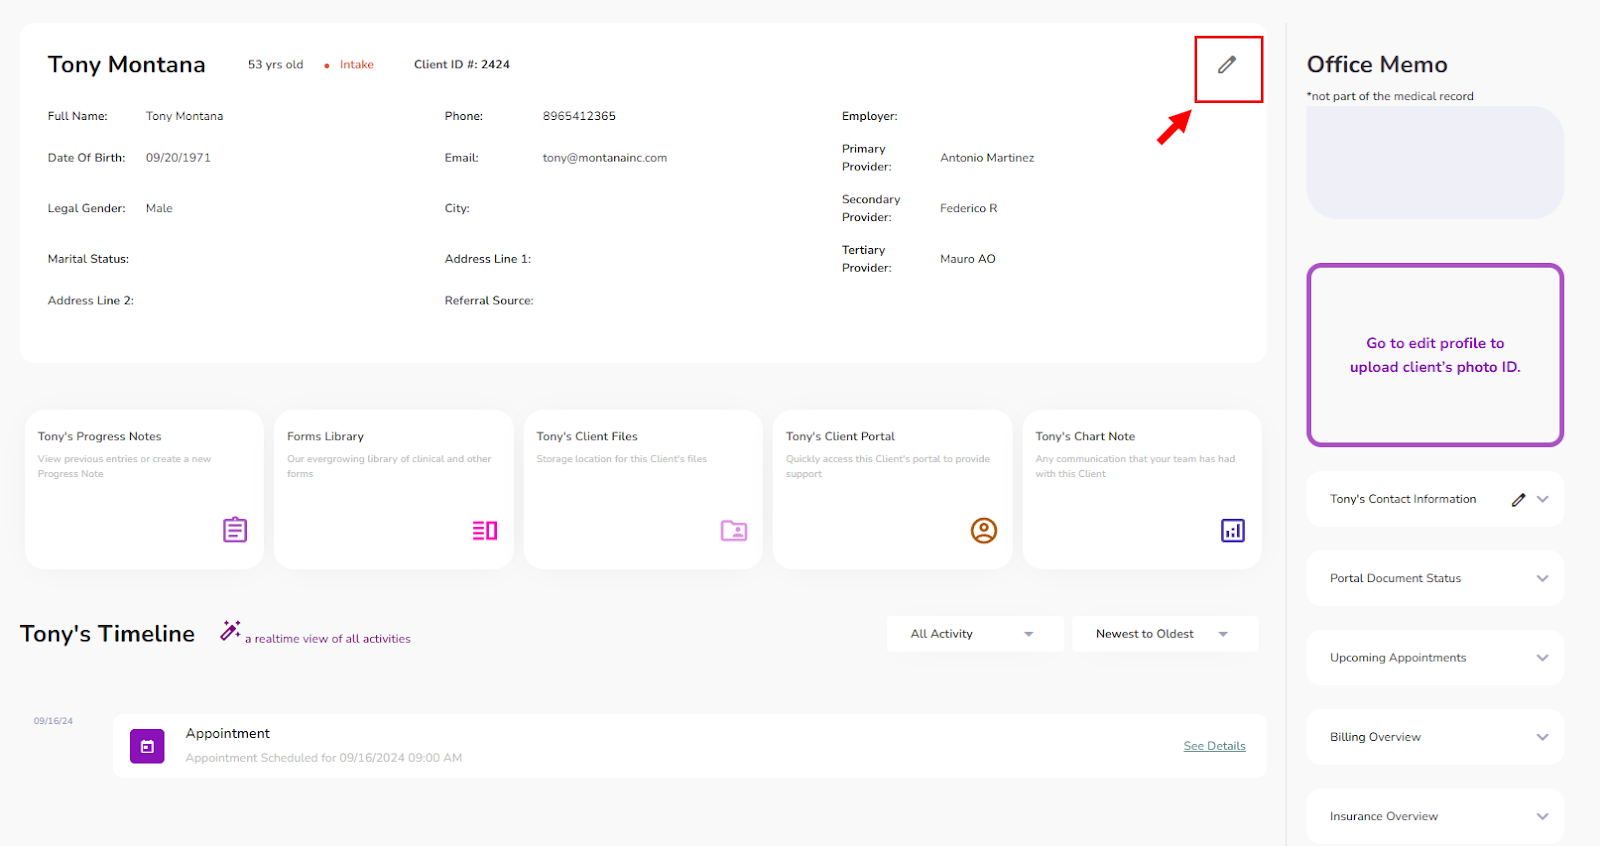
Open the Client Profile and select the Pencil icon to access the Profile Editor.
Navigate to the Clinical Info tab.
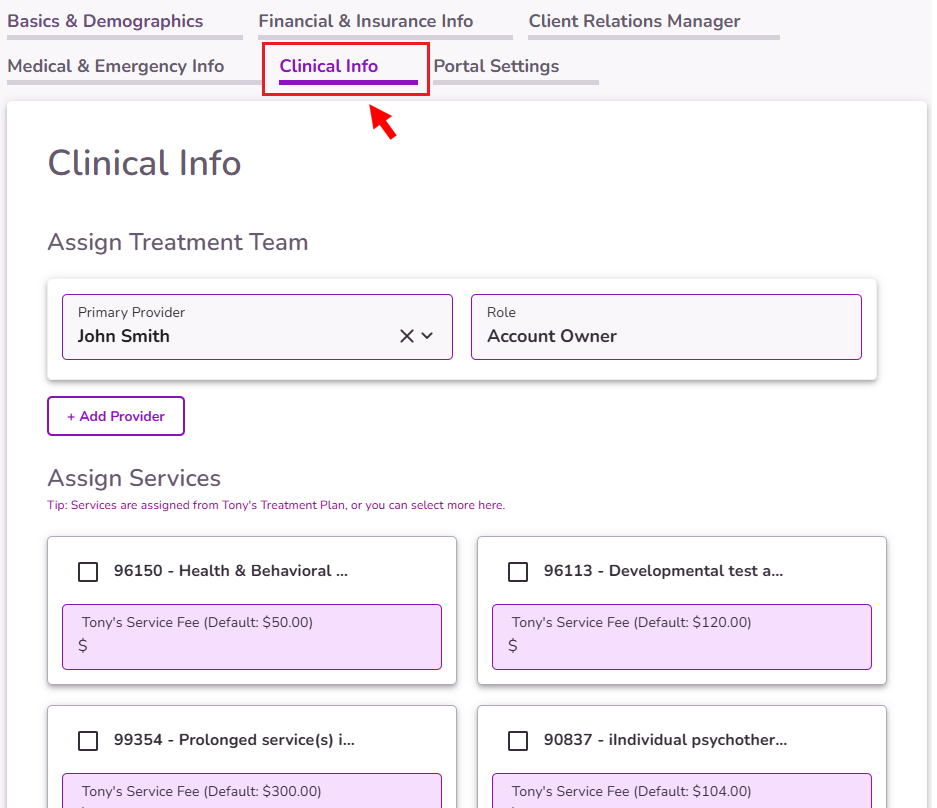
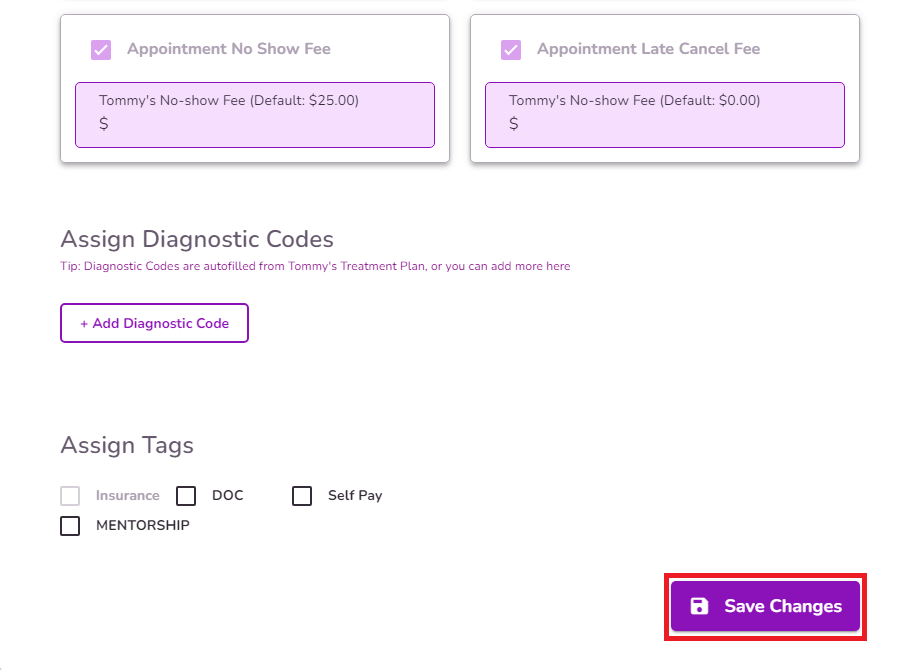
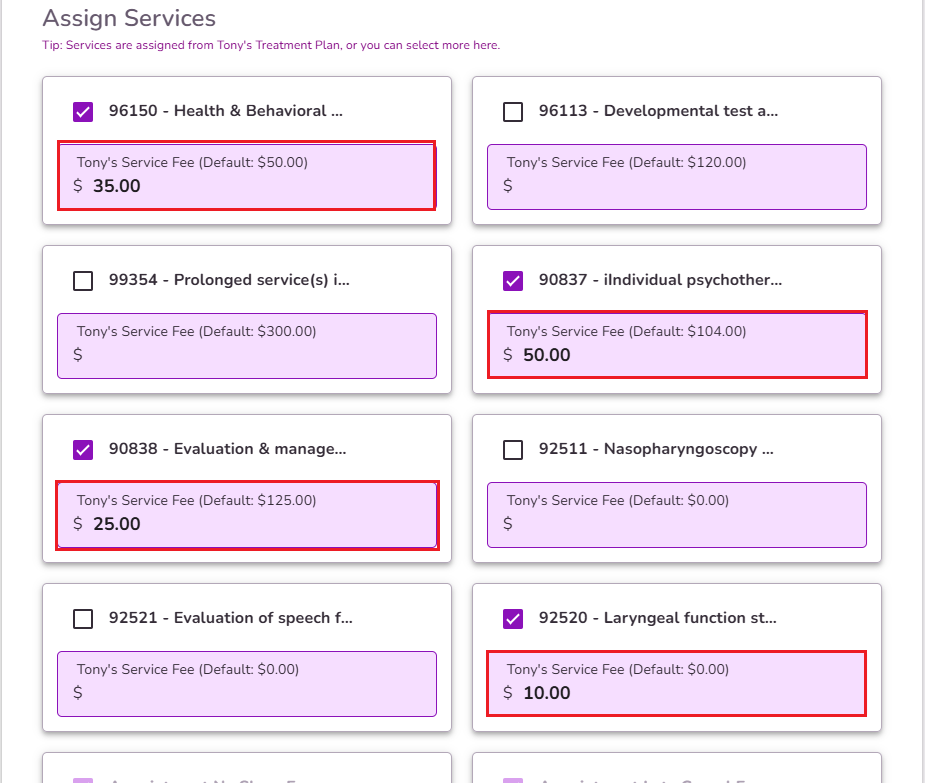
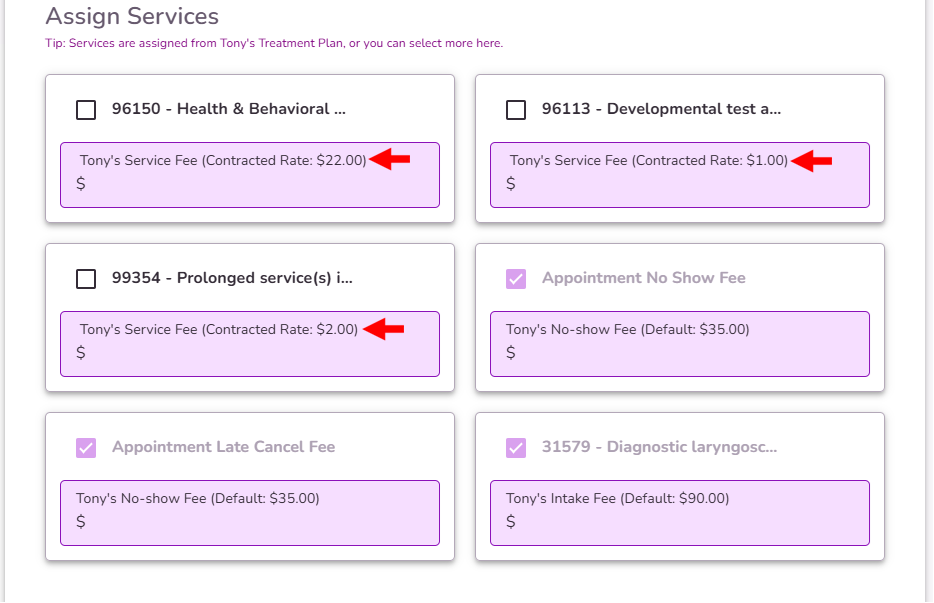
Scroll down to the Assign Services section. Use the checkboxes to select the services you’d like to assign to the client.
NOTE: Admins can edit the available services in Practice Manager. Click here to learn how to manage services in Practice Manager.

If a client qualifies for a Sliding Scale or requires a custom fee for a specific service, you can enter the adjusted amount in the designated box.
IMPORTANT: When booking an appointment, the custom fee will override the default fee set in Practice Manager.
IMPORTANT: The services assigned in this section will be the only ones available for scheduling appointments.
If the client’s insurance matches a payer with a Payer Contracted Rate: only the Contracted Billing Rate services will appear in the Assign Services section. The system will display the specific contracted rate fee for each service.
NOTE: If you enter a custom fee, it will override the payer’s contracted rate.
Click here to learn more about Payer Contracted Rates.
IMPORTANT: If the payer has no Contracted Billing Rates added in Practice Manager, the Clinical Info tab will not display any services for the client.
Once you’ve assigned the necessary services, select Save Changes to apply your updates.