Understanding The Client Relation Manager
At TiQ we understand how important it is for clients to have their Emergency Contacts, Responsible Parties, and Legal Guardians (depending on each scenario), properly saved and accessible. This guide will show you how to create client relationships and grant permissions to them.
- If adding a Minor
On the Client Profile, select the Pencil Icon to open the Profile Editor

On the Basics & Demographics tab, scroll down to the Client Demographics section

From the Client Demographics section, click the checkbox “Select if client is legally a Minor”.
NOTE: By selecting this box you will be required to add a Legal Guardian in the Client Relations Manager.

Select Save Client Profile to save your changes

- Add a new relation
Navigate to and Select the Client Relations Manager tab
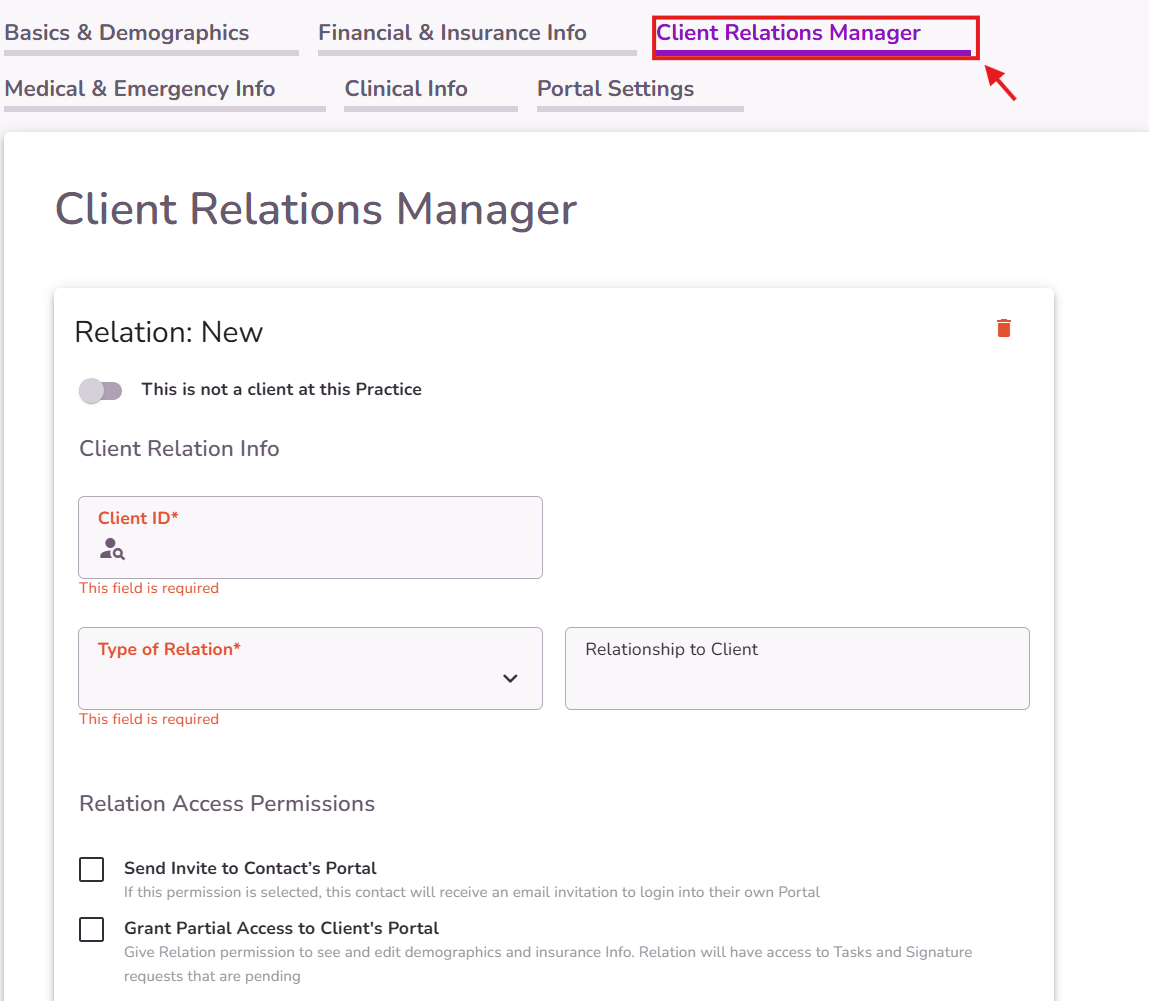
If there are no Client Relations added, you will see a blank Client Relations form.
If the client relation being added is not a client at your practice, turn on the “This is a not a client at this Practice” toggle.
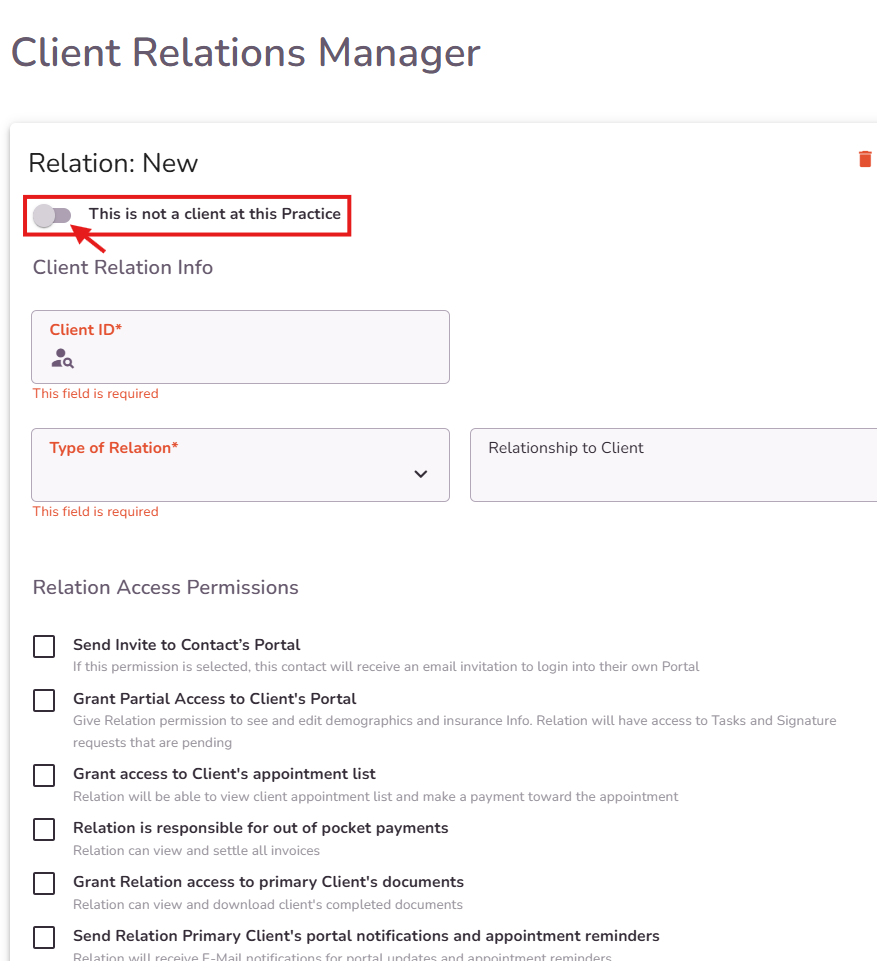
When the "This is a not a client at this Practice" toggle is on, you will need to ente the following required information:
- First Name
- Last Name
- Type of Relation
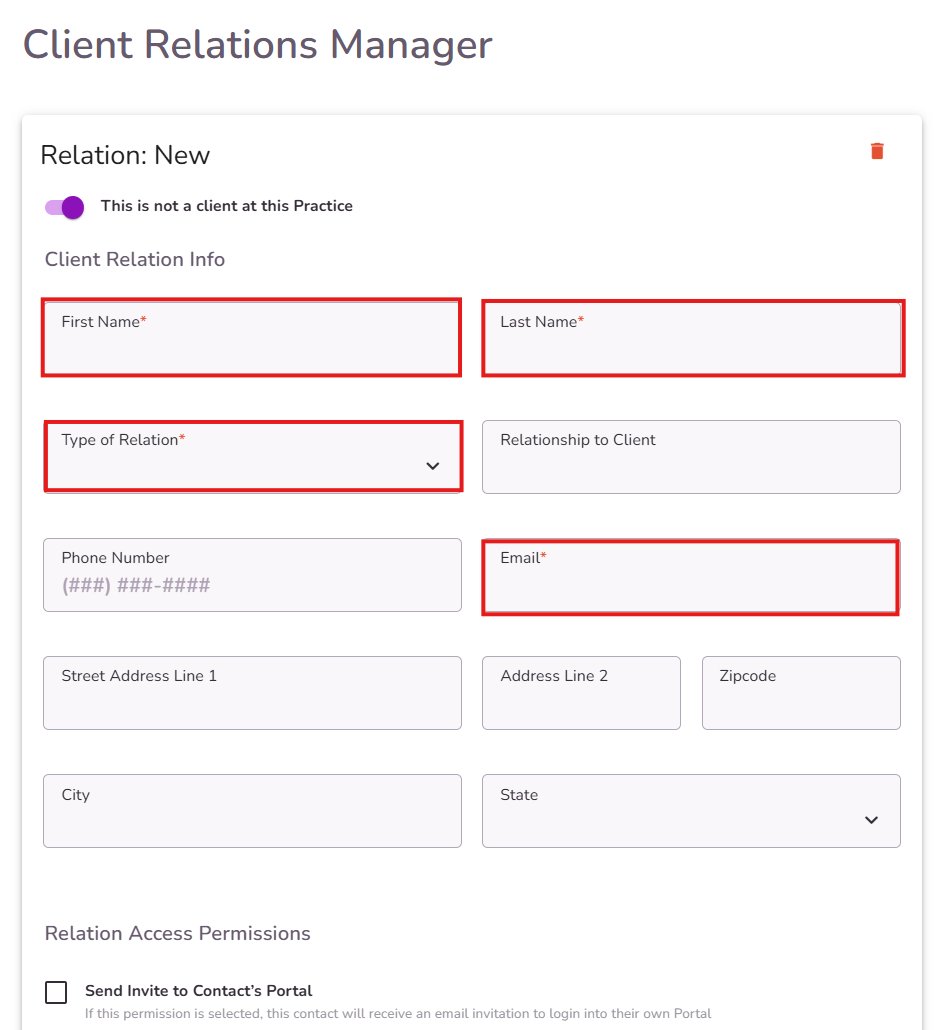
-
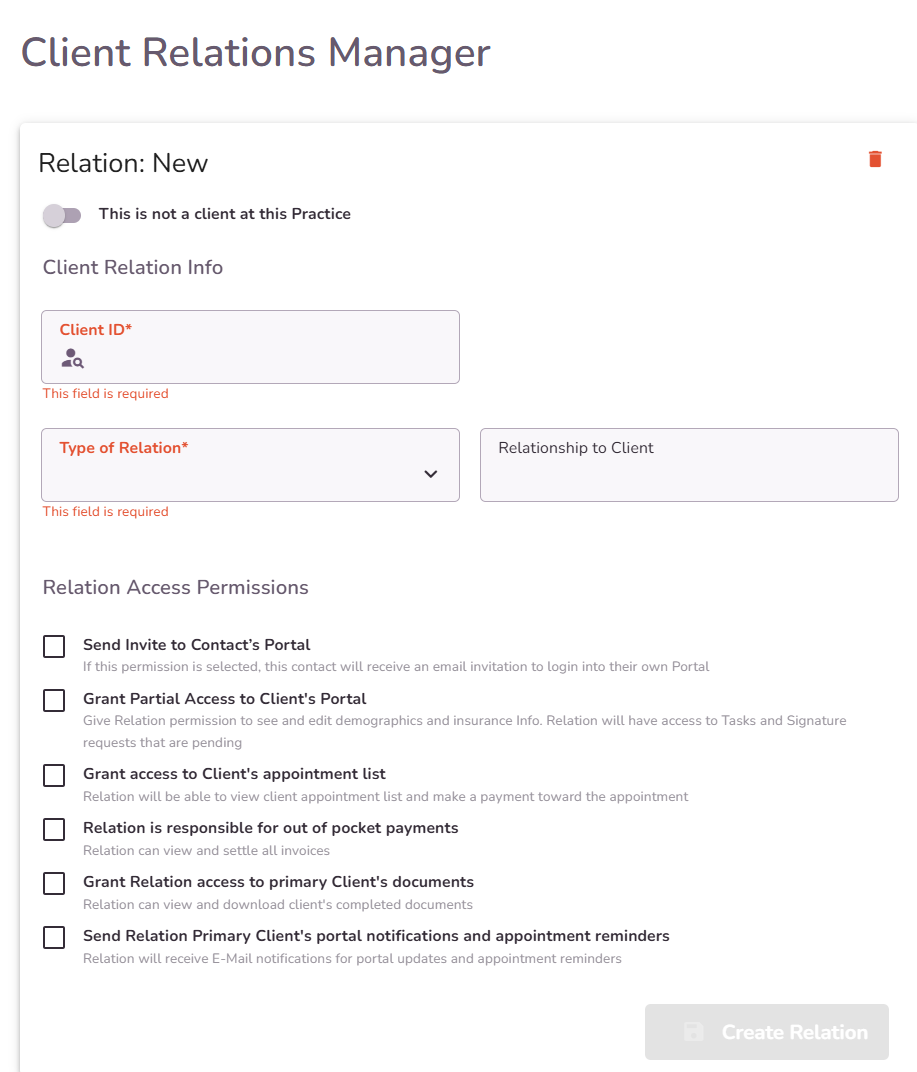
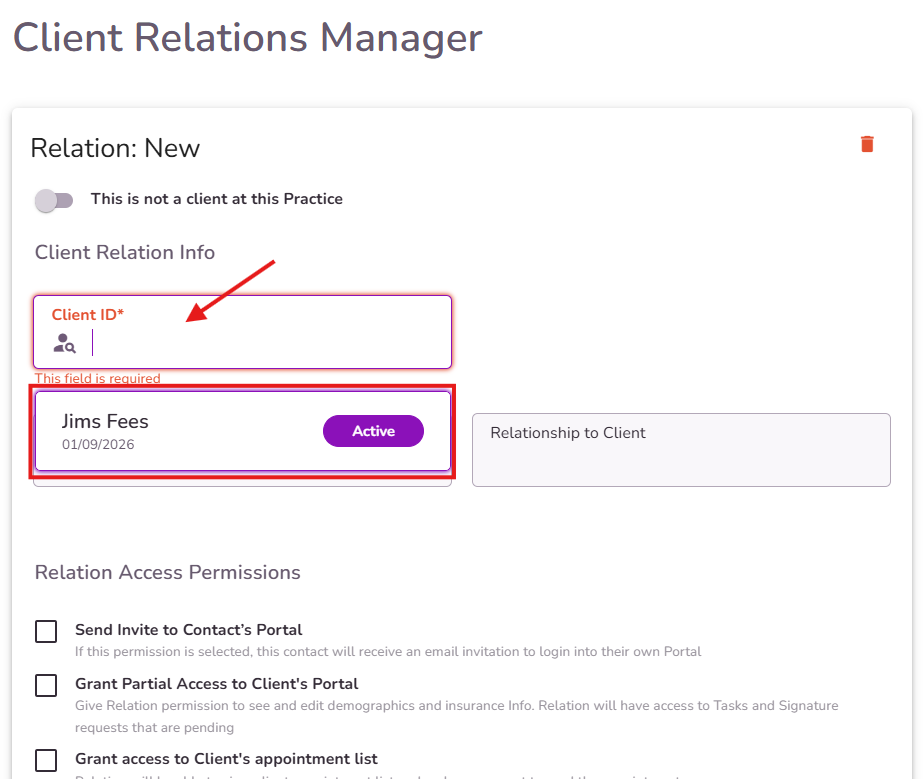
On the other hand, ff the client relation being added is an active client at your practice, enter their Client ID (Name or ID) and they will be listed in the drop down menu
NOTE: When the Client ID is added, the information from the active TiQ profile will be added as the client's relation
Select the Type of Relation from the dropdown
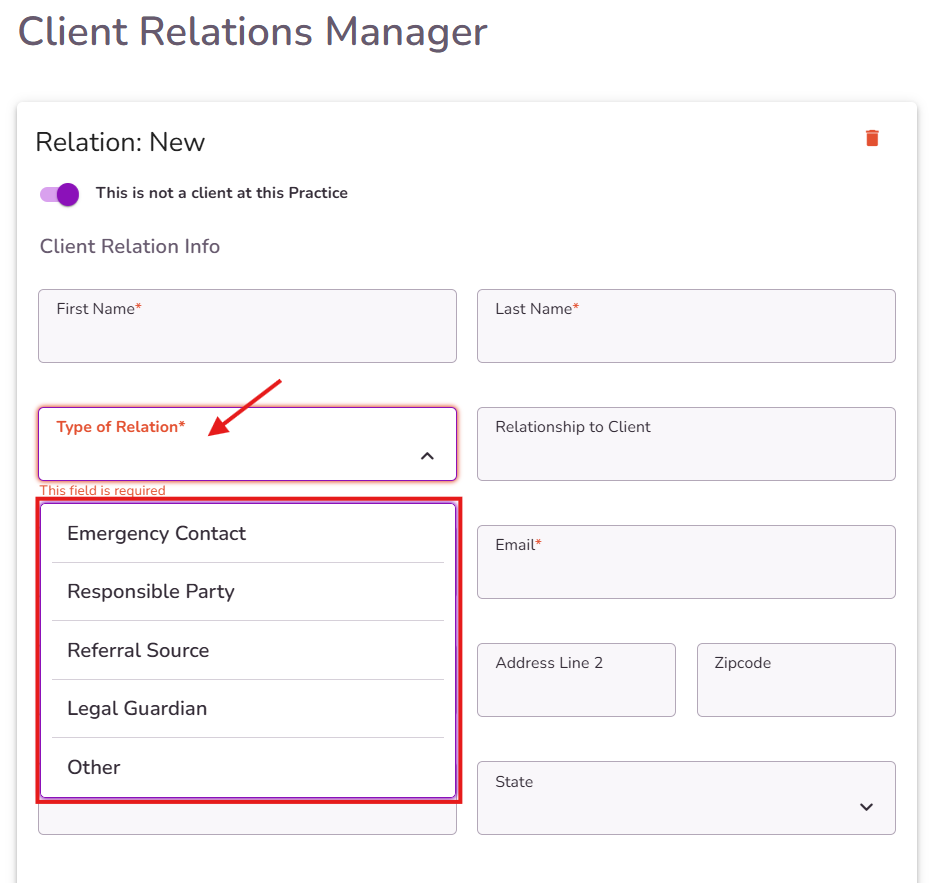
Note: Adding a client relation as a "Referral Source" will display this information in the client’s profile overview.

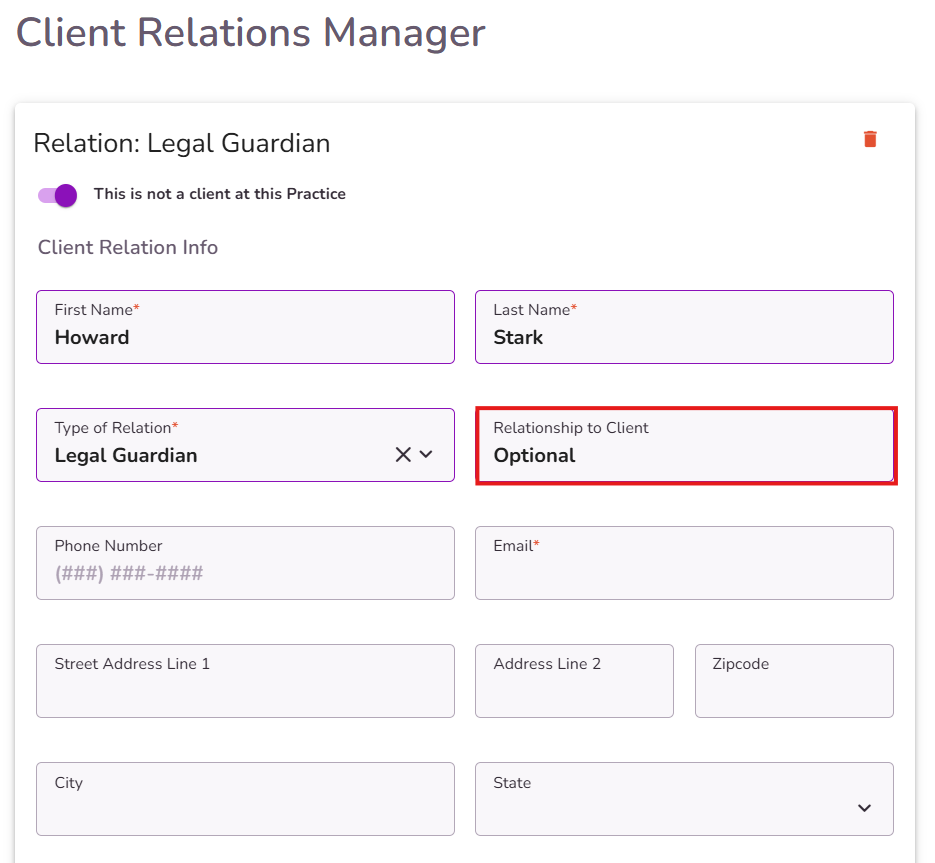
The Relationship to Client is optional
From the Relation Access Permissions section, grant the appropriate permissions. Each permission indicates in detail what is being granted to the contact.

Select the Create Relation button to save your client's relation info.

If the Send Invite to Contact’s Portal permission was checked, after selecting “Create Relation” you’ll get a popup window where you can select forms to send to the client portal and to the relations portal.
Select Skip if you don’t want to send the portal invitation at this point, or select Invite To Portal & Submit to send the selected forms (if any) to the client portal along with the client portal invitation.

IMPORTANT: If you don’t want the client relation to receive a client portal invitation, make sure that the Send Invite to Contact’s Portal permission is unchecked when saving the client relation.
NOTE: By default, the 'Send Invite to Contact’s Portal' permission will be selected for these types of relations when adding a relation to the client profile:
a. Legal Guardian
b. Responsible Party

- Invite both your client and the contact to the Portal.
Inviting a contact to their own portal will provide them with a unique portal login, granting the specific permissions set in the previous step.
NOTE: If a contact, such as a parent, needs access to a minor’s portal, the email added for the minor on the Client Demographics page must be used.
Navigate to the Portal Settings tab within the client profile.

Select the Send Invite to Client button.

On the Portal Invitation popup, you will see your client's name
IMPORTANT: If the Send Invite to Contact’s Portal permission was checked when creating the client relation, you’ll also see the client relations name here.

Select the forms you wish to send to each individual, and select Invite to Portal & Submit button.

Now that you have made the connection between your client and contact, you can also send additional forms at a later time if needed. Here is how:
- Identify your client from the Client iQ.
- Select Forms Library and identify which form(s) you would like to send.
- Select the (+) icon and then Send to Portal.
- On the confirmation screen, select the individual you wish to send the form to. You will see the primary client and any other individual listed in that clients relationship manager.
NOTE: Here you can send the form to one individual at a time. All forms sent this way will land in the primary clients file once completed.

- Editing or Deleting your client Relations
From the Client Relations Manager Tab, select the 3 dots from the specific relation card view.

From the menu, you will have the following options:
- Access Portal to view the contact's portal
- Send Reset Password Email in case the contact needs to reset their password
- Edit to revoke or grant additional permissions
- Delete to remove the contact entirely

Be sure to select Save Changes to save the changes you've made.


