How to Record Client Insurance Information
From the Navigation Bar, select Client iQ.

Search for and select a client from the roster.

From the client profile, select the Edit icon.

Navigate to the Financial & Insurance Info tab.

In the Insurance Info section, from the drop-down select the Rendering Provider's Taxonomy Code.

NOTE: In the Insurance Info section, you can enable or disable an insurance method in the Client's Profile to manage information for historical reference or reactivation. When you disable an insurance, it remains present for reference, but won't be used for claim generation.
When you choose to re-enable an insurance, the payer order field adjusts its available options based on the currently active insurances in the client profile. For instance, if a client profile lists 3 insurances, with 2 disabled and 1 enabled, a claim will only be generated using the payer information from the ENABLED insurance. The disabled insurances serve as informationalrecords.
Enabling or Disabling the insurance ensures that only active insurances are considered for claim generation, streamlining the process for accurate billing.

Upload the front and back images of the insurance card if available.
After uploading them here, these pictures will be available in the Client Files.

Enter the rest of the information.
NOTE: From the 'Select the Payer Order' drop-down field, you can select an option (Primary, Secondary, Tertiary, etc.) only once.

IMPORTANT: If “Self” is not selected in the Relationship To Insured box, you’ll be prompted to complete the Holder’s information. Click HERE to learn how to fill in the Holder’s information.

Select + Add Additional Insurance button to add additional Insurance Providers to this client profile.

IMPORTANT: If the EPSDT checkbox is selected, box 24H will auto-select YES on the claim form. If EPSDT checkbox is not selected, box 24H will stay NO by default.

You can also manually enter the clients Coinsurance percentage, Copay, and Deductible amounts. However, these boxes will be autofilled after you run an insurance verification for the client, unless they are locked.

Add the Pre-authorized Services
NOTE: This information will pre-fill box 23 on the CMS-1500 claim form. Click here to learn more about pre-authorized services.

Once you're done adding the clients insurance information, select the Save Changes button at the bottom.

Clients can also add or update their insurance information on their end by following these steps:
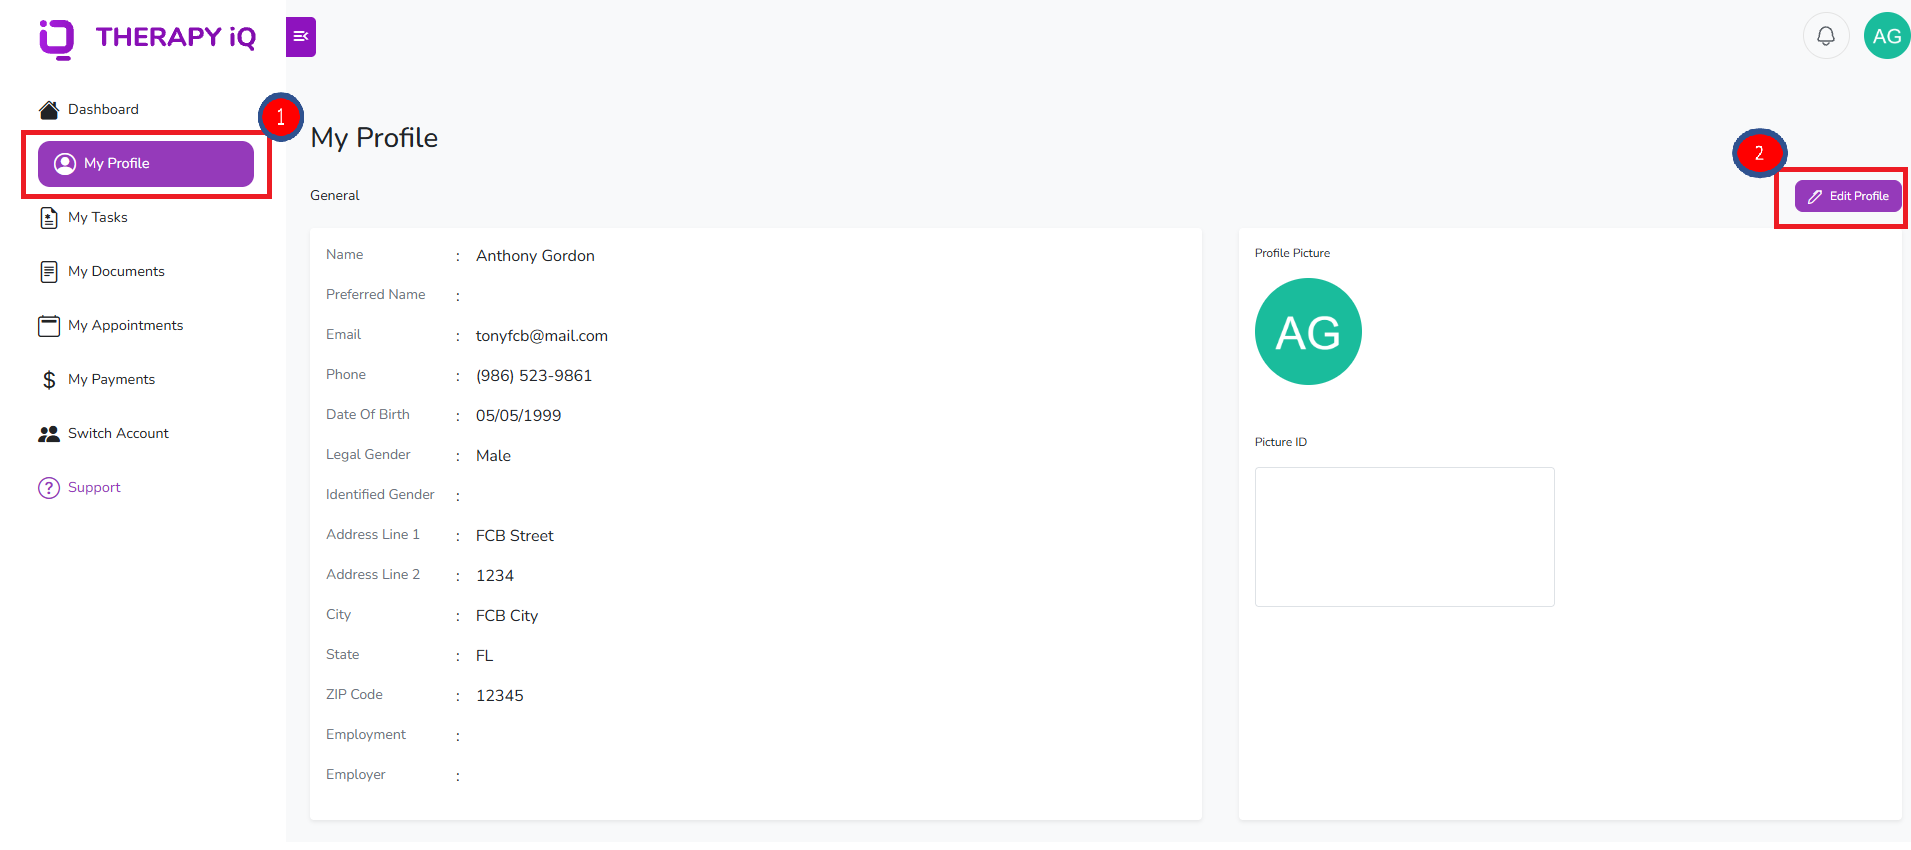
In their portal, they should navigate to My Profile, and then select Edit Profile.
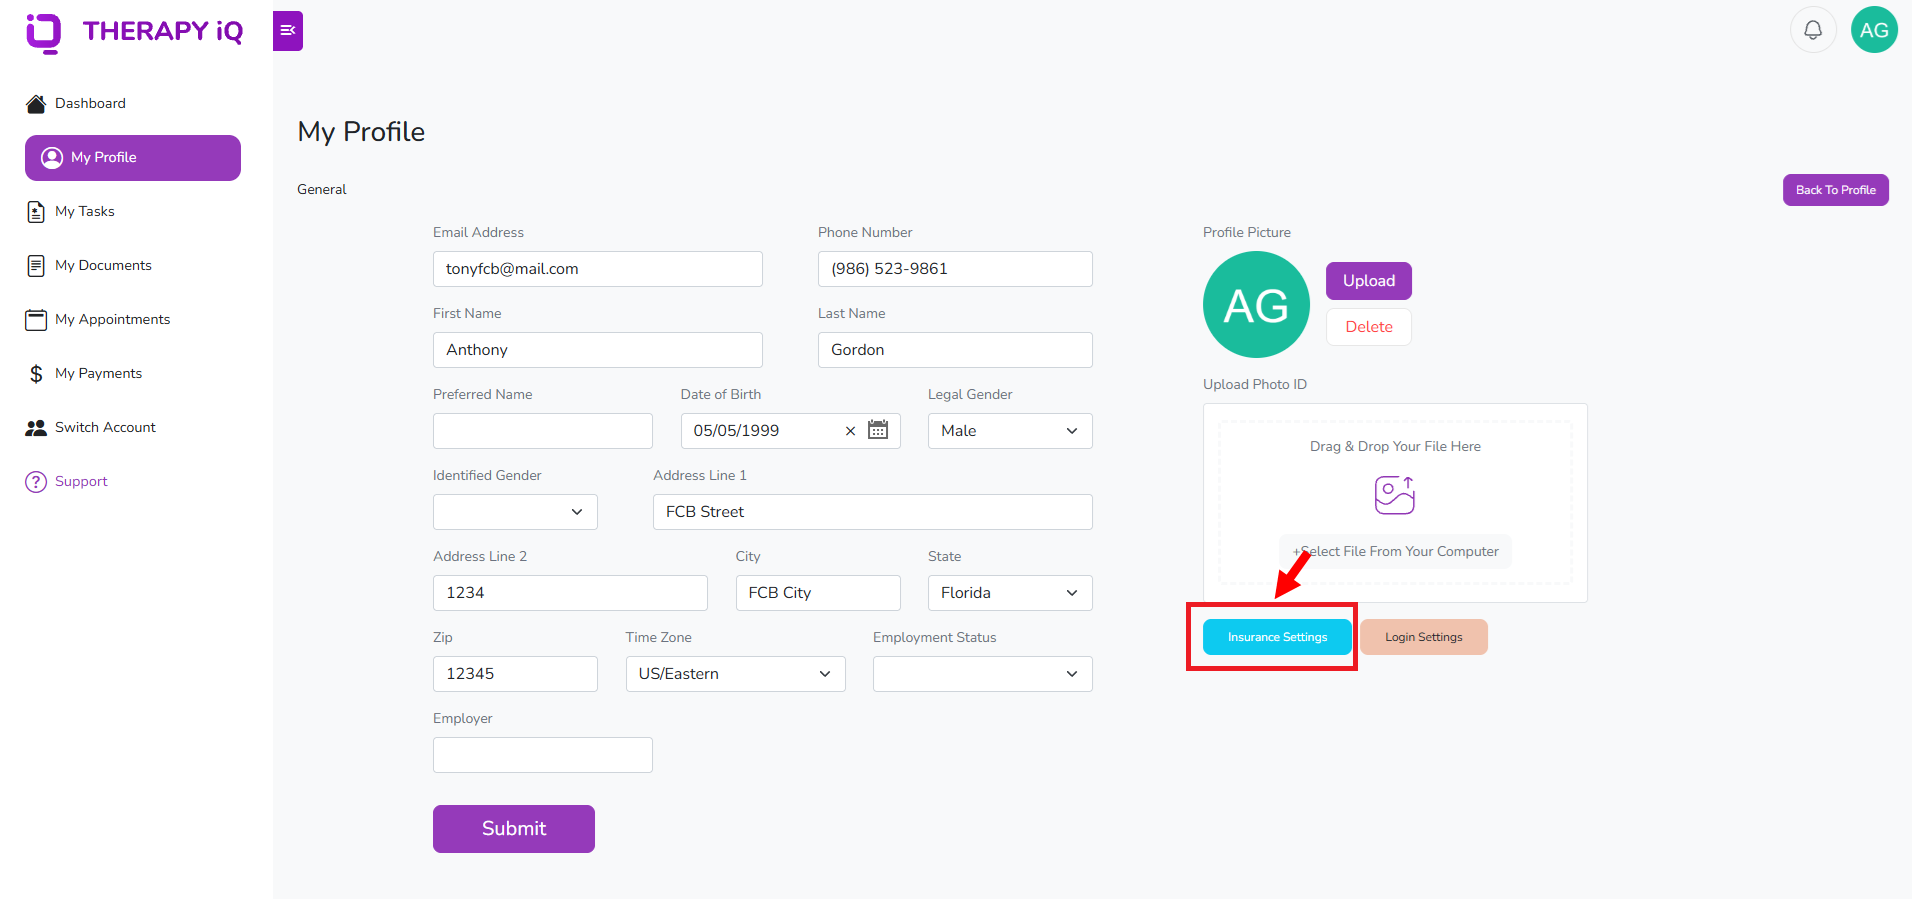
Select Insurance Settings
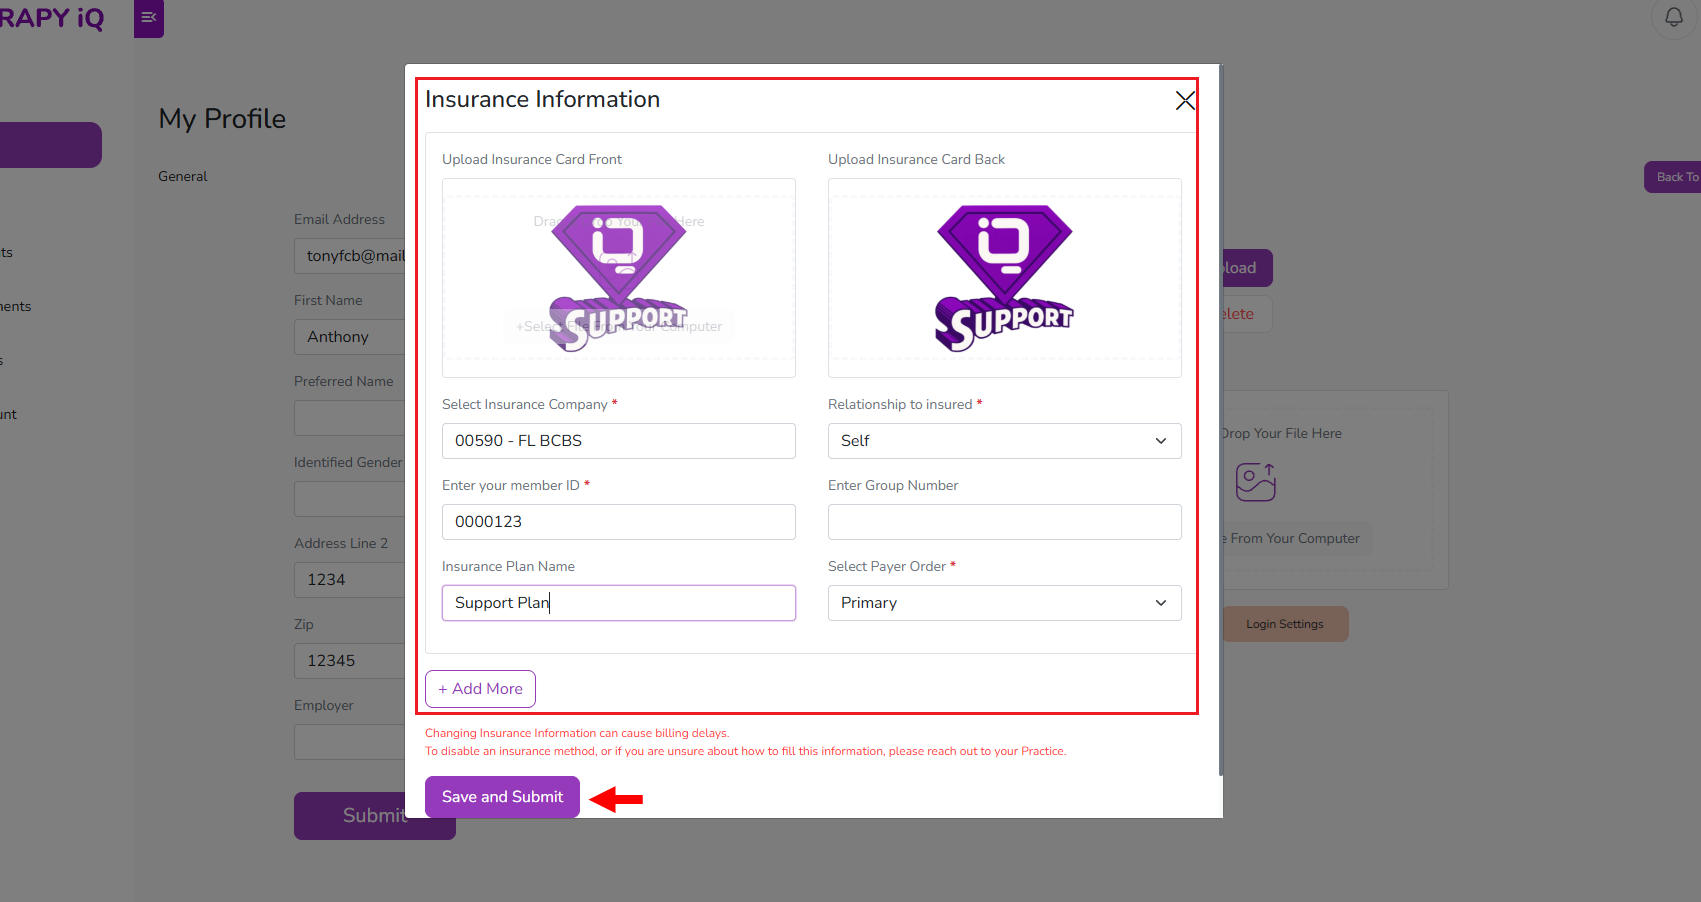
Enter the insurance information, and select Save And Submit.
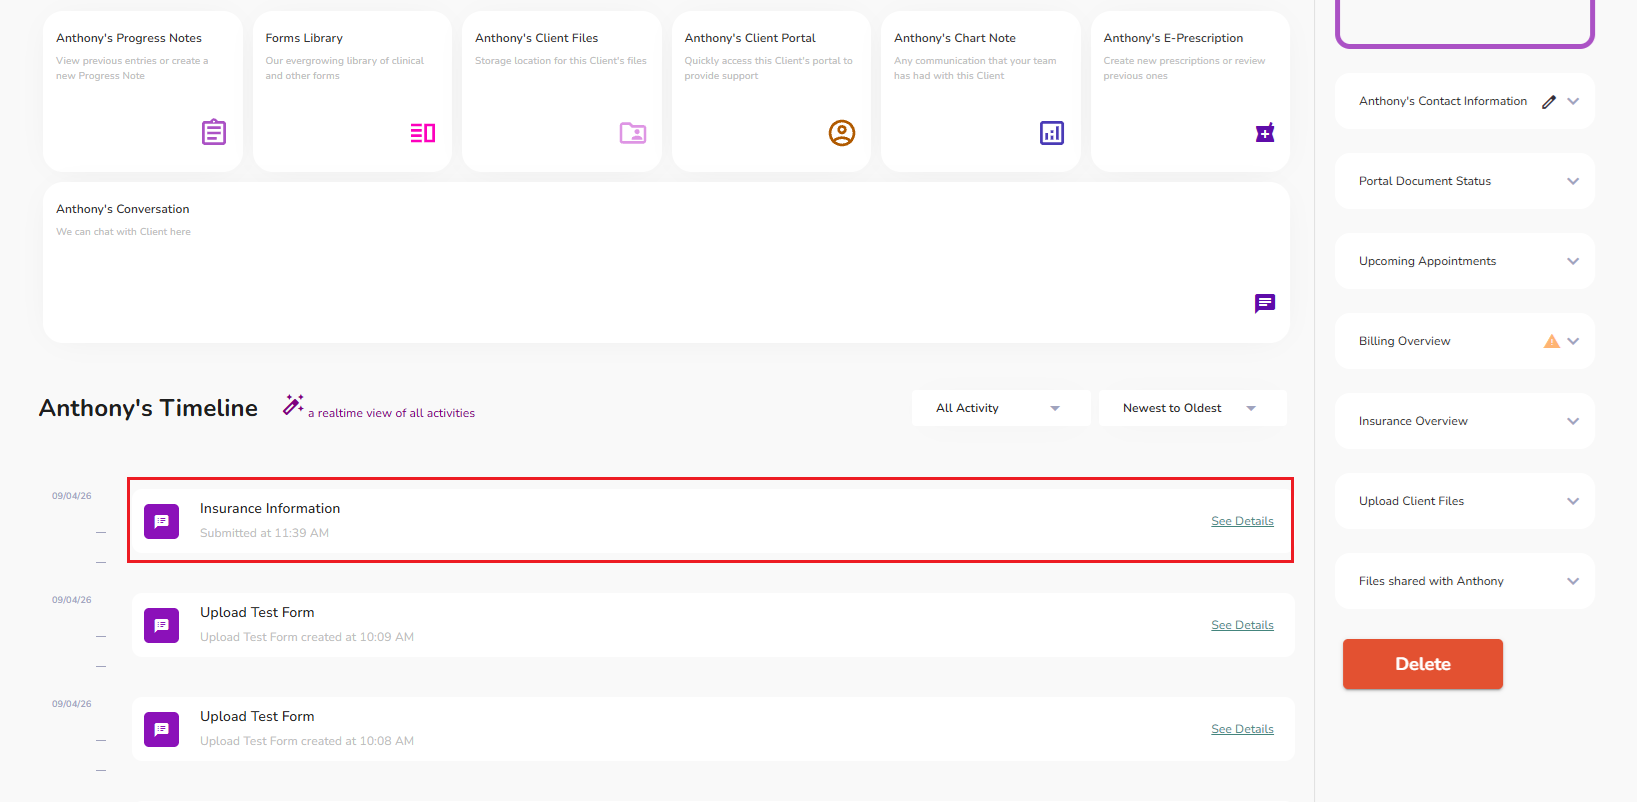
When the client updates their insurance information from the portal, this creates a new record in the client's timeline.