How to Manually Send an Invoice to a Client
In TiQ, invoices are generated automatically whenever a new event is scheduled. There is no manual step required to create an invoice related to an event. As long as the client has a balance to pay for the service, the invoice will be created automatically. You also have the option to manually create standalone invoices for items that are not related to events. Click here to learn more about this option.
Although invoices are created automatically for events, there is a setting that controls whether they are sent to clients automatically or manually. You can review or update this setting by navigating to Practice Manager > Billing & Payment. From there, you can choose to have invoices sent automatically when they are created, or to send them manually at a time that works best for you.
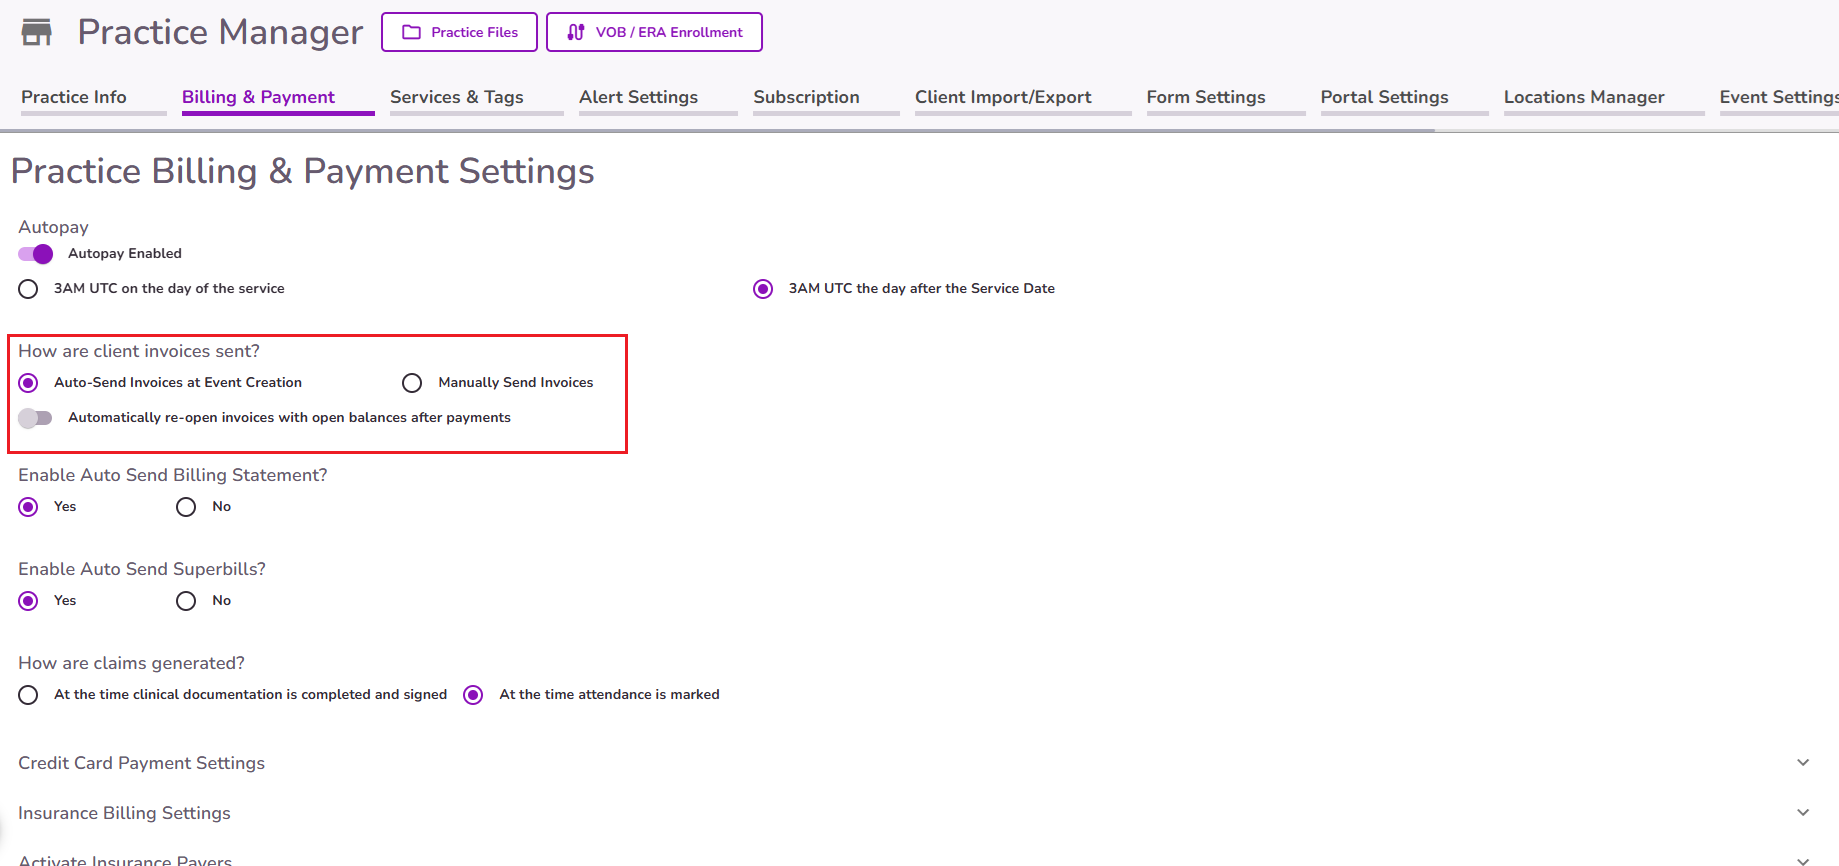
When the “Manually Send Invoices” option is selected, there are three (3) ways to send invoices to clients:
Option 1 - From the Billing Overview
Navigate to the Billing Overview in the client’s profile.

Locate the invoice you would like to send and click the Send (>) icon.
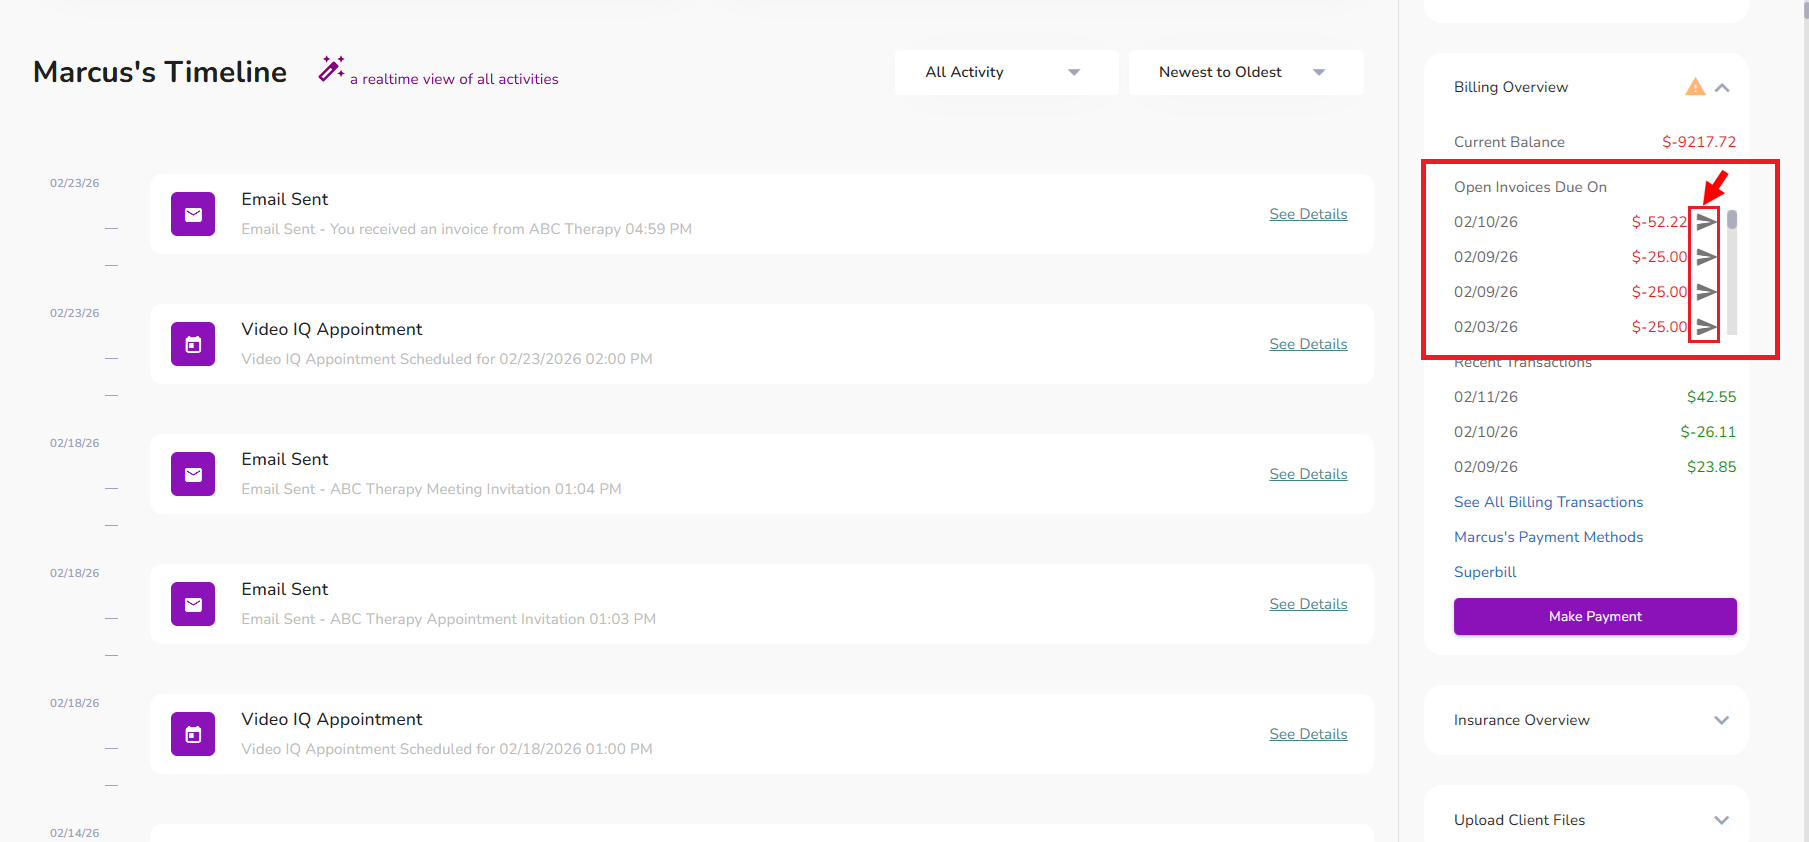
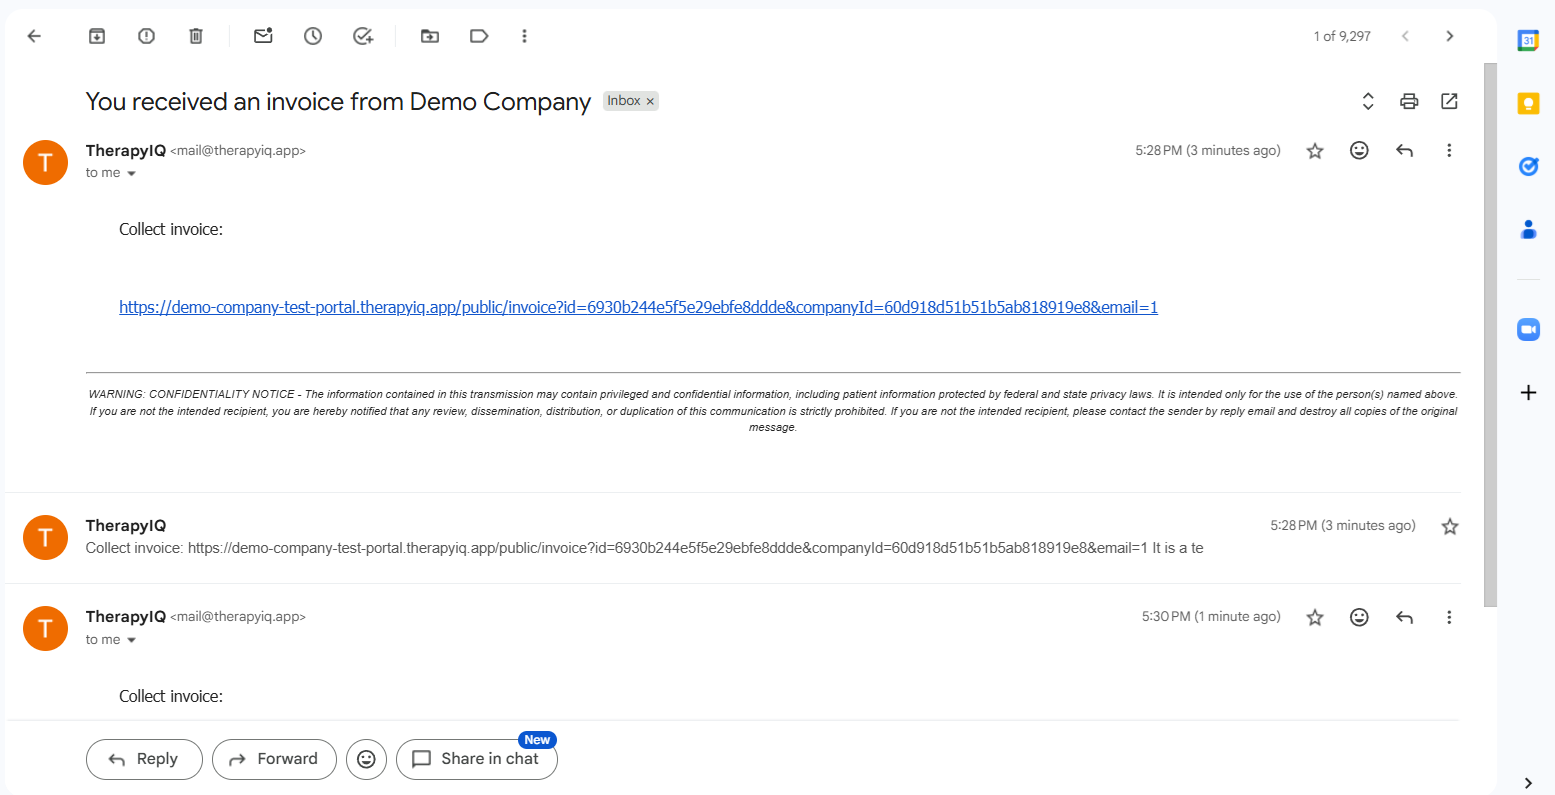
In the pop-up window, confirm who should receive the invoice and click Send Invoice. You can send it to the client’s email, to a client’s relation (if listed), or to a third party.

A confirmation message will appear once the invoice has been successfully sent.

Note: Invoices can be sent this way to clients with an "Inactive" status. They will receive the invoice via email and can complete the payment from there.
Option 2 - From the event.
You can also manually send an invoice from the event by clicking the Send Invoice to Client’s Portal button.
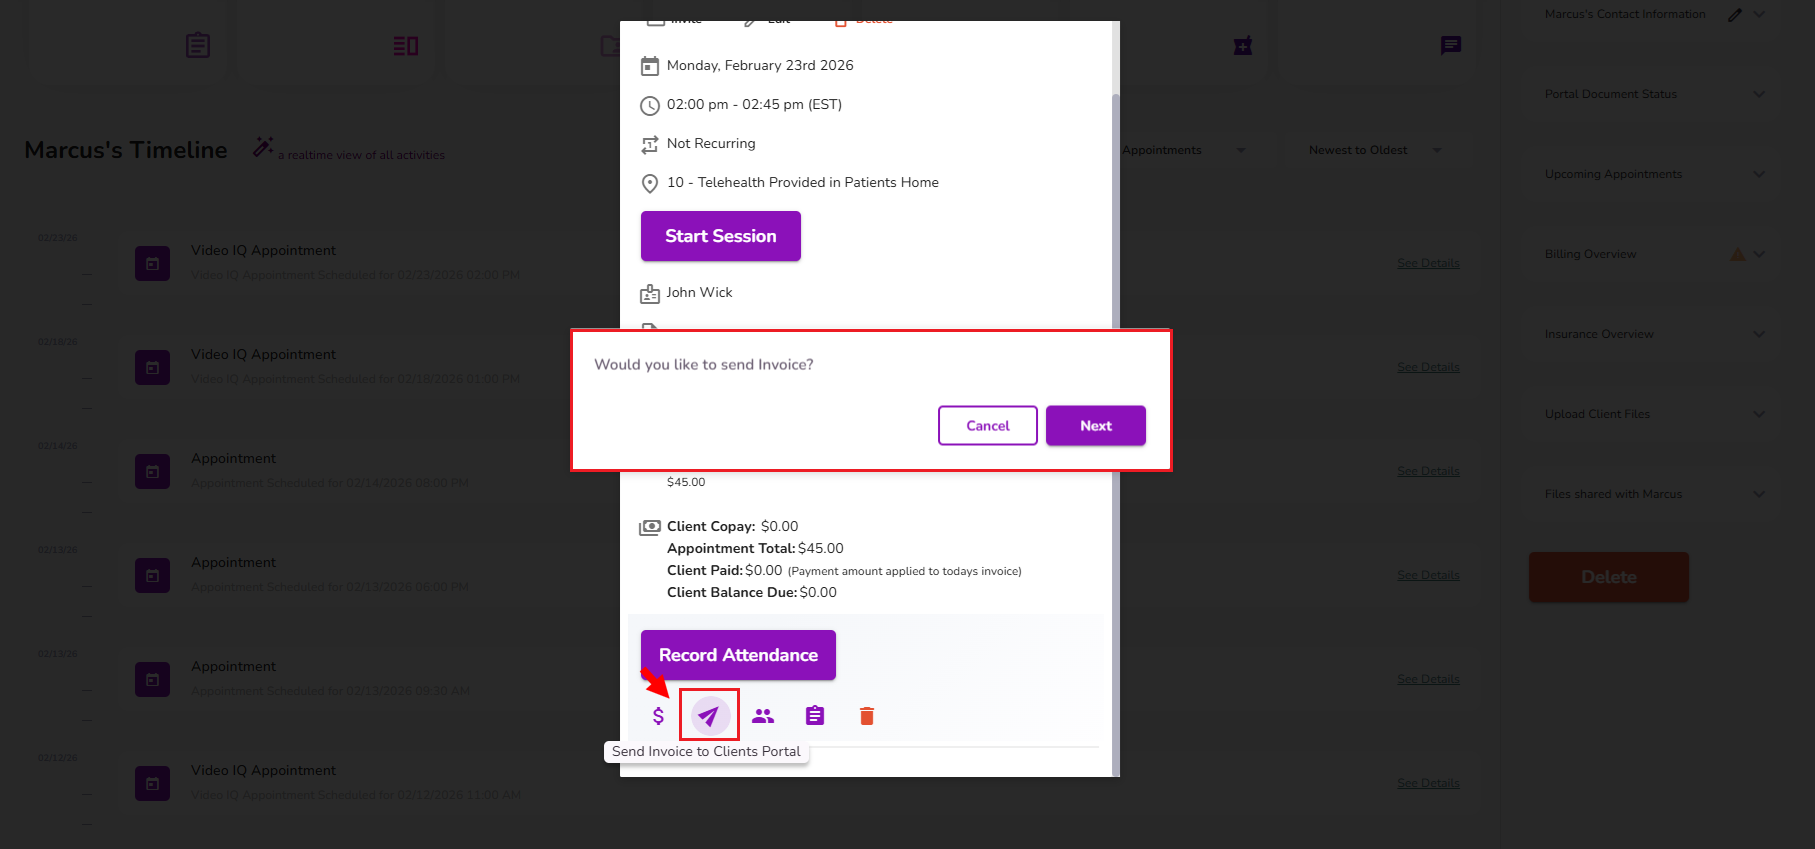
You will see a confirmation message at the bottom of the screen. The “Invoice Sent” legend will then appear on the event.
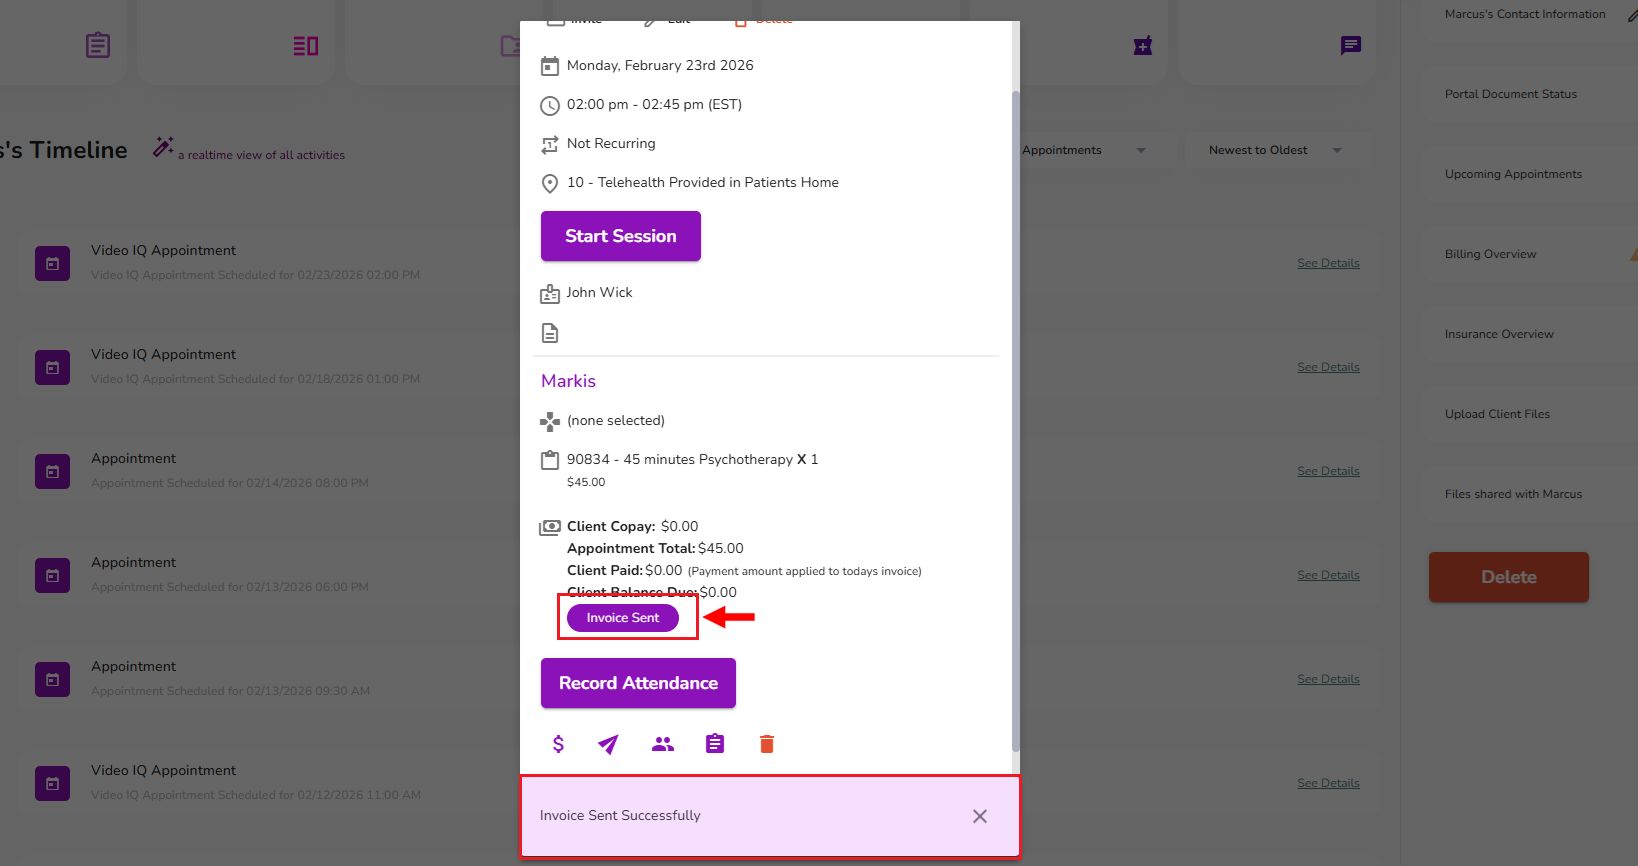
IMPORTANT: If the event does not display the “Invoice Sent” legend, this means that the invoice for that event has not been sent to the client.
Note: Invoices can be sent this way to clients with an "Inactive" status. They will receive the invoice via email instead, and can complete the payment from there.
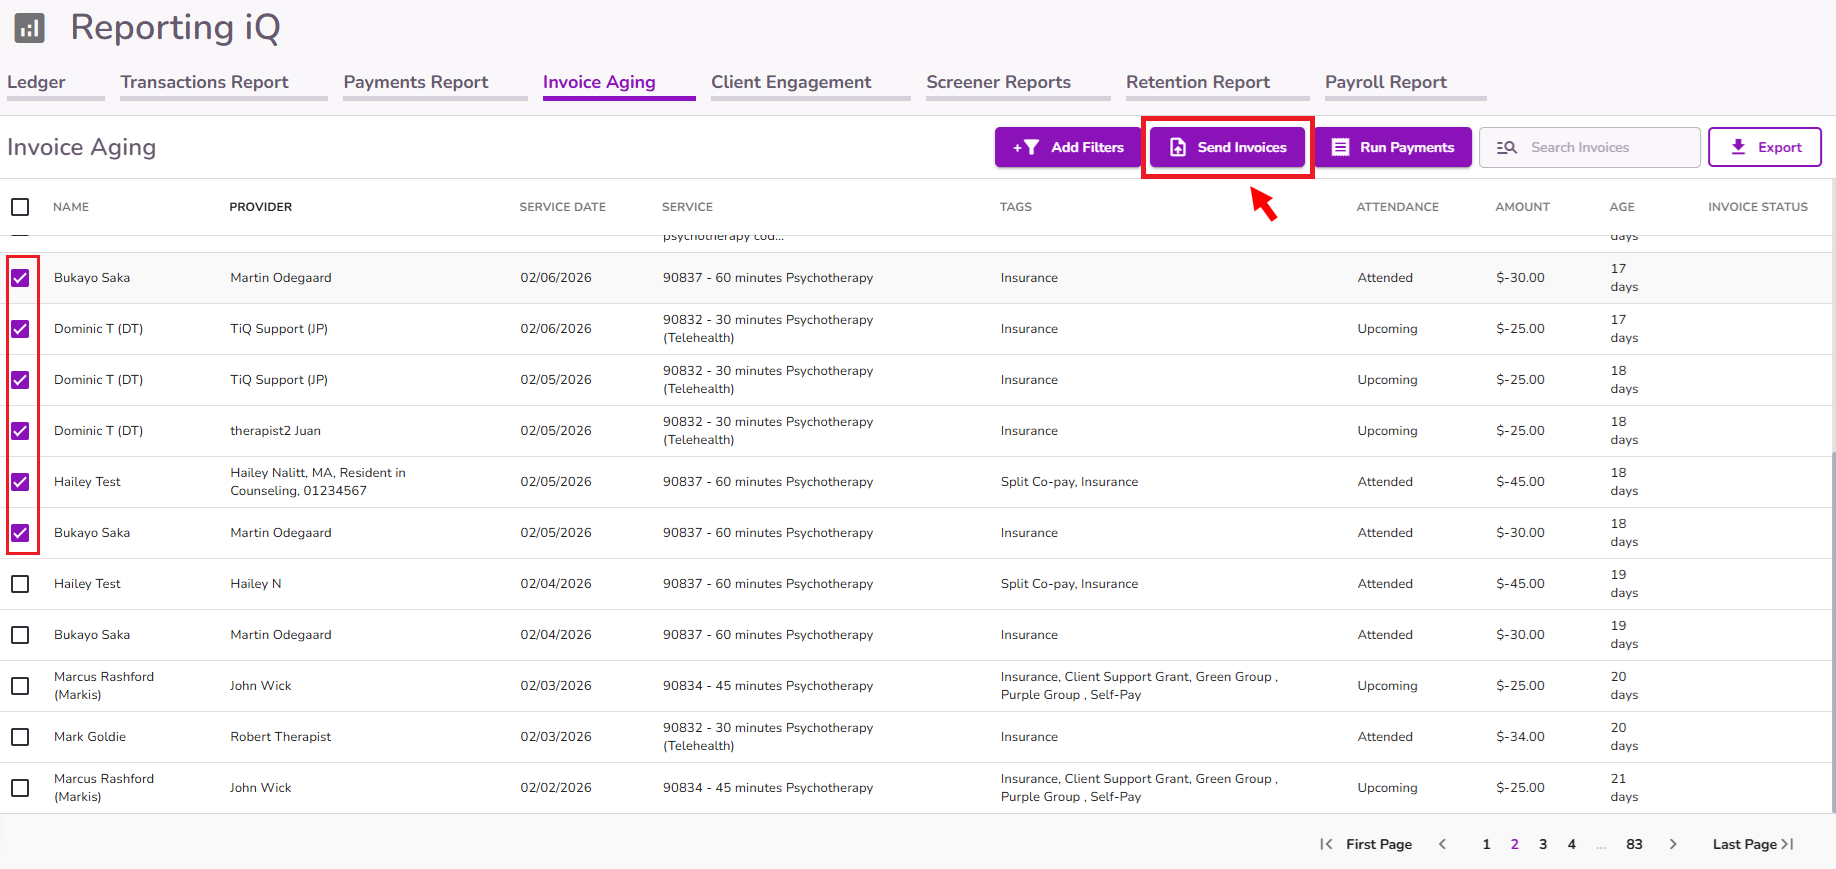
Option 3 - From the Invoice Aging report.
Users with access to the Invoice Aging Report can send one or multiple invoices at the same time. Simply select the invoices you would like to send, and click the Send Invoices button.
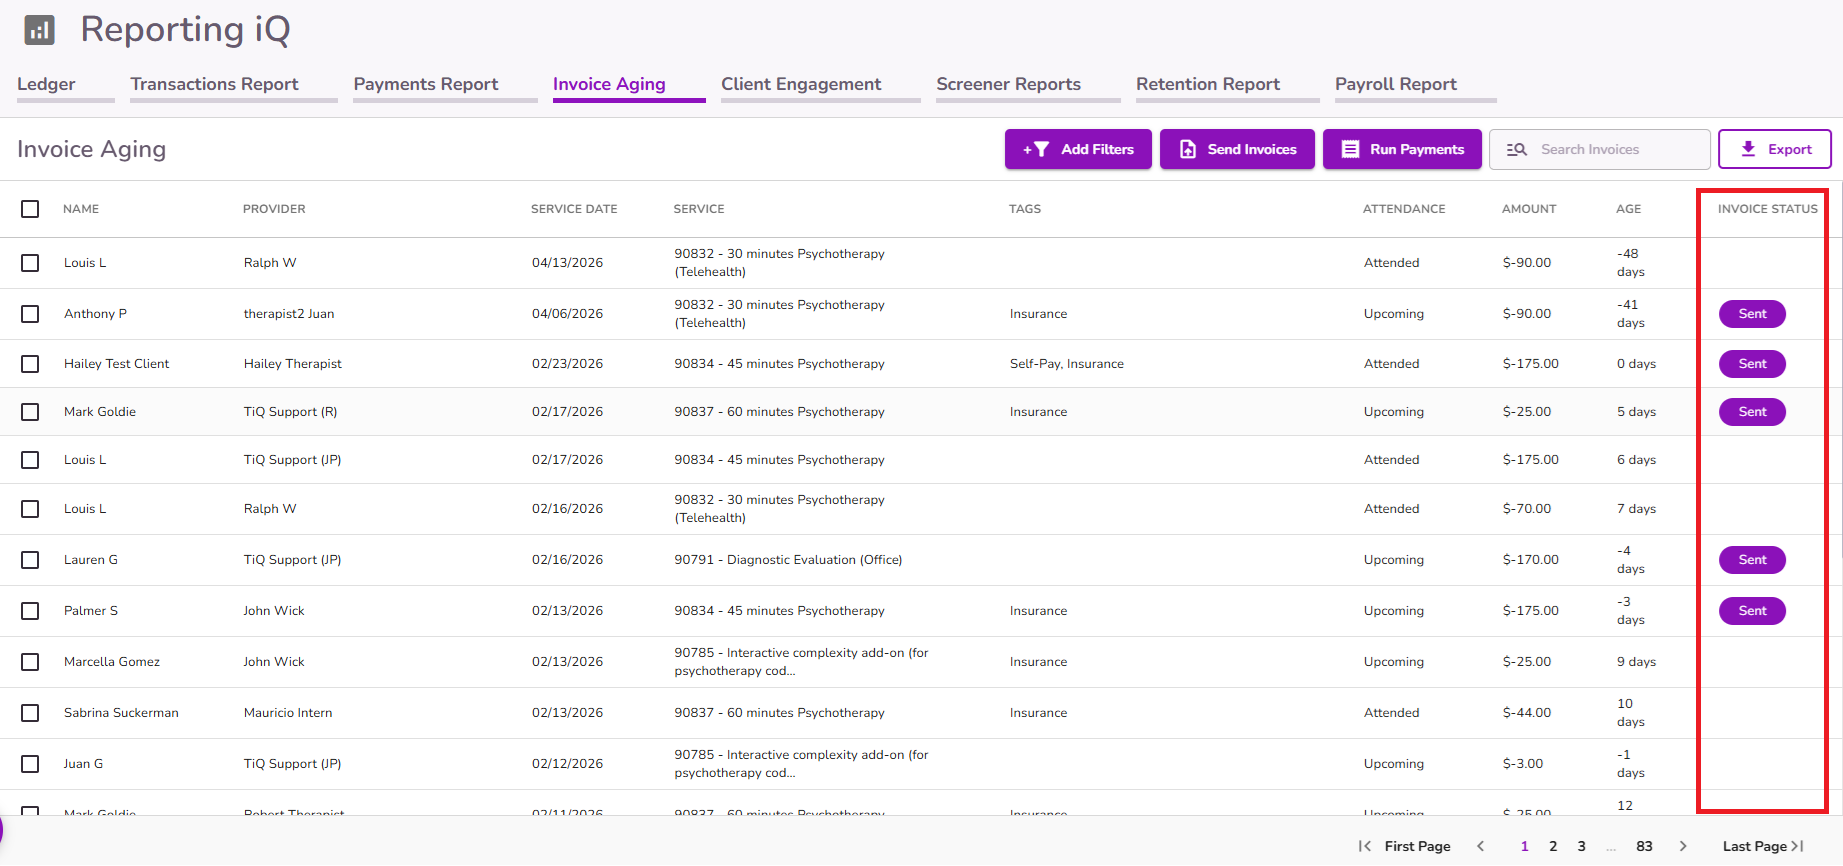
If an invoice has been sent, you will see the word “Sent” under the Invoice Status column.
Note: Invoices can be sent this way to clients with an "Inactive" status. They will receive the invoice via email and can complete the payment from there.


